So far we have seen about Appium Inspector, also we created a simple test method to launch the app from our java code. Now it’s time to move to next level.
From this session we will cover few advanced topics, which would be helpful for beginners and intermittent test engineers. No worries we will cover step-by-step.
Guys, to understand Appium and its API’s to its root level, It is must to learn the basics of Selenium because at some point we will club both Selenium and Appium libraries. So to be honest, you are not expected to be a Geek in Selenium, but yes Selenium basics are must with any programming language.
Please don’t get confused between Selenium and Appium. As we know both are BINDINGS/Libraries which provided an API for us to perform Automation testing. Bindings means a collections of packages supporting any programming languages. In Java term we can say collections of “Jar” files which can be used with Java.
Appium bindings/libraries with any programming languages are used to automate a mobile application
In other hand, Selenium bindings/libraries with any programming languages are used to automate Web applications. Means both are having its own libraries to perform an operation.
For better understanding, I will take an example, In Selenium library we have an exclusive class called “Actions” using this class we have perform important web page operations like mouseHover(moveToElement), doubleClick, contextClick, dragAndDrop, keyUp, keyDown etc.. But do we need all these actions for Mobile? Do we really need to rightclick and mousehover’s in mobile app? The answer is NO. That’s why Appium is having its own list of libraries, from Appium library we have a class called “TouchActions” where we can perform mobile based operations like Swipe, Scroll, tap, point etc.
It’s all about from which library we are importing into our code
Selenium: “import org.openqa.selenium.interactions.Actions;”
Appium: “import io.appium.java_client.TouchAction;”
I hope we are clear with Appium and Selenium API’s. Now we are in a shape to proceed even further.
Starting now we will focus on creating a Maven project with TestNG and Excel utility to test the App. So that it will be interesting for you guys to follow-up and you will also get the satisfaction of framework design and much more.
How to create a Maven Project?
Before creating a Maven project, we should know about what Maven is and why we need that?
Maven is basically a build tool. Unlike Java project, Maven is having its own folder structure and Dependency mechanism where one can easily maintain the code and update the dependencies in a structured and proper way.
We do have our own video tutorial on what is Maven and how to create a Maven project by Naveen. Please refer the link below for tutorial:
In our tutorial, we are giving preference to Maven framework, because of the some reasons like,
- Will save our time and effort from downloading the Appium jars and other must have Jars and link it with our project
- We can use the existing Maven folder structure to maintain our class/java files.
- With the help of POM file, we can easily maintain our libraries up-to-date
- Now a days Maven projects are getting famous in QA fraternity. So it is in must learn list
Creating a Maven project in Eclipse:
Step 1: Open eclipse

Step 2: From the eclipse home page to to Menu bar and click on
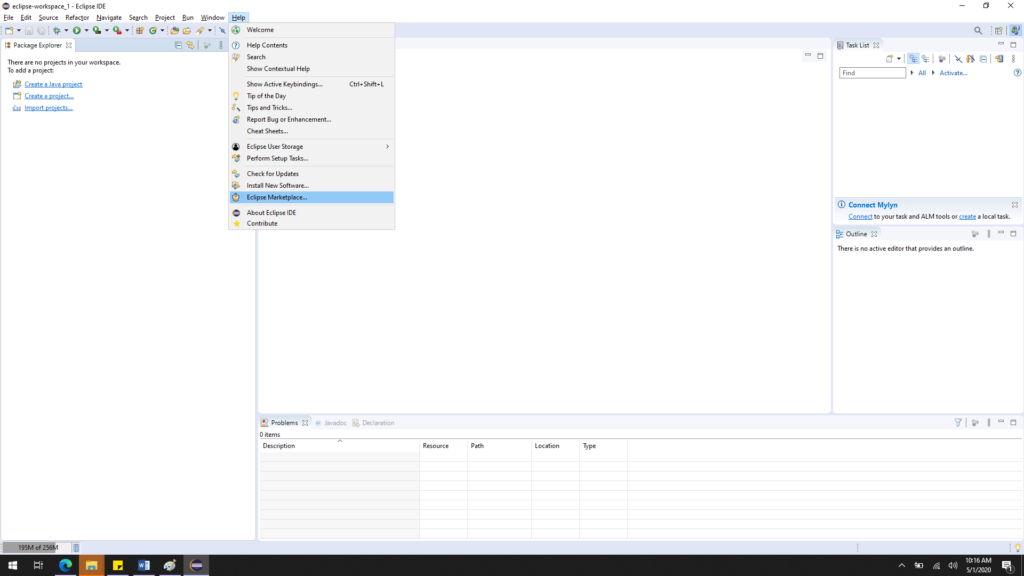
Step 3: Search for the text “Maven”
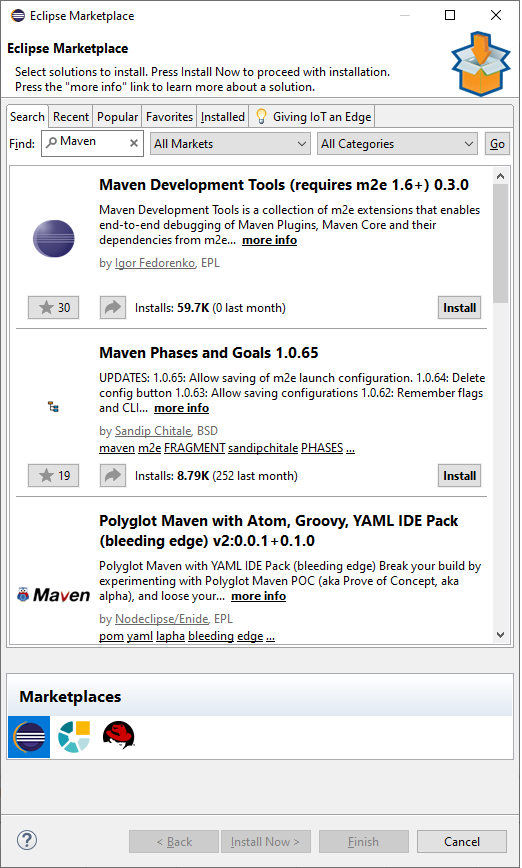
Step 4: Install the Maven plugin, just by clicking on Install button
Step 5: Once you got the below screen, select all checkboxes and click on “Confirm” button
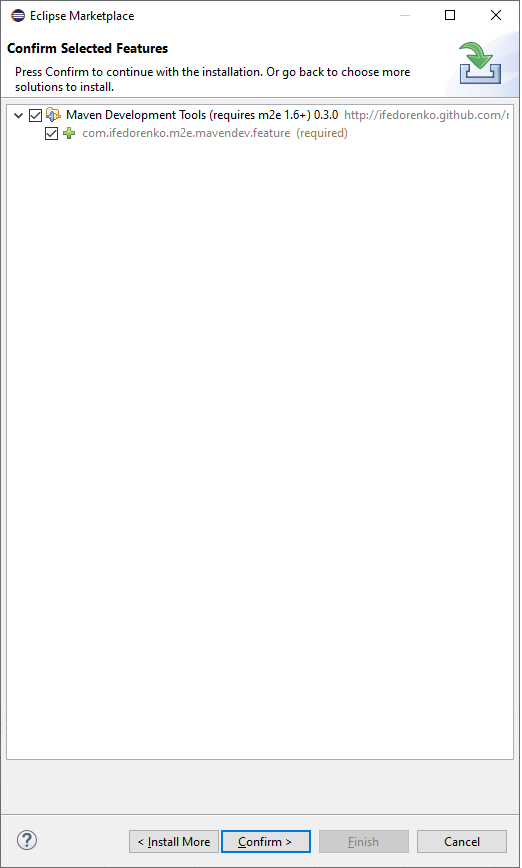
Installation should be successful. Restart the eclipse.
Step 6: To confirm whether maven plugins are available in Eclipse, that just go to Menu bar and click on New -> Projects
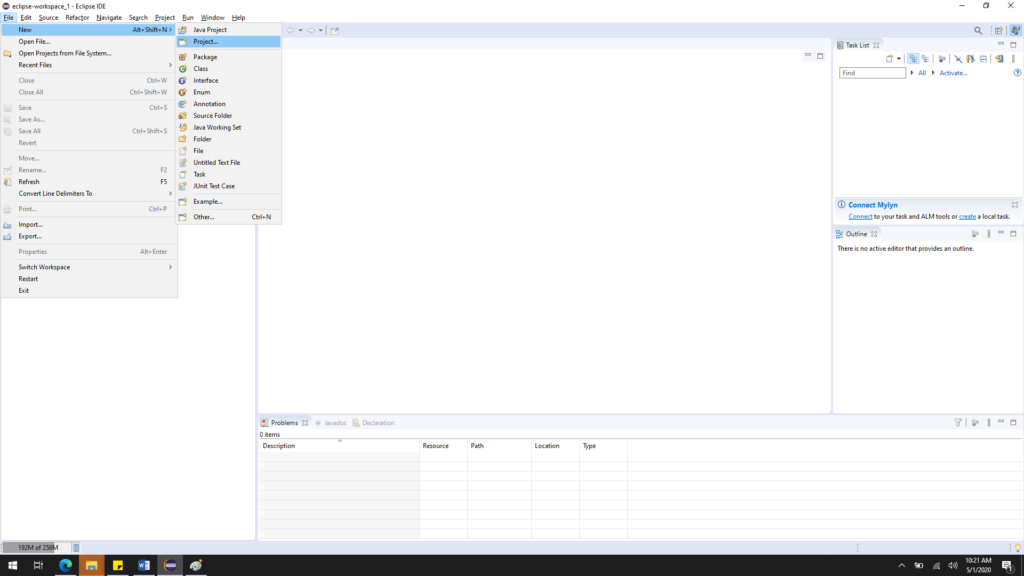
Look in Project wizard for the Name “Maven”. You should get a screen like below,
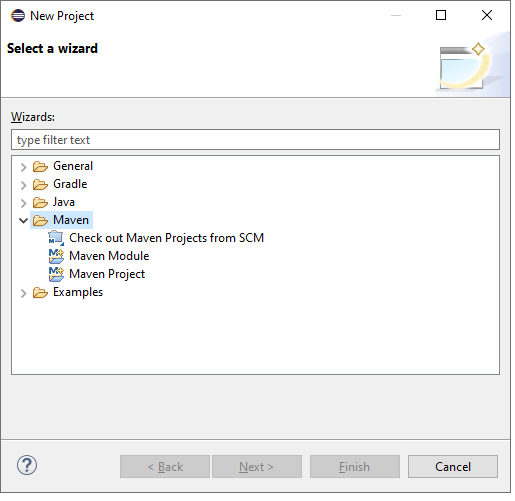
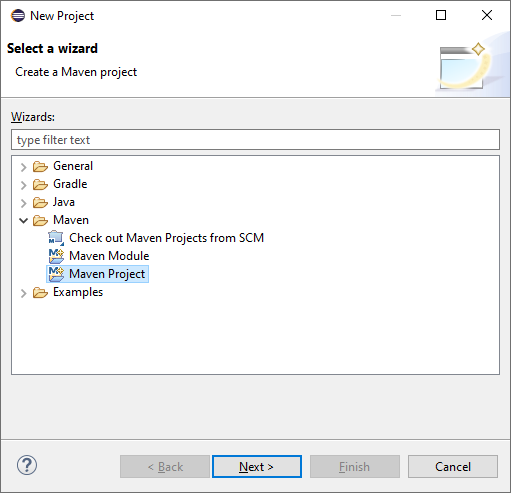
Step 7: Select “Maven Project” and click on Next
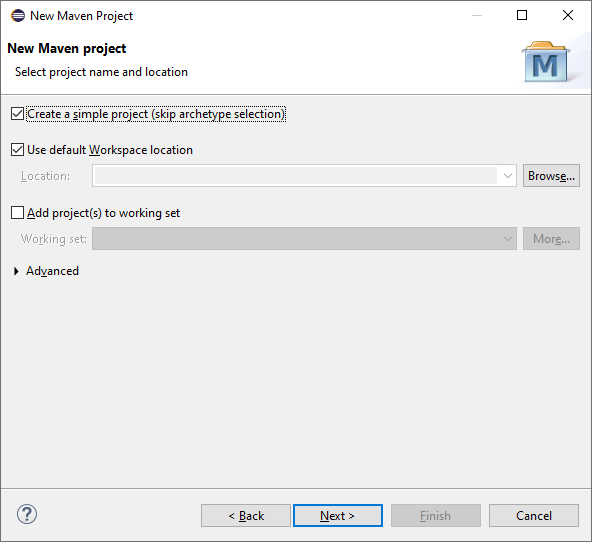
Step 8: In this screen, you can ignore any pre-defined or existing archtype just by selecting the checkbox “Create a simple project (skip archtype selection)”. We are selecting this checkbox because, there are lot of developers and Maven community guys created pre-defined set of architecture which will be useful for developers with selected POM dependencies. Since we need Maven framework for our Testing, the existing archtypes won’t help so we can simple skip the existing ones and create our own.
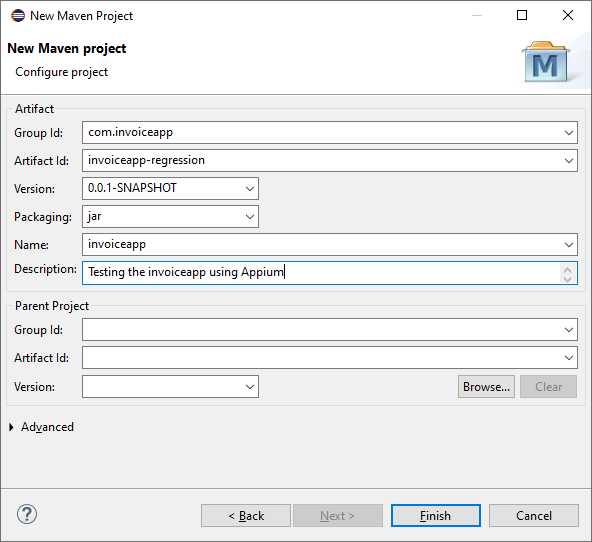
Step 9: Click on Next button. Here comes our Major part.
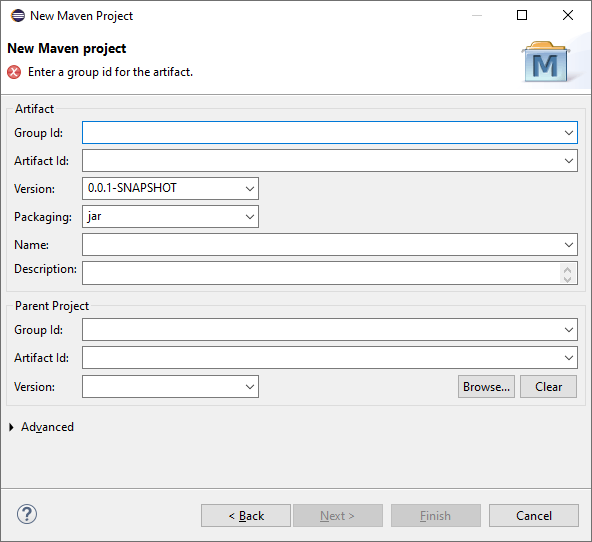
- Group id: This is an important field an internal Identity to identify the project.
- Naming practice: Reversed domain name of the app under test.
- Example: com.invoiceapp (or) org.invoiceapp [usually lowercases are preferred]
- Artifact id: Artifacts means a document, a name of the jar we are going to create. Also the name given in this field is going to be our framework name.
- Lower cases are preferred. For our project I’m giving the name as “invoiceapp-regression”
- Version: Skip this by selecting the default value 0.0.1-SNAPSHOT. The usage of this field is for version controlling includes giving increments for Major, Minor and low level changes. You can understand the importance and usage of this field when we discuss about the POM file in future sessions.
- Packaging: Let it be jar only
- You can enter any valid values in “Name” and “Description” fields.
- Ignore the Parent Project. This will simply help to inherit the arch from other Maven project.
Now our Maven project and framework skeleton is ready. This is how the initial structure look like.

In any Maven based projects, the below 3 fields are really Mandatory. Without these 3 fields we cannot create or use a Maven project
- GroupID
- ArtifactID
- Version
There is one more field called “Scope”. We will see all these fields in detail in POM Dependency session.
In our next session, we will see
What is a framework? Why we need a Framework
How to add Appium and other utility jar’s in Maven POM file
Cheers!
Naveen AutomationLabs
Blog Contributors:
Author: Ragavendran
Ragav, having 10+ years of testing experience on which 7 years of rich experience in automation using UFT, Selenium (Java/Python). Expertise in Web and Mobile automation testing using Appium.
www.linkedin.com/in/Ragavendran-Ragav
Reviewer: Naveen Khunteta


0 Comments
2 Pingbacks