
~Source: Google
Introduction:
In this Article, We are going to learn about creating UI Test automation framework with Cucumber BDD Approach.
What is BDD ?
- Behaviour-driven development is an Agile software development process that fosters collaboration between developers, software testers, and the non-technical, business side in a software development process.
- It asserts how an application should behave from the end user’s perspective.
Why Cypress ?
- Front end testing tool built for the modern web applications.
- Because of its Architectural design, Cypress delivers fast, consistent and reliable test execution compared to other Automation tools
- Cypress takes snapshots as your tests run. We can hover over each command in the Command Log to see exactly what happened at each step.
- Cypress automatically waits for commands and assertions before moving on.
- Ability to test edge test cases by Mocking the server response.
Cypress Project Setup with Cucumber:
- Download Node js from https://nodejs.org/en/download/ as per your operating system, as the cypress is built on the node js.
- Create a folder and import the folder in any editor atom, sublime or visual studio code and open the terminal.
- Setup a new npm package : npm init, this will create package.json in your project.
- Open the terminal and enter npm install cypress cypress-cucumber-preprocessor, this will install cypress and cucumber in your project.
- Dependencies should get added in package.json file.
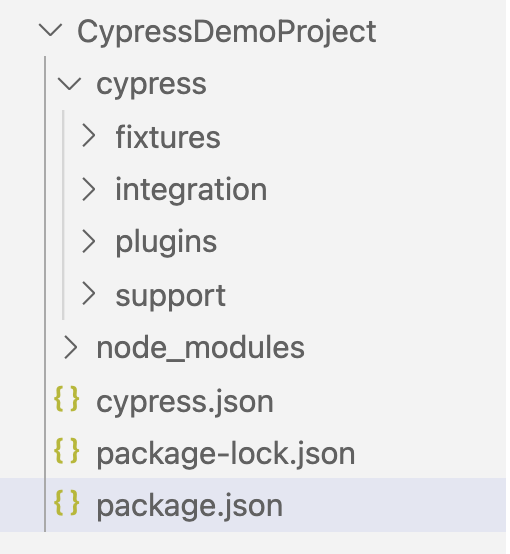
- Execute a command npx cypress open and you will be displayed with these folders in editor’s Left Pane.
To enable the cucumber preprocessor plugin:
Open cypress/plugins/index.js and this snippet
const cucumber = require('cypress-cucumber-preprocessor').default

module.exports = (on, config) => {
  on('file:preprocessor', cucumber())
}
Add support for feature files to your Cypress configuration
cypress.json{
  "testFiles": "**/*.feature"
}
Add this section to your package.json:
"cypress-cucumber-preprocessor": {
"nonGlobalStepDefinitions": true
}
To bind our step definitions to our features files.
Cucumber Feature File:
A feature file can contain a scenario or can contain many scenarios in a single feature file but it usually contains a list of scenarios in English format using some BDD keywords and the language is called “Gherkin“.
Steps:
- Create a folder under the Integration folder as CucumberTests
- Create a file login.feature and click login.feature and type Feature and the syntax for the same will get poped up automatically:
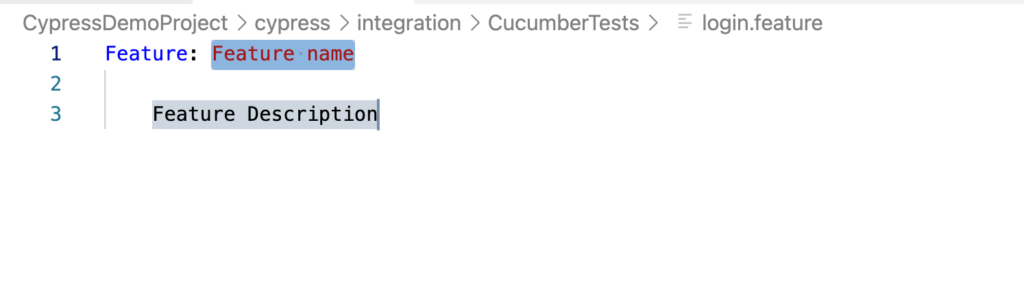
Provide Feature name, Feature Description and Type Scenario and give Scenario name.
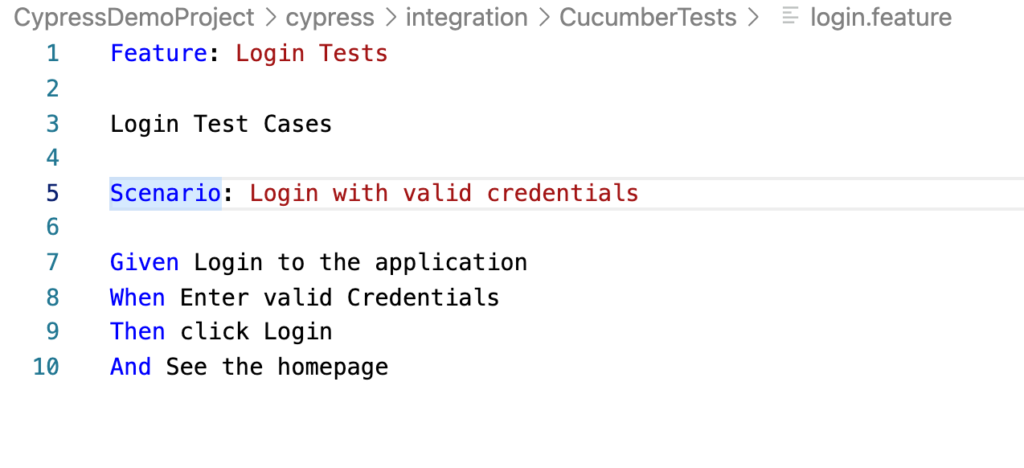
Let’s try to understand the Feature File:
After the Scenario, we need to write certain statements with Keywords Given, When, Then, And also But.
- Given: It describes the pre-requisite for the test to be executed.
- When: It defines the trigger point for any test scenario execution.
- Then: It holds the expected result for the test to be executed.
- And: It provides the logical AND condition between any two statements
- But: It signifies logical OR condition between any two statements.
Now, We have to create the step definition for the test written in the feature file:
Since we have feature file with us, now we have to create step definition file for the same :
- Create a folder login, remember folder name should be the same as the name of feature file.
- login.feature is the feature file name and folder should have name as login
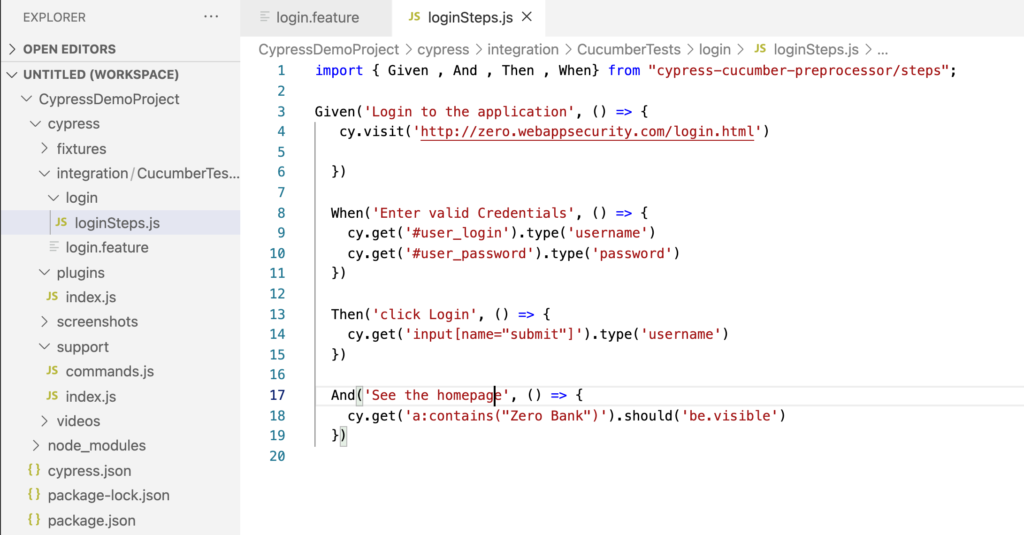
- Under the login folder, create a loginSteps.js file and start Mapping the test steps with feature file test cases.
and folder in left pane and step definition would look like below:
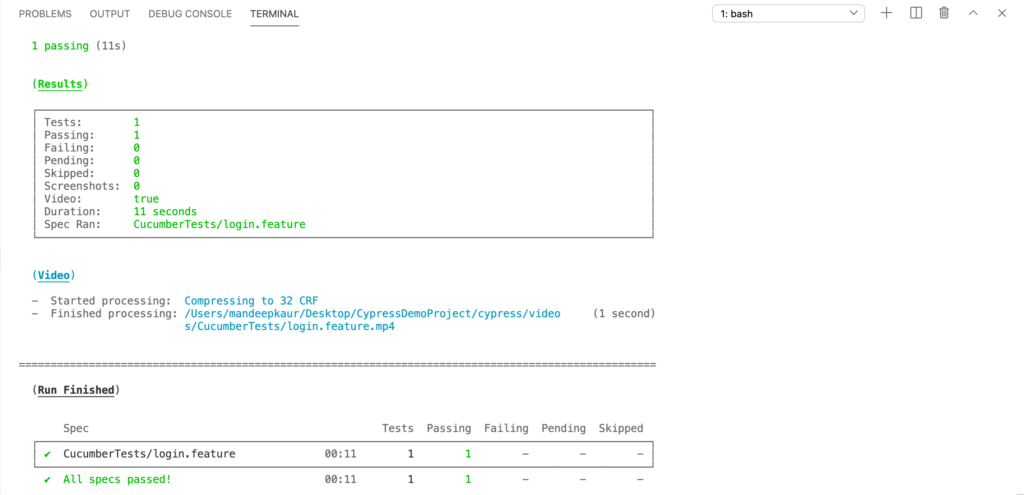
Hit the command npx cypress run and output on console will be displayed as below:
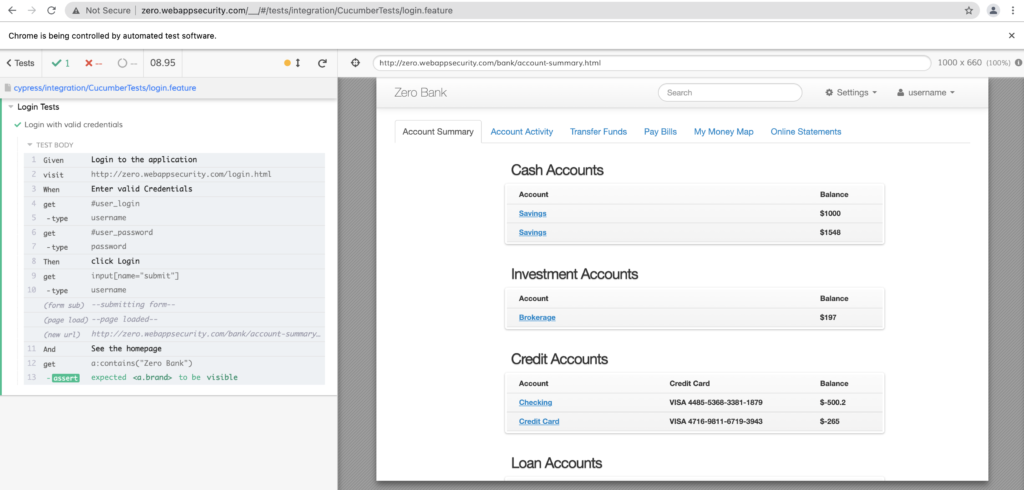
and to run in Test runner enter the command npx cypress open in the terminal and then run feature file and will be displayed as below:
Step Definitions with Dynamic Parameters:
Say, when you have to pass username and password as dynamic values below is the code snippets to be followed
Feature: Login Tests

Login Test Cases

Scenario: Login with valid credentials

Given Login to the application
When I type username as "username"
And I type password as "password"
Then click Login
And See the homepage
import { Given , And , Then , When} from "cypress-cucumber-preprocessor/steps";
Given('Login to the application', () => {
cy.visit('http://zero.webappsecurity.com/login.html')
})
When('I type username as {string}',username=> {
cy.get('#user_login').type(username)
})
And('I type password as {string}',password=> {
cy.get('#user_password').type(password)
})
Then('click Login', () => {
cy.get('input[name="submit"]').click()
})
And('See the homepage', () => {
cy.get('a:contains("Zero Bank")').should('be.visible')
})
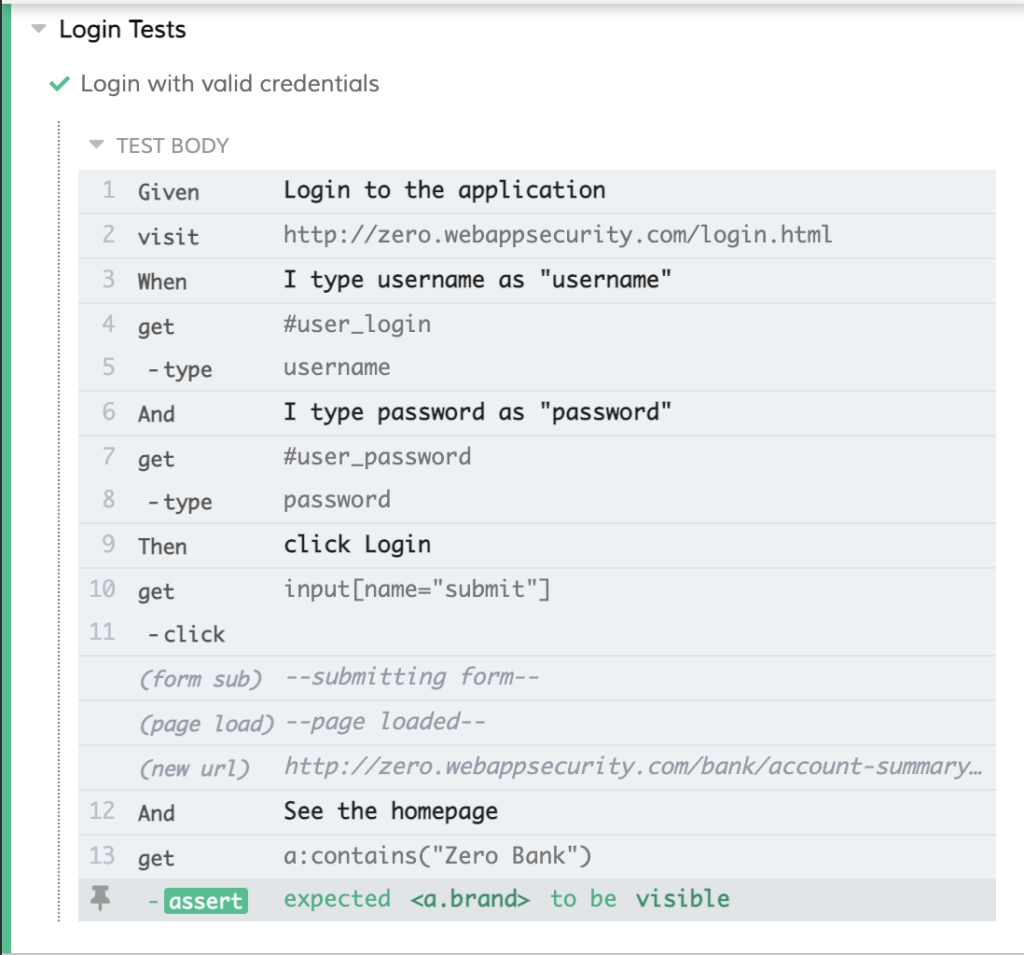
and In the Test Runner, it will be shown as with proper Given, When, Then and And statements:
Concept of Grouping and Filtering of Test Cases/ Smart Tagging:
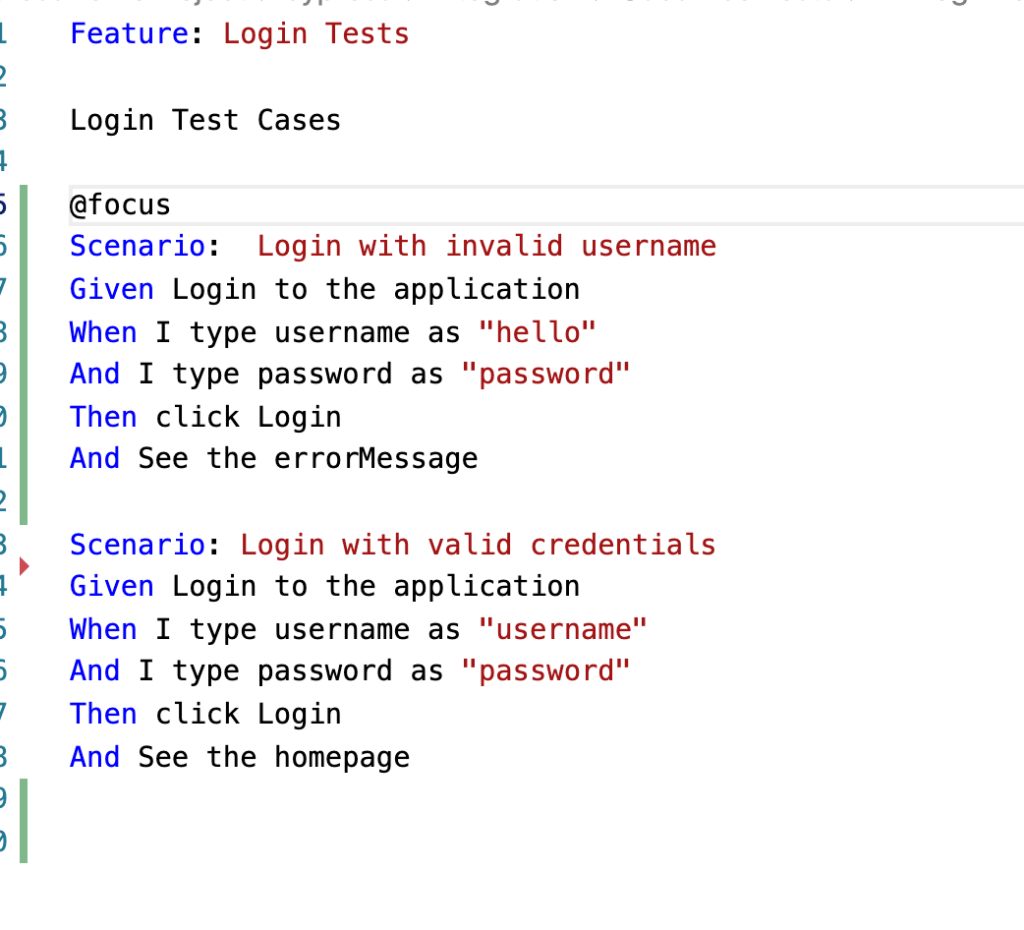
when you have multiple scenarios and wanted to check few test cases to run, just put @focus on the specific scenarios you want to run:

Also, you can tag your test cases with @smoke and @Regression test cases and run the particular scenarios from your command line with the below command :
./node_modules/.bin/cypress-tags run -e TAGS=’not @Smoke and (@Regression or @Sanity)’
Hooks Support in cypress and cucumber:
- The cypress-cucumber-preprocessor supports both Mocha’s before/beforeEach/after/afterEach hooks and Cucumber’s Before and After hooks.
- Cucumber Before hooks run after all Mocha before and beforeEach hooks have completed and the Cucumber After hooks run before all the Mocha afterEach and after hooks.
- As we are using Mocha test framework with cucumber and cypress, it’s always good to go with Mocha hooks.
Let’s begin to Explore Data Driven Testing with cucumber:
Feature File:
Feature: Login Tests

Login Test Cases

Scenario: Login with multiple credentials
Given Login to the application
When I type the credentials
| uname | pword |
| username | password |
| hello | world |
Then click Login
To pass multiple test data set, you define the test set in tabular form like done above:
import { Given , And , Then , When} from "cypress-cucumber-preprocessor/steps";

Given('Login to the application', () => {
   cy.visit('http://zero.webappsecurity.com/login.html')
  })

  When('I type the credentials',function(dataTable) {
    cy.get('#user_login').type(dataTable.rawTable[1][0])
    cy.get('#user_password').type(dataTable.rawTable[1][1])
    cy.get('#user_login').type(dataTable.rawTable[2][0])
    cy.get('#user_password').type(dataTable.rawTable[2][1])
  })

  Then('click Login', () => {
    cy.get('input[name="submit"]').click()
  })
Let’s try to understand the code:
To fetch the test data, just write dataTable in function and as I have defined 2D array, fetch first username as dataTable.rawTable[1][0] that means raw one and 0 coloumn and it will fetch username as “username”.
Generating HTML Cucumber Reports:
Add below code snippet in package.json
"cypress-cucumber-preprocessor": {
"cucumberJson": {
"generate": true,
"outputFolder": "cypress/cucumber-json",
"filePrefix": "",
"fileSuffix": ".cucumber"
}
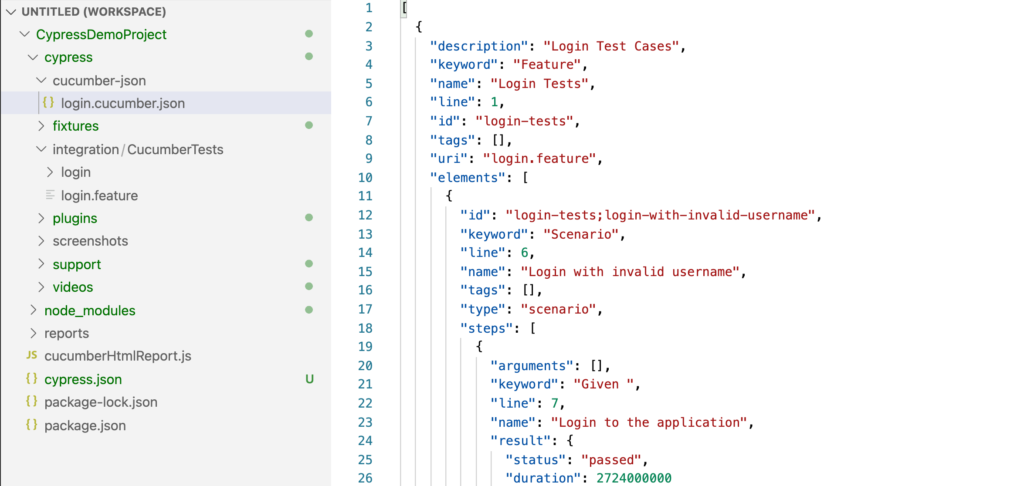
}and remember we have already have cypress-cucumber-preprocessor “nonGlobalStepDefinitions”: true, after that cucumberJson should be put in package.json and output will be generated under cypress/cucumber-json.
cucumber.json file:
And to create HTML report : Install this plugin with the following command:
- npm install multiple-cucumber-html-reporter –save-dev
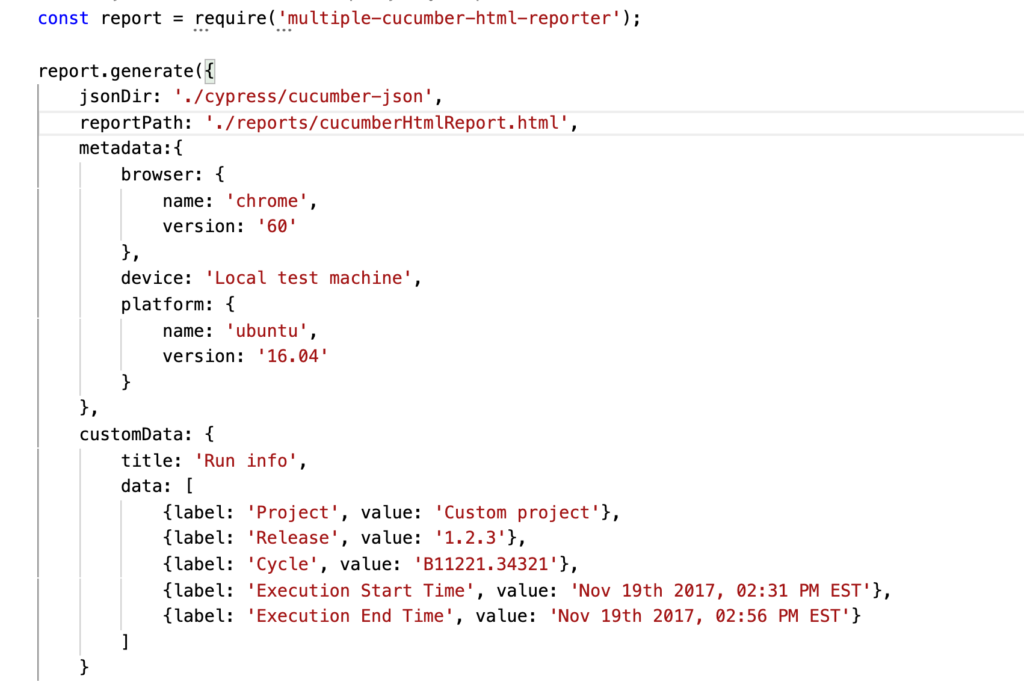
- Add cucumberHTMLReport.js file under your parent project and paste the below code:
const report = require('multiple-cucumber-html-reporter');

report.generate({
	jsonDir: './path-to-your-json-output/',
	reportPath: './path-where-the-report-needs-to-be/',
	metadata:{
        browser: {
            name: 'chrome',
            version: '60'
        },
        device: 'Local test machine',
        platform: {
            name: 'ubuntu',
            version: '16.04'
        }
    },
    customData: {
        title: 'Run info',
        data: [
            {label: 'Project', value: 'Custom project'},
            {label: 'Release', value: '1.2.3'},
            {label: 'Cycle', value: 'B11221.34321'},
            {label: 'Execution Start Time', value: 'Nov 19th 2017, 02:31 PM EST'},
            {label: 'Execution End Time', value: 'Nov 19th 2017, 02:56 PM EST'}
        ]
    }
});
Configure jsonDir and reportPath as or the way you want :
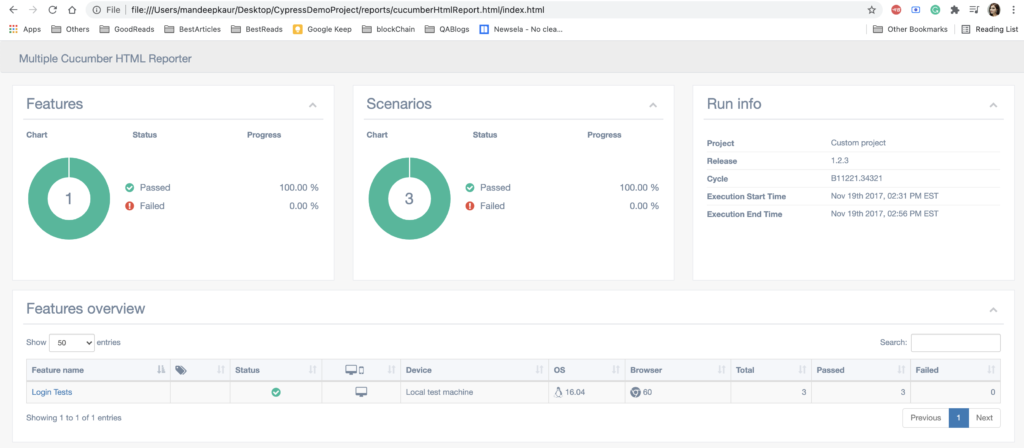
Now, we need to execute this js file to get the HTML Report , just hit the command as node cucumberHTMLReport.js

Open this file in browser to get full-fledge HTML report:
For the code reference, please clone the project from:
https://github.com/MandeepKaur2020/CypressFrameworkBDD.git
References:
- https://www.npmjs.com/package/cypress-cucumber-preprocessor
- https://github.com/TheBrainFamily/cypress-cucumber-preprocessor
Conclusion:


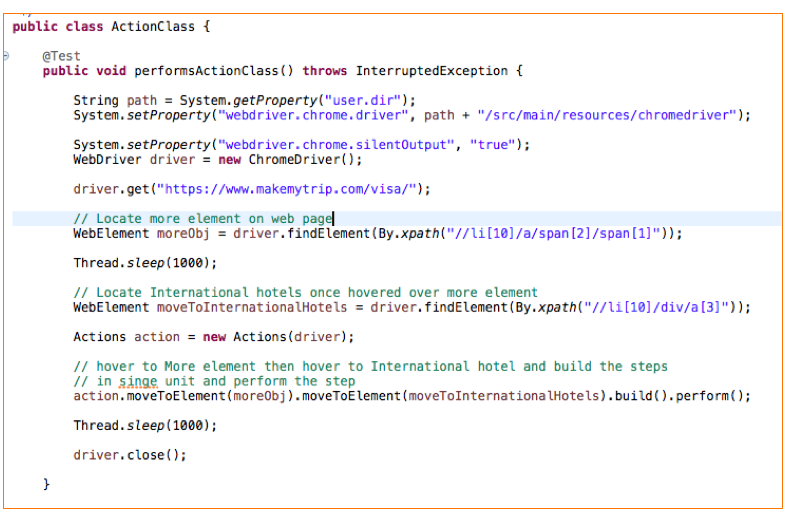


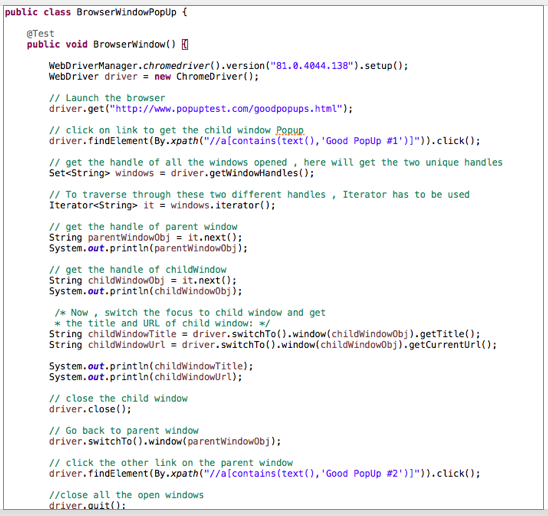


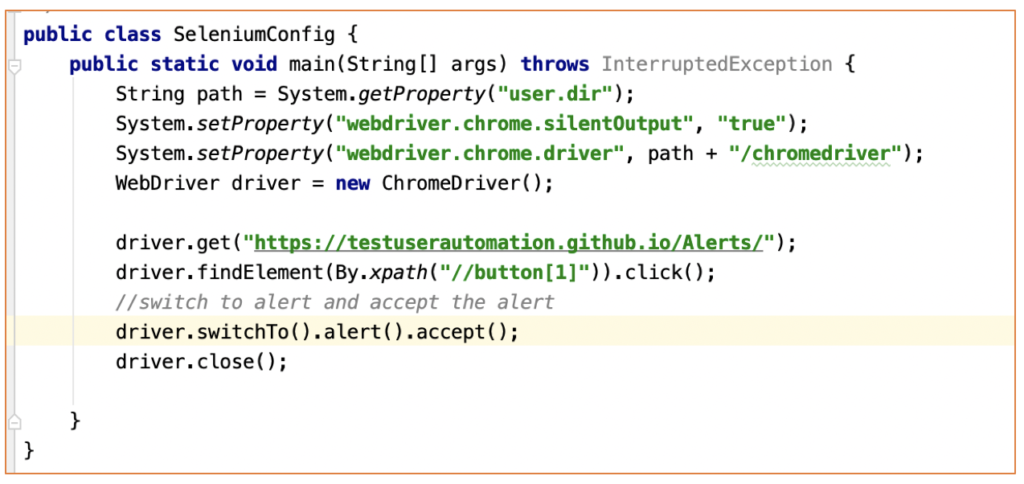


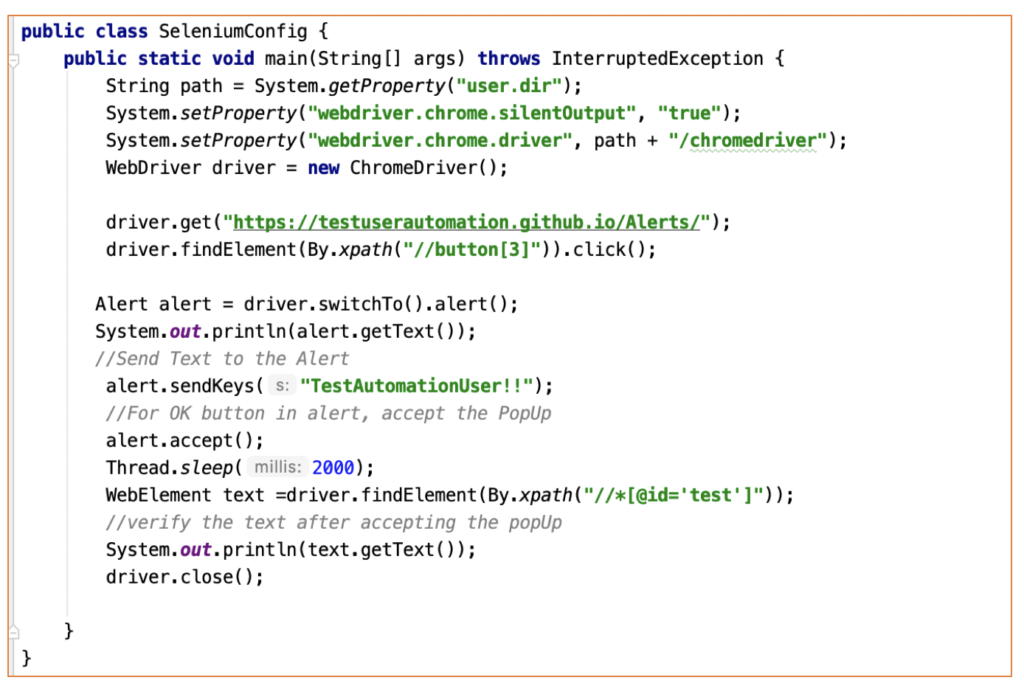


 Let’s see the code to handle this popup:


 – Basics To Advanced (Coming Soon)")