Where we learn technology

Tag: Appium (Page 1 of 2)

13. Implementing Page Factory in Appium based Framework


In our previous blog we have seen how to create a POM and with the help of POM and TestNG we executed our first test case in our Appium automation framework. Now we are taking our next step in the ladder that is “Page Factory”.

We all knows that POM is a pattern or style in other words it acts like a “Object Repository” i.e.  Declaring a Page and page objects/elements in our java class. Page Factory is also same like POM but in addition it comes with lot of predefined notations and attributes to help the automation tester to initiate or declare an element in more standard and robust way.

Let me show an example of POM and Page Factory for better understanding,

Imagine, I have a Login test case to be executed and using POM I have a Login class which is having the below method,

Public void verify_Login() {
//my code goes here
}

Using the above method, my intension is to verify login functionality using a valid username and Password. For this I can go with 4 types of approaches,

  1. Without defining the Locator and Locator strategy as a variable seperately, instead directly implementing the locator in driver.findElement() method.

public void verify_Login() {		 
    driver.findElement(MobileBy.AccessibilityId("username")).sendKeys("Admin");		 
    driver.findElement(MobileBy.AccessibilityId("password")).sendKeys("Admin123");
    driver.findElement(MobileBy.AccessibilityId("login_button")).click();
}

2. Defining the Locator and Locator strategy as a “String” variable

String loc_Username = "username";
String loc_Password = "password";
	
public void verify_Login() {		 
    driver.findElement(MobileBy.AccessibilityId(loc_Username)).sendKeys("Admin");		 
    driver.findElement(MobileBy.AccessibilityId(loc_Password)).sendKeys("Admin123");
    driver.findElement(MobileBy.AccessibilityId("login_button")).click();
}

3. Defining the Locator using “By” variable (‘By’ from selenium or ‘MobileBy’ from Appium using POM)

public static By loc_Username = MobileBy.AccessibilityId("username");
	public static By loc_Password = MobileBy.AccessibilityId("password");
	public static By loc_login_btn = MobileBy.AccessibilityId("login_button");
	
	public void verify_Login() {
		driver.findElement(loc_Username).sendKeys("Admin");
		driver.findElement(loc_Password).sendKeys("Admin123");
		driver.findElement(loc_login_btn).click();
	}

4. Defining each Locator directly as a “MobileElement“ with the help of Page Factory. This is what we gonna see in this session.

We have already covered till point #3 in our previous blogs, in this blog we will see point #4 which is nothing but Page Factory model.

I will give you a sample code snippet below for Page Factory to discuss and for better understanding

public class LoginPage_PF extends Testengine {
	
	private AppiumDriver<?> driver;
	
	public LoginPage_PF(AppiumDriver<?> driver) {
		this.driver = driver;
		PageFactory.initElements(new AppiumFieldDecorator(driver), this);
	}	
}

In the above code, it is very clear that we have a Constructor and using this keyword we are declaring the driver. What is the next line means?

PageFactory.initElements(new AppiumFieldDecorator(driver), this);

This is the point we initiated the Page Factory. Here PageFactory is a class which is having a static method “public static <T> T initElements(WebDriver driver, Class<T> pageClassToProxy)” this method is used to initiate the driver instance of a given class and which will return an instantiated instance of the class with WebElement.

AppiumFieldDecorator() which is one of an overridden constructor of the class “AppiumFieldDecorator”. This constructor is used to decorate/initiate each mobile element directly as a “MobileElement” variable.

In combination of PageFactory.initElements and AppiumFieldDecorator we can initiate a variable/element with the help of @FindBy annotations.

Remember, one of the main advantage using Page Factory is declaring locators/elements directly as a “MobileElement”. To do so it is important to initiate the driver as soon as the class is invoked this is one of a main reason why we are initiating page factory in Constructor.

Quick Hint: “this” keyword is a reference variable which refers to the current object, so instead of using this keyword in the below line, we can directly mention the class name as well.

PageFactory.initElements(new AppiumFieldDecorator(driver), this);
 Or
 PageFactory.initElements(new AppiumFieldDecorator(driver), LoginPage_PF.class);

Quick Hints:

  1. “PageFactory” class comes from the package “org.openqa.selenium.support”.
  2. “AppiumFieldDecorator” comes from the package “io.appium.java_client.pagefactory.”
  3. Any @ notations are internally referring to interfaces
  4. It is always a good practice to comment for each element or for a group of elements about its usage and how to use.

Tips: There is another ways of initiating PageFactory, is while creating an instance of the page, for example

LoginPage_PF login = PageFactory.initElements(driver, LoginPage_PF.class)

It is up to you to select any one of these ways in your framework.

Hope we are clear with the Constructor and initElements parts, Let’s move to Page Factory Annotations

What are Page Factory Annotations?

Page Factory annotations are used to provide the way of finding a MobileElement. Also it will make the user feel the code more readable and understandable.  

       @FindBy() is one of an annotation which helps user to declare a WebElement

Quick Hint: We are telling ‘@’ special key as an annotation, actually it is an interface with @infront. Example: public @interface Test, public @interface FindBy.   

About @FindBy in java docs
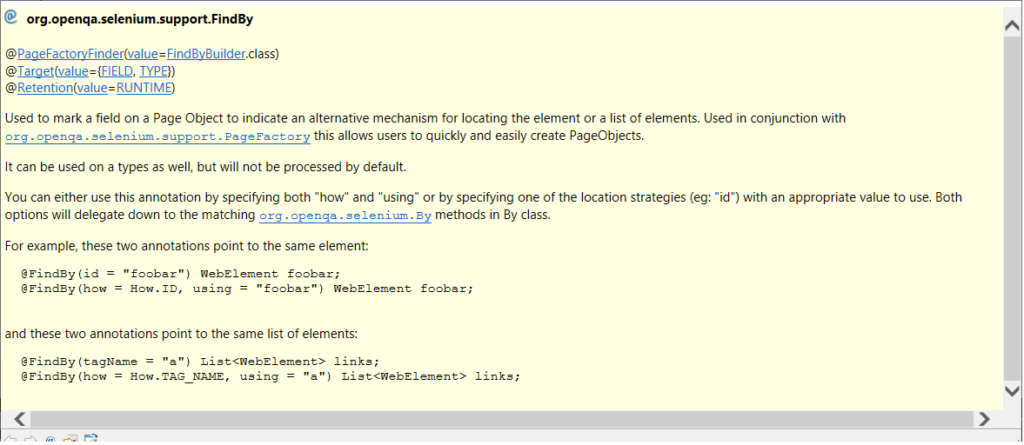
@FindBy is used to find and initiate WebElements, and to define MobileElements we need to use annotations like  @iOSXCUITFindBy and @AndroidFindBy

@iOSXCUITFindBy is used to declare variable as “IOSElement” which is for Apple idevices

@AndroidFindBy is used to declare variable as “AndroidElement” which is for Android based devices

List of locators available for @iOSXCUITFindBy

List of locators available for @AndroidFindBy

Sample code snippet below on @FindBy

@AndroidFindBy(id = "username")
 AndroidElement loc_Username_android;

 @iOSXCUITFindBy(accessibility = "username")
 AndroidElement loc_Username_ios;

Here, we are instructing Appium to use @AndroidFindBy to find an element using the strategy “id” and look for the text “username” in DOM, same for @iOSXCUITFindBy

Hence we already initialized our variable as a MobileElement, no need to use driver.findElement() method every time to access any element, instead we can directly use the variable name followed by selenium/Appium operations to be performed, for example

loc_Username_android.sendKeys(“Admin”);

Cool right!!! the background is, “driver.findElement(By.ID(“username”))” will convert any given locator as a MobileElement/WebElement in runtime and uses the selenium/Appium operations like click(), sendKeys() etc.. Since we already declared our variables as a MobileElement no need to use the findElement() method.

Please find below for the code snippet, which includes explicit wait just to let you know how to use the MobileElement.

package com.invoiceapp.pages;

import org.openqa.selenium.support.PageFactory;
import org.openqa.selenium.support.ui.ExpectedConditions;
import org.openqa.selenium.support.ui.WebDriverWait;
import invoiceapp.base.Testengine;
import io.appium.java_client.AppiumDriver;
import io.appium.java_client.android.AndroidElement;
import io.appium.java_client.pagefactory.AndroidFindBy;
import io.appium.java_client.pagefactory.AppiumFieldDecorator;

public class LoginPage_PF extends Testengine {
	
	protected AppiumDriver<?> driver;
	public WebDriverWait wait;
	
	
	/**
	 * Constructor with a parameter 
	 * @param driver as an instance of AppiumDriver<?>
	 */
	public LoginPage_PF(AppiumDriver<?> driver) {
		this.driver = driver;
		PageFactory.initElements(new AppiumFieldDecorator(driver), this);
	}
	
	// Looking for the text field "Username" in Login page
	@AndroidFindBy(id = "username")
	AndroidElement loc_Username_txt;

	// Looking for the text field "Password" in Login page
	@AndroidFindBy(id = "password")
	AndroidElement loc_Password_txt;
	
	// Looking for the Button field "Username" in Login page
	@AndroidFindBy(id = "login_button")
	AndroidElement loc_login_btn;
	
	public void verify_Login() {
		wait = new WebDriverWait(driver, 10);
		wait.until(ExpectedConditions.visibilityOf(loc_Username_txt));
		loc_Username_txt.sendKeys("Admin");
		
		wait.until(ExpectedConditions.visibilityOf(loc_Password_txt));
		loc_Password_txt.sendKeys("Admin123");
		
		wait.until(ExpectedConditions.visibilityOf(loc_login_btn));
		loc_login_btn.click();
	}

}

Hope we are very clear till this level. Now the question comes, How to call this class from our Test class?

Okay, so we are using constructor in our Page class i.e. “PageFactory_Example” which expect an argument to be passed. Please find the code below to understand how to pass the driver as an argument for the PageFactory_Example.class

package test;

import org.testng.annotations.BeforeClass;
import org.testng.annotations.Test;
import com.invoiceapp.pages.LoginPage_PF;
import invoiceapp.base.Testengine;

public class PageFactoryTest extends Testengine {
	
	public static LoginPage_PF login;
	
	@BeforeClass
	public static void initiateDrivers() {
		// Passing the driver as an argument to LoginPage_PF constructor 
		login = new LoginPage_PF(driver);
	}

	@Test
	public void test_TC001_verifyAppLaunch() {		
		login.verify_Login();
	}
}

That’s all folks!!! We are now good to go with the PageFactory model in our framework. In our next blog we will see how to create a separate class for PageFactory and to get the instance of that to initiate all our elements instead of initiating everytime in our Page classes.

Also we will see how to utilize Page Factory annotations to define a MobileElement in such a way it which works for both Android and iOS, also how to create a common method for both OS, and few additional topics around Page Factory annotations like @CatcheLookup and using “how” keyword ect..

Stay focused!!!

Note: Whatever code used here are basic level and its only to understand the concept of Page Factory. We are not going to use the same code in our Framework. In our next blog I will definitely demonstrate the same using our AUT.

Hope this helps understanding the concept of Page Factory. Please post your suggestion or questions in comments sections if you have any.


I will commit the codes discussed here in my Github repo. You can clone it and start modifying as per your idea. 

https://github.com/Karthickragu/Appium_Blog

Cheers!

Naveen AutomationLab

Blog Contributors:

Author:  Ragavendran

Ragav, having 10+ years of testing experience on which 7 years of rich experience in automation using UFT, Selenium (Java/Python). Expertise in Web and Mobile automation testing using Appium.

https://www.linkedin.com/in/Ragavendran-Ragav

Reviewer: Naveen Khunteta 

https://www.linkedin.com/in/naveenkhunteta

12. Executing Test case in Appium with POM

Guys, we are half a way done with our framework creation process. So far we have implemented below operations in our framework,

  1. Created a Maven project and added our dependency jars in POM
  2. Created a Base file (Testengine.java) and initiated logs, Extent report and AppiumDriver
  3. Created Pages for our mobile screens using POM method
  4. We have also seen how to add our mobile elements using MobileBy class

In this session, we are going to use all the operations mentioned above, i.e. creating a test case for our Android application and running the same. While test case is running we will capture the test logs and add the test steps in our Extent report with the help of TestNG Listeners. Going to cover pretty much in this session so please stay focused.

Guys I’m not going to focus on loggers, Extent report etc.., as we have already seen enough in our previous blogs. Please use our video tutorial to refresh your skill on reporting and also for easy understanding. 

First things first, we will define our test strategy.

What we are going to do now? Since our Base class and POM are done (please refer previous blog)

  1. Creating a new package under the folder “src/test/java” and name it as “tests”
  2. Under the test package, we will create a new java file and name it as “SmokeTest.java”
  3. In the “SmokeTest.java” file we will implement the ITestListener interface
  4. See how and where to use the ITestListener methods in our test class
  5. Create our first Test case and run the same

All set.. Time to launch….

Create a new package under the folder “src/test/java” and name it as “tests” and under the test package, create a new java file and name it as “SmokeTest.java”

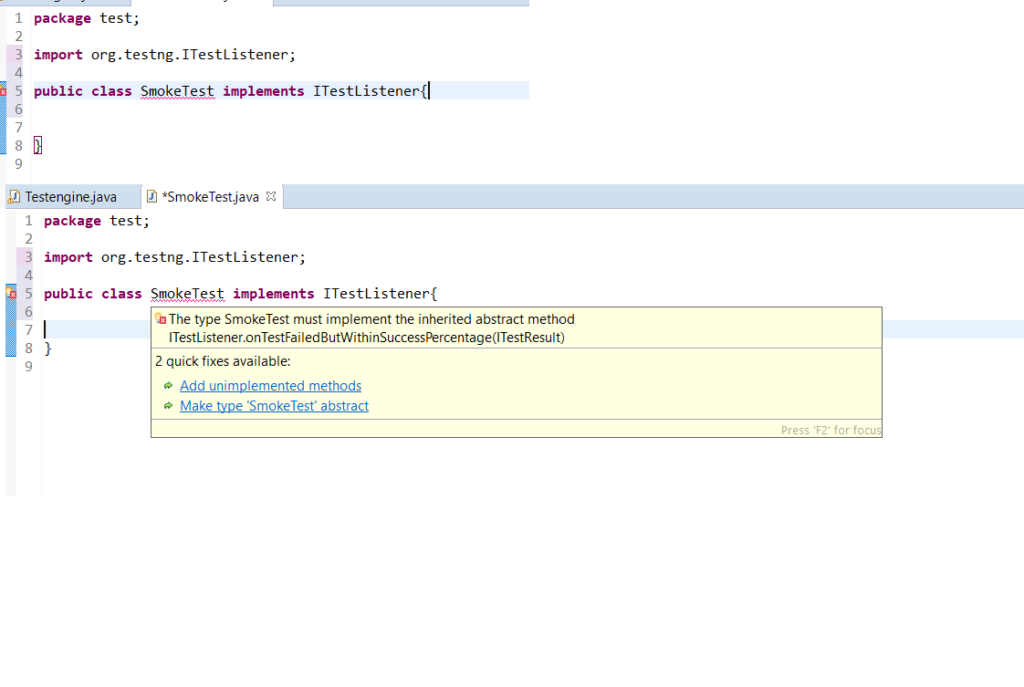
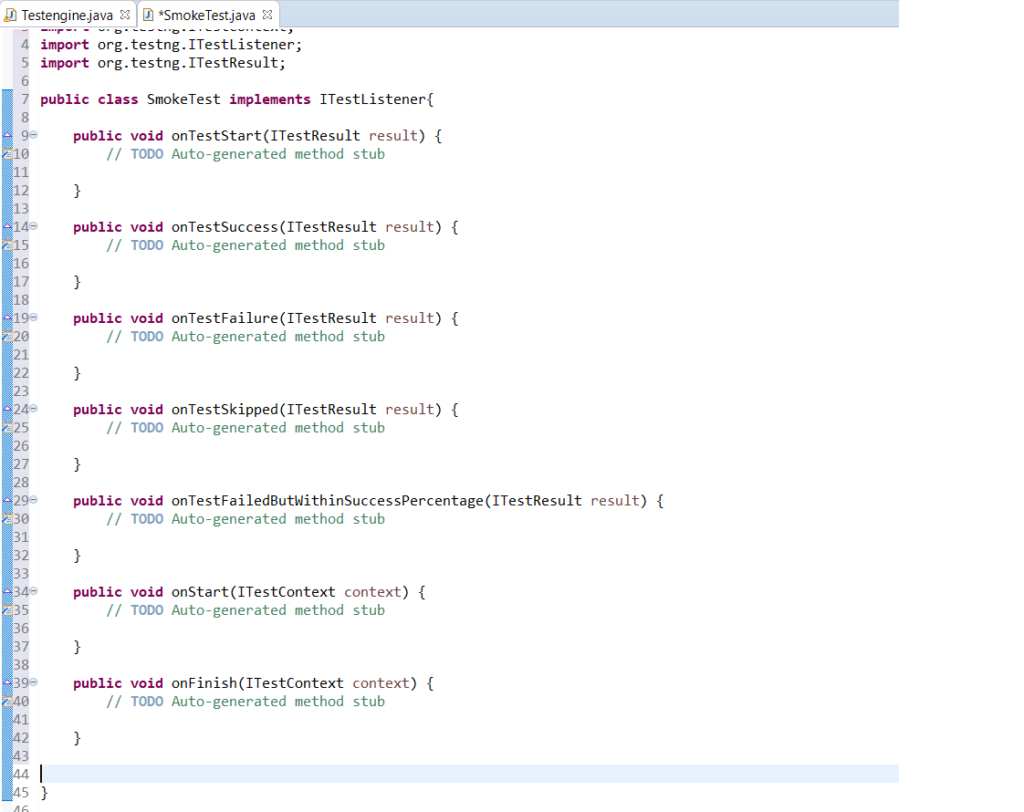
In the “SmokeTest.java” file we will implement the ITestListener interface and implements all the unimplemented methods

Once all the unimplemented Methods are added, our “SmokeTest.java” file will look like this,

Listener interface is especially for “@Test” method, so it will allow us to have all our pre-requisites and post processing activities in our Listener Methods.

For example,

In the “public void onTestStart” method, I can have all the prerequisite of my Test case, because it will execute before @Test annotation. [Please don’t confuse with @BeforeMethod] both are different

I can set all the activities for my Test case in case of failure on the “public void onTestFailure” method.  Ex, Screenshot capturing, adding a failed step in our report and log ect…

Please go through our ITestListener tutorials for more ideas

Quick hint: It is not mandatory to add Listeners in the same class where our @Test methods are available, we can also have a different and dedicated class for Listeners as well. [This can be achieved using TestNG xml file]

Remember: We have Implemented @BeforeTest , @BeforeTest and @BeforeMethod in our Testengine class. Below for reference. @BeforeMethod will open the app(AUT) and makes the app ready for our test case.

package invoiceapp.base;

import org.testng.annotations.BeforeMethod;
import org.testng.annotations.BeforeSuite;
import org.testng.annotations.BeforeTest;
import org.testng.annotations.Test;

import java.io.BufferedReader;
import java.io.FileInputStream;
import java.io.FileNotFoundException;
import java.io.FileReader;
import java.io.IOException;
import java.net.URL;
import java.util.Properties;
import org.apache.log4j.Logger;
import org.openqa.selenium.By;
import org.openqa.selenium.remote.DesiredCapabilities;

import com.aventstack.extentreports.ExtentReports;
import com.aventstack.extentreports.ExtentTest;
import com.aventstack.extentreports.reporter.ExtentHtmlReporter;

import io.appium.java_client.AppiumDriver;
import io.appium.java_client.android.AndroidDriver;
import io.appium.java_client.android.AndroidElement;
import io.appium.java_client.ios.IOSDriver;
import io.appium.java_client.ios.IOSElement;
import io.appium.java_client.remote.AutomationName;
import io.appium.java_client.remote.MobileCapabilityType;

/***
 * 
 * @author Ragav
 * @date May 10, 2020
 * 
 */

/**
 * 
 * @Usage: This class is used to initiate the Appium Driver and all other
 *         reporting stuffs. All static variables are declared here and
 *         inherited by other classes.
 *
 */

public class Testengine {

	public static Logger log;
	public static ExtentHtmlReporter htmlReporter;
	public static ExtentReports extent;
	public static ExtentTest test;
	public static FileInputStream fInputStream;
	protected static Properties properties;

	// Initiating Appium Driver
	public static AppiumDriver<?> driver;

	/*
	 * This method is used for initializing the Log4j and Config.properties
	 */
	@BeforeSuite
	public static void startSuite() {
		log = Logger.getLogger("devpinoyLogger");
		log.info("Test Started successfully");

		log.info("Initializing the Config.properties file");
		// Path where Config.properties file is placed
		String propertyFilePath = "src//main//resources//config.properties";

		BufferedReader reader;
		try {
			reader = new BufferedReader(new FileReader(propertyFilePath));
			properties = new Properties();
			try {
				properties.load(reader);
				reader.close();
				log.info("Properties file loaded successfully:");
				// Config file is loaded successfully, now with the help of
				// properties.getProperty(key) we can retrieve the value.
			} catch (IOException ioE) {
				ioE.printStackTrace();
			}
		} catch (FileNotFoundException fnfE) {
			fnfE.printStackTrace();
			log.fatal("Unable to find/Load the Properties file ");
			throw new RuntimeException("Configuration.properties not found at " + propertyFilePath);
		}
	}


	/*
	 * This method is used for init the Appium Driver and Extent report
	 */
	@BeforeTest
	public static void startTest() {

		// Getting the driver declared using our Capabilities
		try {
			driver = startAppium();
		} catch (Exception e) {
			log.fatal("Driver is not Initiated as Expected" + e.getMessage());
		}
		// LOC for initializing the Extent Report
		log.info("Initializing the Extent Report");
		try {
			log.info("Extent report is available under the directory " + System.getProperty("user.dir") + "/Reports/");
			// starting the HTML report
			htmlReporter = new ExtentHtmlReporter(System.getProperty("user.dir") + "/Reports/testReport.html");
			// To Initialize the reporters
			extent = new ExtentReports();
			// attach only HtmlReporter
			extent.attachReporter(htmlReporter);
			// Providing internal name for the report
			htmlReporter.config().setReportName("Test Report");
			// To create a test case and steps, we need to use reference variable for
			// "ExtentTest" class.
			// This test reference will help us to create test.
			test = extent.createTest("testcase Name");
		} catch (Exception e) {
			log.error("Unable to Initialize the Extent Report" + e.getMessage());
		}
	}


	/*
	 * This method is used for initiate the AppiumDriver with caps and connection protocol
	 */
	public static AppiumDriver<?> startAppium() {
		// Initializing the Appium driver
		try {
			DesiredCapabilities cap = new DesiredCapabilities();
			// All Capability values are retrieved from Config.properties file.
			cap.setCapability(MobileCapabilityType.PLATFORM_NAME, properties.getProperty("PLATFORM_NAME"));
			cap.setCapability(MobileCapabilityType.PLATFORM_VERSION, properties.getProperty("PLATFORM_VERS"));
			cap.setCapability(MobileCapabilityType.DEVICE_NAME, properties.getProperty("DEVICE_NAME"));
			cap.setCapability("appActivity", "com.invoiceapp.InvoiceLaunchScreenAct");
			cap.setCapability("appPackage", "com.invoiceapp");
			cap.setCapability("autoLaunch", true);
			cap.setCapability(MobileCapabilityType.NEW_COMMAND_TIMEOUT, 500);
			cap.setCapability(MobileCapabilityType.AUTOMATION_NAME, AutomationName.ANDROID_UIAUTOMATOR2);

			// Declaring the driver as "Android driver" with the Host and Port number to communicate with Appium desktop
			driver = new AndroidDriver(new URL("http://127.0.0.1:4723/wd/hub"), cap);
			//Printing the driver details in Log file
			log.info("Driver declared successfully : " +driver);
		} catch (Exception e) {
			driver = null;
			log.fatal("Driver declaration failed : " +driver);
			log.fatal(e.getStackTrace());
		}
		//Returning the instance of the driver to the parent method
		return driver;
	}

	@BeforeMethod
	public static void openApp() {
		log.info("Test case started successfully");
		log.info("Trying to launch the Application under Test");
		try{
		driver.launchApp();
		log.info("Application launched successfully");
		}catch(Exception e) {
			log.info("Unable to launch the application :" +e.getMessage());
		}
	}
	

}

Now to initiate the AndroidDriver before our @BeforeMethod, I have added @BeforeClass in our SmokeTest.java file. This is just to make sure our driver is initiated and a new instance has been created properly before executing @BeforeMethod or @Test.

Quick hint: It is not necessary to add all the @Before and @After (methods/annotations) in the same class, based on our needs we can have it in different class as well. Please find the code below,

Hope it is clear till now, as I said we need to add our POM logic in this test case, to do so we have another package called “pages” where we have a class called “Company_Setup” with POM right, now it’s time to initiate that class using constructor.

We all know the use of Constructor in a class. For quick reference,

  1. Constructor is a default method of a class,
  2. Constructor will be executed first whenever an instance/reference has been created for a class
  3. If no constructor defined manually, a default hidden constructor will be created by JVM to execute the class. etc….

So using constructor in “Company_Setup” class we can define our Driver which will be applicable for all methods inside the class.

I’m going to add a local variable for Driver and declare it inside the constructor. Code below,

Quick hint: If driver is not declared/initiated properly we will get a “NullPointerException” 😊

Since “Company_Setup” accepts a driver as an input, we need to initiate “Company_Setup” class and pass the driver from @BeforeClass method. Simple right, code below.

Public static Company_Setup com_Setup;
@BeforeClass
	public static void initiateDrivers() {
		com_Setup = new Company_Setup(driver);
	}

Now, we are going to add test steps in our @Test method using the “com_Setup” reference to access the Company_Setup class. Like below

This looks good, but not perfect because this will simply execute the test case and we cannot make sure on the test case test case status because there is no test conditions applied. We all know without “Assert” a test case never be fulfilled.

Time to add Assert in our test case, There are lot of methods to verify and Assert a condition, here I’m going to use a classical way of Assertion. i.e. In our POM classes under method I’m gonna add a try/Catch block to execute a test case like below, (it’s a classical way found in most of the Old frameworks)

package com.invoiceapp.pages;

import org.openqa.selenium.By;

import invoiceapp.base.Testengine;
import io.appium.java_client.AppiumDriver;
import io.appium.java_client.MobileBy;
import io.appium.java_client.android.AndroidDriver;

public class Company_Setup extends Testengine {
	
	public AppiumDriver<?> driver;
	public static Boolean assertion = false;

	public Company_Setup(AppiumDriver<?> driver) {
		this.driver = driver;
	}
	
	// Variables are declared as static to access directly in methods
	static By addLogo = MobileBy.id("frag_obup_RlAddCompLogo");
	static By addSignature = MobileBy.id("frag_obup_RlAddSignature");


	public Boolean clickOnLogobutton() {
		assertion = false;
		try {
			driver.findElement(addLogo).click();
			assertion = true;
			log.info("Add Logo, button clicked successfully");
		} catch (Exception e) {
			assertion = false;
			log.error("Unable to click on the Add Logo button, " + e);
		}
		return assertion;
	}

	public Boolean clickOnSignaturebutton() {
		assertion = false;
		try {
			driver.findElement(addSignature).click();
			assertion = true;
			log.info("Add Logo, button clicked successfully");
		} catch (Exception e) {
			assertion = false;
			log.error("Unable to click on the Add Logo button, " + e);
		}
		return assertion;
	}
}

Since methods are returning Boolean values and to capture the result of each method, we can make an Assert in our test case like below,

package test;

import org.testng.Assert;
import org.testng.ITestContext;
import org.testng.ITestListener;
import org.testng.ITestResult;
import org.testng.annotations.BeforeClass;
import org.testng.annotations.Test;

import com.invoiceapp.pages.Company_Setup;

import invoiceapp.base.Testengine;

public class SmokeTest extends Testengine implements ITestListener {
	
	public static Company_Setup com_Setup;
	
	@BeforeClass
	public static void initiateDrivers() {
		com_Setup = new Company_Setup(driver);
	}

	@Test
	public void test_TC001_verifyAppLaunch() {		
		Assert.assertTrue(com_Setup.clickOnLogobutton());
		Assert.assertTrue(com_Setup.clickOnSignaturebutton());
	}

	public void onTestStart(ITestResult result) {
		log.info("Test case started successfully");
		log.info("Trying to launch the Application under Test");
	}

	public void onTestSuccess(ITestResult result) {
		// TODO Auto-generated method stub

	}

	public void onTestFailure(ITestResult result) {
		// TODO Auto-generated method stub

	}

	public void onTestSkipped(ITestResult result) {
		// TODO Auto-generated method stub

	}

	public void onTestFailedButWithinSuccessPercentage(ITestResult result) {
		// TODO Auto-generated method stub

	}

	public void onStart(ITestContext context) {
		// TODO Auto-generated method stub

	}

	public void onFinish(ITestContext context) {
		// TODO Auto-generated method stub

	}

}

A proper test case has been added in the @SmokeTest.java file  and now we can able to execute it as a “TestNG Test”.

Guys, whatever illustrated here is a common way of adding and executing a test case. There are still plenty of ways to do this. Please elaborate your knowledge by thinking in different angles and try to put your own thoughts. We are here to help you.

Execute the scripts and add your comments, eager to see the results.

In our next blog, we will see how to implement “PageFactory” and create a common methods using POM for both Android and iOS.

I’m using the AUT version 1.10.82 committed the same in my git repo. Please download and use the app if you have any plan to clone code from my git repo.

Points to Remember:

  1. ITestListener is an interface which extends ITestNGListener
  2. Another popular interface is there called “ITestResult”
  3. @Test is a testNG annotation, not a method(I mentioned as methods in blog just for your understanding)
  4. Soft Assert and Hard Assert are two types are asserts available
  5. Some times Assert and few annotations can be driven from JUnit make sure to import the proper TestNG package
 

I will commit the codes discussed here in my Github repo. You can clone it and start modifying as per your idea. 

https://github.com/Karthickragu/Appium_Blog


Cheers!

Naveen AutomationLab

Blog Contributors:

Author:  Ragavendran

Ragav, having 10+ years of testing experience on which 7 years of rich experience in automation using UFT, Selenium (Java/Python). Expertise in Web and Mobile automation testing using Appium.

https://www.linkedin.com/in/Ragavendran-Ragav

Reviewer: Naveen Khunteta 

https://www.linkedin.com/in/naveenkhunteta

11. Page Object Model(POM) and MobileBy in Appium

In our previous blog, we have seen how to create a Base class(we named it as TestEngine.java). In this session we will see about POM and how to create .java file for each screen and manage our Mobile Elements.

Page Object Model(POM):

Guys, if you are new to Automation world, it is must for you to know about POM. I will explain the POM logic using simple examples in this session, so that you can understand it well. Most importantly POM is a very easy concept to understand and its one of a Best Practice to implement it in our project/framework.

In simple words, POM means creating java files based on “Pages/Screens”. For example let’s consider “RedBus” mobile application and its pages, (listed few pages for reference)  

  1. Login page
  2. Home page for Bus search
  3. Home page for Train search
  4. Home page for Flight search
  5. Home page for Hotel search
  6. Bus seat selection page
  7. Payment Page
  8. Confirmation page and so on….

Like this we can have up to some 20 pages. Imagine each page are having approximately 70 elements.

In our framework, do you think it’s really a good idea to declare and maintain all 1400 elements in a single java file? No definitely not!!!

To overcome this issue we are going for POM design. In POM, each pages are considered as a java file, like below

Mobile Pages/Screens/ Activity Corresponding Java file  Number of Elements 
Login page Login.java 10
Home page for Bus search HomePage_Bus.java 50
Home page for Train search HomePage_Train.java 70
 Home page for Flight search HomePage_Flight.java 65
 Home page for Hotel search HomePage_Hotels.java 80
 Bus seat selection page BusSelection.java 55
 Payment Page PaymentPage.java 35
 Confirmation page and so on…. ConfirmationPage.java 90

Quick Tips: Java class file name should start with a Capital letter.

Valid class name: Login.java

Invalid class name: login.java  

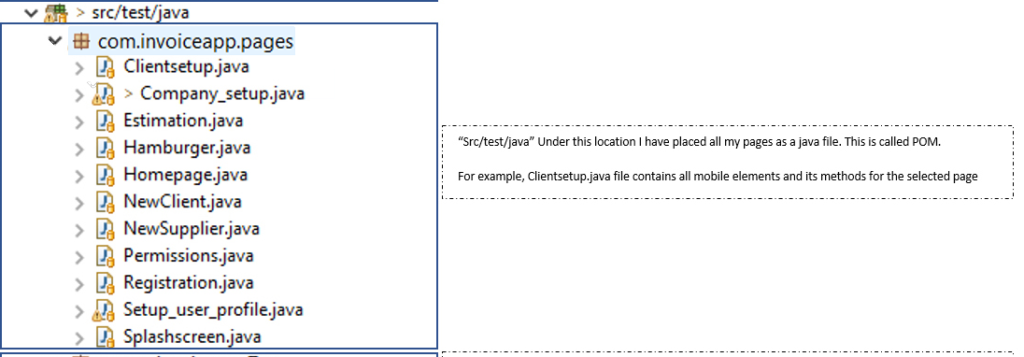
We can have all POM files under our parent project folder “Src/test/java” with a package named “com.projectName.pages”. This picture will definitely enhance your understanding.


Hope you guys are now clear with what is “POM”, our next step is creating java files based on POM and declaring the MobileElements. Please follow the steps and understand how it works. 

I'm using an app called "Invoice Manager", please refer the blog "Connect to Appium using Java / Python" for getting the app details and desired capabilities.

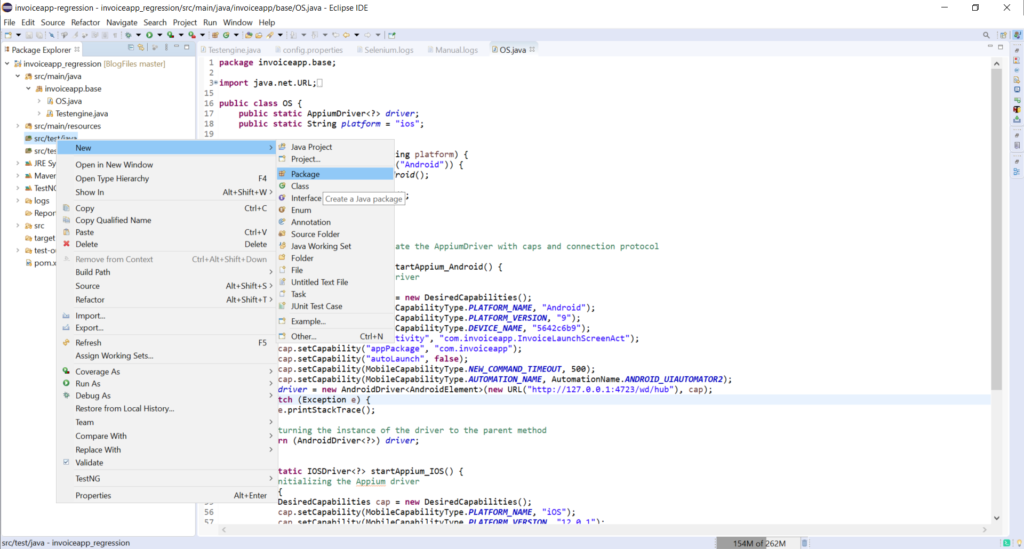
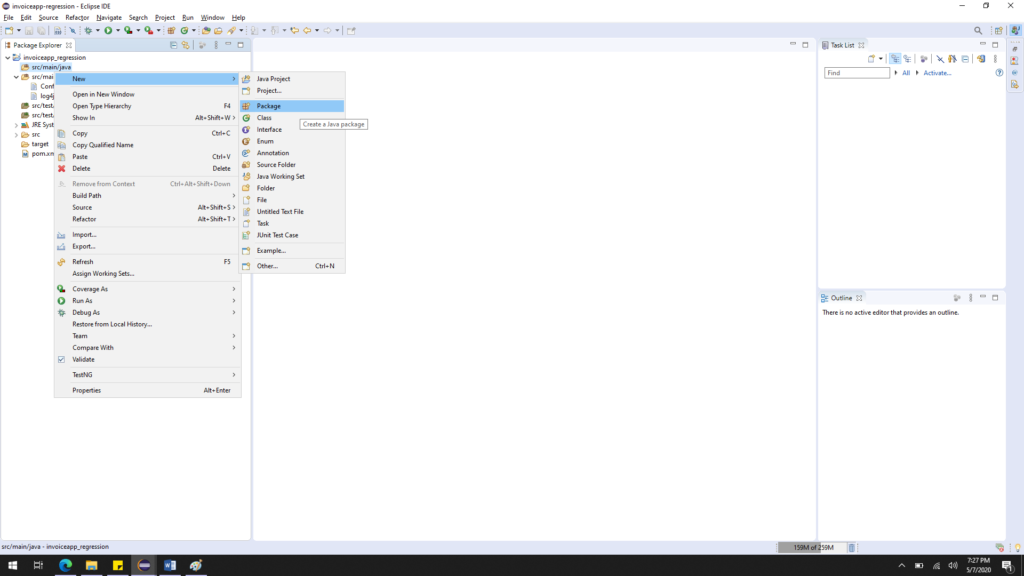
Step 1: Create a new Package and name it as “pages” under src/java/test.

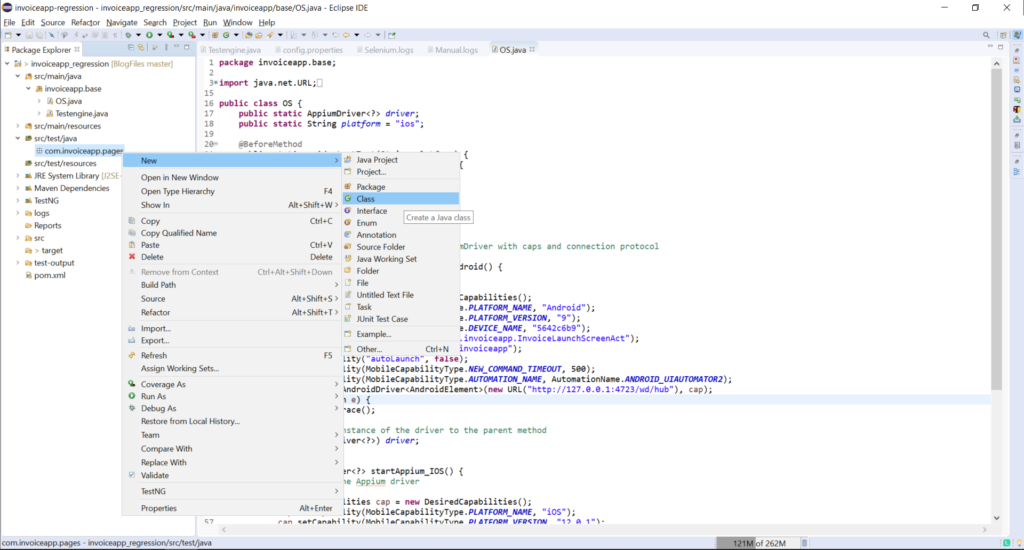
Step 2: Once Package is created, start adding java files under those package, File name should be the name of Mobile page/activity. For example, “Loginscreen.java”

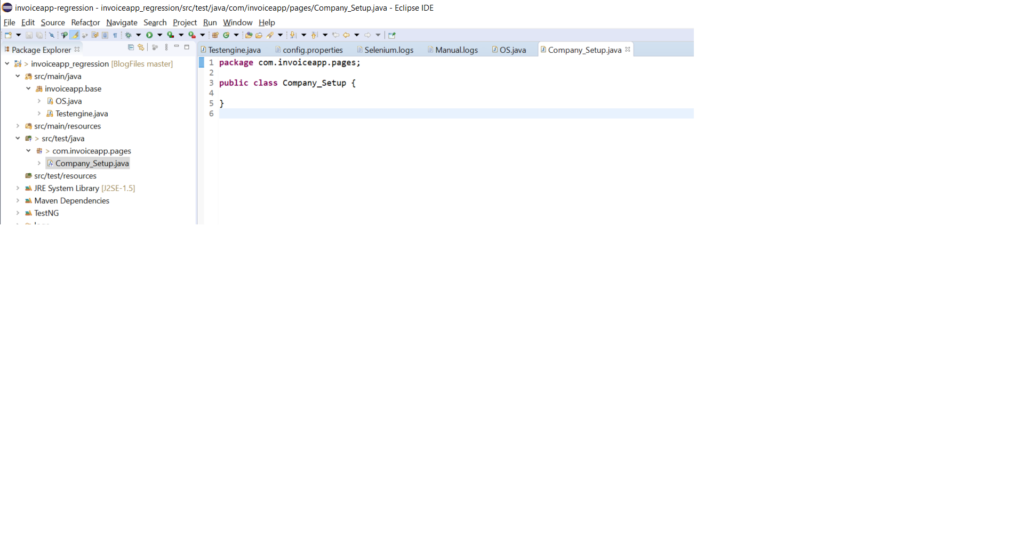
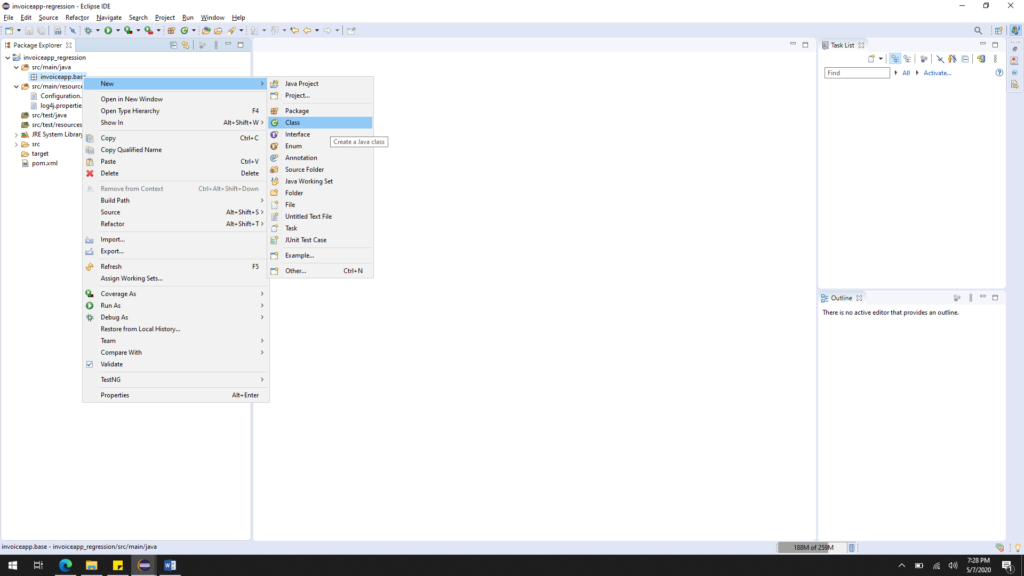
Step 3: Created a java file and named it as “Company_Setup.java” because I’m going to work in “Company setup” page in my mobile application.

Now, our java file is created successfully. Here the question comes, How can I connect my Base class “Testengine” to this “Company_Setup” class? the answer is using Inheritance concept in Java.

Guys, If you are not clear with OOPS concept, please understand it from our video

https://www.youtube.com/watch?v=g3r5KK2Acx8

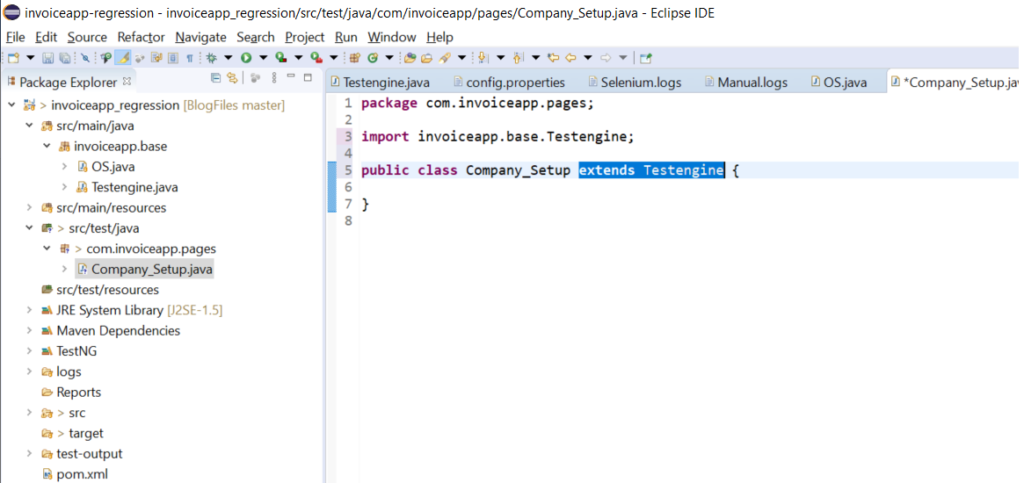
Using the keyword “extends” we can inherit the properties of our Base class, like below. Please make sure to import the correct package of Base class.

All set guys, now java will allow us to use the variables and methods from my “Testengine” class in “Company_Setup” class using inheritance.


Before starting with element declaration in our class, please take a look on this small video to understanding how to Inspect element in Appium and adding it in to our class file.


Video on Inspecting element in Appium and declaring the element variable in java file.

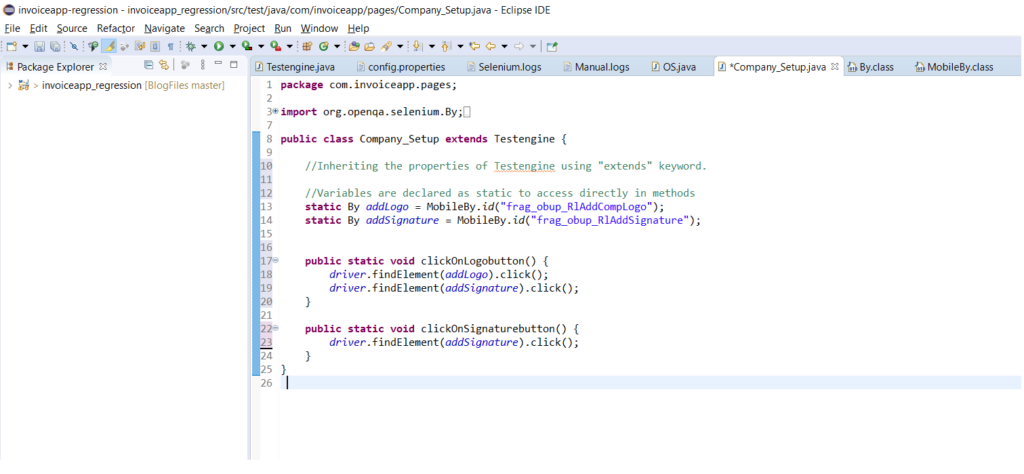
Below image describes how to declare our elements using By class. Also created two methods, One for clicking the Logo button another for Signature button.

Quick Tip: Method name in java should always starts with a small letter. Best practice is using camel case, we can use underscore(_) to make it readable

Valid method name: clickOnLoginButton() or clickOn_LoginButton()

Invalid method name: ClickOnloginbutton()  

Here comes the Important rule, How to declare my Elements in Java file?

There are lot of ways we can declare an element. Here I demonstrate 3 most commonly used approaches, (please scroll down to understand what is By and MobileBy)

Approach #1: Using locator string directly in findElement() method using By class,

driver.findElement(MobileBy.id("loginbutton")).click();

Approach #2: Using String class to save the locator string and declaring in findElement() method,

String loginbtn = "loginbutton";
driver.findElement(MobileBy.id(loginbtn)).click();

Approach #3: Using “By” class to declare the element in findElement() method.

By addLogo = MobileBy.id("loginbutton");
driver.findElement(addLogo).click();

All approaches does the same action of clicking the “loginbutton” element, but the way of declaring the element is important here. Lets see the advantages and disadvantages of each,

Approach# 1, in this case, no re-usability concept . If there is a change in locator string, then we need to find and update everywhere. One of the worst way of declaring our elements.

Approach# 2, this approach is okay to use because we have reusability concept here. But the problem is, we don’t know what locator strategy to use in driver.findElement() method. Whether loginButton is an “ID”, or “name” or “tagname”. Also we are wasting the memory by declaring lot of String variables.         

Approach# 3: It is one of a best method to declare our element. Using “By” class we are directly declaring our locator string. We have reusability concept, Ease of maintenance and we know the strategy as well.

So, for now I prefer to use Approach 3 in our framework.

Note: Best practice and industry standard approach is using POM with “PageFactory”. We will see about PageFactory in upcoming blogs.

What is “By” and “MobileBy”?

Guys this is little tricky to understand, Please understand this carefully. Lot of questions may comes from this in Interview point of view

  1. Both “By” and “MobileBy” are abstract class, which hold the locator strategy methods.
  2. “By” class comes from the package “org.openqa.selenium” and “MobileBy” comes from the package “io.appium.java_client.MobileBy”.
  3. All methods inside “By” and “MobileBy” are static in nature. That is why java is allowing the methods “id”, “xpath”, “classname” to use directly with By or MobileBy without creating any class reference.
  4. “MobileBy” extends “By” class(inheritance). It means we can use all methods of “By” class using “MobileBy” class.
  5.  Using “By” class we cannot use methods belongs to “MobileBy”. For example if you want to use the MobileBy method like “AndroidUIAutomator()”, “AccessibilityId()”, “iOSNsPredicateString()” ect… are not allowed.
  6. “MobileBy” supports platform (iOS & Android) based location strategy for mobiles.
List of available methods in By and MobileBy,
By MobileBy Inherited from By
public static By id(String) public static By id(String) Yes
public static By linkText(String) Not applicable for Appium N/A
public static By partialLinkText(String) Not applicable for Appium N/A
public static By name(String) public static By name(String) Yes
public static By tagName(String) Not applicable for Appium N/A
public static By xpath(String) public static By xpath(String) Yes
public static By className(String) public static By className(String) Yes
public static By cssSelector(String) public static MobileBy.AndroidUIAutomator(String) No
  public static MobileBy.iOSNsPredicateString(String) No
  public static MobileBy.iOSClassChain(String) No
  public static MobileBy.IosUIAutomation(String) No
  public static MobileBy.ByAccessibilityId(String) No
 

Guys, in our next session we will see how to create a simple test case which will call our methods as a test step using TestNG…

I’m so excited about the next topic because, we are going to create a java files for our “Test cases” and handle multiple methods as a steps in our test case. Stay focused…


I will commit the codes discussed here in my Github repo. You can clone it and start modifying as per your idea. 

https://github.com/Karthickragu/Appium_Blog


Cheers!

Naveen AutomationLab

Blog Contributors:

Author:  Ragavendran

Ragav, having 10+ years of testing experience on which 7 years of rich experience in automation using UFT, Selenium (Java/Python). Expertise in Web and Mobile automation testing using Appium.

https://www.linkedin.com/in/Ragavendran-Ragav

Reviewer: Naveen Khunteta 
https://www.linkedin.com/in/naveenkhunteta

10. How to create a Mobile automation framework that supports both Android and iOS?

In previous blog, We created a method in our parent class to declare our driver as “AndroidDriver”. Here comes another scenario, suppose I need to automate both iOS and Android application using the same framework.  


Is it possible?, How can I do this ?

Please read the blog carefully, this is little tricky in term of understanding the driver, but very easy to implement

How to create a Mobile automation framework supports both Android and iOS?

Nowadays it is common that, most of the applications are being developed for both Android and iOS. So when creating a test framework we need to think and create a flexible and reliable framework for supporting both the applications.

One good thing is that for most of the applications, user flow/architecture will not change based on the Operating system. For example, if you take any application which supports both Android/iOS like “RedBus” or “Linkedin”, you can see that the screens and UI will be same for both OS. May be the look and feel of UI’s can change depends on the SDK’s like XCode/Android studio.

Quick Tip: I suggest you to take a look of few softwares like Xamrin and ReactNative. These softwares are used to create a unique code which executes in both iOS and Android with the help of inbuild SDK libraries.    

Being said that, screens and UI’s are same for both the apps, Our job is now easy to create class and maintain using POM for each screens. Because we can create a single .java file with elements supporting for both iOS and Android. For example,

By android_login_button = By.id("login");
By ios_login_button = By.id("XCUIlogin");

or
AndroidElement button_Login_android = (AndroidElement) driver.findElement(By.id("Login_button"));

IOSElement button_Login ios = (IOSElement) driver.findElement(By.id("XCUIlogin"));

The above example is just for your understanding. We should not create or initiate any elements like this in framework. Do you know why?

Because, consider a page having 50 elements, so we need to declare 50 variables for android and 50 variables for iOS. In total we declared 100 variables in a single java file. Do you think it is easy to manage like this? Also think about the amount of memory we are consuming because of these variables.

So to create a flexible and easily manageable framework we have lot of existing stuffs to declare our variables. For example we can use @FindBy annotations, for example,

@AndroidFindBy(id = "Login")
@iOSXCUITFindBy(id = "XCUILogin")
MobileElement login_Button;

By using @FindBy we can create a common variable for both OS. Remember, “Login_Button” variable is now common for both Android and IOS,

driver instance will automatically detects the identifier based on OS,

If, driver is an AndroidDriver then it will consider @AndroidFindBy.

If driver is IOSDriver, then it will consider @XCUITFindBy.

Did you notice?, “Login_Button” variable is declared as a type “MobileElement”, so in our code no need to use “driver.findElement” or “By” class to declare/identify the UI.

We can directly perform element operations like .click(), .sendKeys() and all other conditions[same like WebElement], For example,

Boolean visible = login_button.isDisplayed();
login_button.click();
String button_text = login_button.getText();

Always remember, Coding is not only about writing and executing the code, we need to give priority for “Best practices” like code Optimization, Memory optimization, lesser LOC etc…  


How to Implement and declare driver in our Class?

Now, we are going to see how to create a method in “TestEngine.java” file that handles condition and supports for both iOS and Android.

As I already said, AppiumDriver<?> is a parent class for  “AndroidDriver” and “iOSDriver”. So to make our driver to support both OS, we need to declare our driver as AppiumDriver.

// Initiating Appium Driver
	public static AppiumDriver<?> driver;

Okay, our driver is now “AppiumDriver”, how to assign the “Android” or “iOS” driver to our Appiumdriver?

//driver As an AndroidDriver
driver = new AndroidDriver<AndroidElement>(new URL("http://127.0.0.1:4723/wd/hub"), capabilities);

//driver As an IOSDriver
driver = new IOSDriver<IOSElement>(new URL("http://127.0.0.1:4723/wd/hub"), capabilities); 

Our driver is now compatible to handle both OS. Still confused? Please find sample code below,

package invoiceapp.base;

import java.net.URL;
import org.openqa.selenium.remote.DesiredCapabilities;
import org.testng.annotations.BeforeMethod;
import io.appium.java_client.AppiumDriver;
import io.appium.java_client.android.AndroidDriver;
import io.appium.java_client.android.AndroidElement;
import io.appium.java_client.ios.IOSDriver;
import io.appium.java_client.ios.IOSElement;
import io.appium.java_client.remote.AutomationName;
import io.appium.java_client.remote.MobileCapabilityType;

public class OS {
	public static AppiumDriver<?> driver;
	
	@BeforeMethod
	public static void startTest(String platform) {
		if(platform.equalsIgnoreCase("Android")) {
			driver = startAppium_Android();
		} else {
			driver = startAppium_IOS();
		}
		}
	
	/*
	 * This method is used for initiate the AppiumDriver with caps and connection protocol
	 */
	public static AndroidDriver<?> startAppium_Android() {
		// Initializing the Appium driver
		try {
			DesiredCapabilities cap = new DesiredCapabilities();
			cap.setCapability(MobileCapabilityType.PLATFORM_NAME, "Android");
			cap.setCapability(MobileCapabilityType.PLATFORM_VERSION, "9");
			cap.setCapability(MobileCapabilityType.DEVICE_NAME, "5642c6b9");
			cap.setCapability("appActivity", "com.invoiceapp.InvoiceLaunchScreenAct");
			cap.setCapability("appPackage", "com.invoiceapp");
			cap.setCapability("autoLaunch", false);
			cap.setCapability(MobileCapabilityType.NEW_COMMAND_TIMEOUT, 500);
			cap.setCapability(MobileCapabilityType.AUTOMATION_NAME, AutomationName.ANDROID_UIAUTOMATOR2);
// driver is declared as an AndroidDriver, which supports AndroidElements
			driver = new AndroidDriver<AndroidElement>(new URL("http://127.0.0.1:4723/wd/hub"), cap);
		} catch (Exception e) {
			e.printStackTrace();
		}	
		//Returning the instance of the driver to the parent method
		return (AndroidDriver<?>) driver;
	}
	
	/*
	 * This method is used for initiate the IOSDriver with caps and connection protocol
	 */
	public static IOSDriver<?> startAppium_IOS() {
		// Initializing the Appium driver
		try {
			DesiredCapabilities cap = new DesiredCapabilities();
			cap.setCapability(MobileCapabilityType.PLATFORM_NAME, "iOS");
			cap.setCapability(MobileCapabilityType.PLATFORM_VERSION, "12.0.1");
			cap.setCapability(MobileCapabilityType.DEVICE_NAME, "iPhone 8");
			cap.setCapability(MobileCapabilityType.UDID, "3jtn3j4n3ijn3ji4nrj34inrj34nr34nrk");
			cap.setCapability("bundleId", "com.invoiceapp");
			cap.setCapability("autoLaunch", false);
			cap.setCapability(MobileCapabilityType.AUTOMATION_NAME, AutomationName.IOS_XCUI_TEST);
// driver is declared as an IOSDriver, which supports IOSElements
			driver = new IOSDriver<IOSElement>(new URL("http://127.0.0.1:4723/wd/hub"), cap);
		} catch (Exception e) {
			e.printStackTrace();
		}	
		//Returning the instance of the driver to the parent method
		return (IOSDriver<?>) driver;
	}	
}

Note: This is just an example for understanding how to declare both the drivers in same class. Again, in lot of ways we can declare and initiate the drivers. In upcoming blog’s, I will defiantly let you know how to implement this in our “TestEngine.java” file and pass the “platform” parameter from TestNG xml file.

Points to Remember:

  1. We can run both the drivers under same Host but not under same PROXY. Proxy should be unique for both the drivers.
  2. Executing IOS application using Windows machine is not possible, I will share the code for both the drivers, you can check IOS if you have Mac machine
  3. By getting and using the driver instance, we can run both iOS and Android in parallel. I will share the code in future blogs.


I’m very excited to create POM. Hope you too, follow us and stay focused…


I will commit the codes discussed here in my Github repo. You can clone it and start modifying as per your idea. 


https://github.com/Karthickragu/Appium_Blog


Cheers!

Naveen AutomationLab

Blog Contributors:

Author:  Ragavendran

Ragav, having 10+ years of testing experience on which 7 years of rich experience in automation using UFT, Selenium (Java/Python). Expertise in Web and Mobile automation testing using Appium.

https://www.linkedin.com/in/Ragavendran-Ragav

Reviewer: Naveen Khunteta 
https://www.linkedin.com/in/naveenkhunteta

9. Creating a Framework [Maven project] for Appium – III

We are now in “Configuration section” in our framework creation procedure. So far we have seen and created a maven project, discussed about the folder structure in Maven, Discussed about the importance of Log and config.properties file. Also created a POM file by adding the dependencies.

As a next step we will create a Base file, to access Log and Config.properties.

It’s time to know how a typical framework works with TestNG, What comes first? And how to maintain the flow?

We all know the importance of TestNG annotations and how to use it. Below listed are the most used TestNG annotations,

@BeforeSuite and @AfterSuite

@BeforeTest and @AfterTest

@BeforeClass and @AfterClass

@BeforeMethod and @AfterMethod

@Test

We will see TestNG in a separate session, now let me give you some important tips to understand the usage, this may change as per the design, but in common we can have an understand like this,

@BeforeSuite will execute first and only once in the hierarchy, so we are going to initialize Log4 under this annotation/method. It is must to start the logging as soon as the execution started that’s why log4j is initialized in Beforesuite.

@BeforeTest will execute second and only once in the hierarchy, so we are going initialize “Config.properties” and “WebDriver” under this annotation/method. To get the must needed values for the execution to proceed further.

@BeforeClass will execute third and only once in the hierarchy, so we are going initialize “Pagefactory” and “Data Utility” under this annotation/method.

@BeforeMethod will execute in an iteration with @Test, i.e. once for each test, so we are going to add our prerequisites for testcase here. Example: creating a test in extent report

@Test, here we will add our test case

@AfterMethod: Post processing of test case, example: Flushing the extent report ect.. and rest of the @After we will see while progressing

Creating a Base File:

Base file is an important file in our framework. This acts as a parent class for most of the class files in our framework. Being said that we need to design this carefully and in most efficient way.

Base class holds the initialization of WebDriver, any properties file, reporting and so on, also in this class we are going to implement TestNG annotations like @BeforeSuite, @BeforeTest, @BeforeMethods and @AfterSuite, @AfterTest, @AfterMethods.

Create a package under “src/main/java” and name it as “invoiceapp.base” (our test application name)

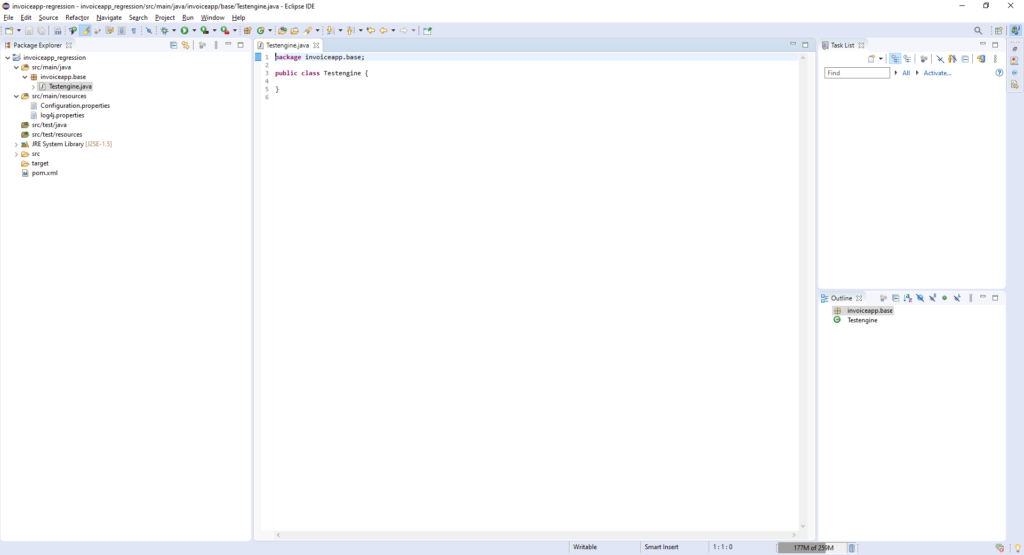
Create a new class in the base package and name it as “Testengine”

I just created a Base class now and named as “TestEngine.java” going forward we are going to use the name “TestEngine” instead of Base class for easy understanding., Its time to add TestNG annotations and methods in to TestEngine class.

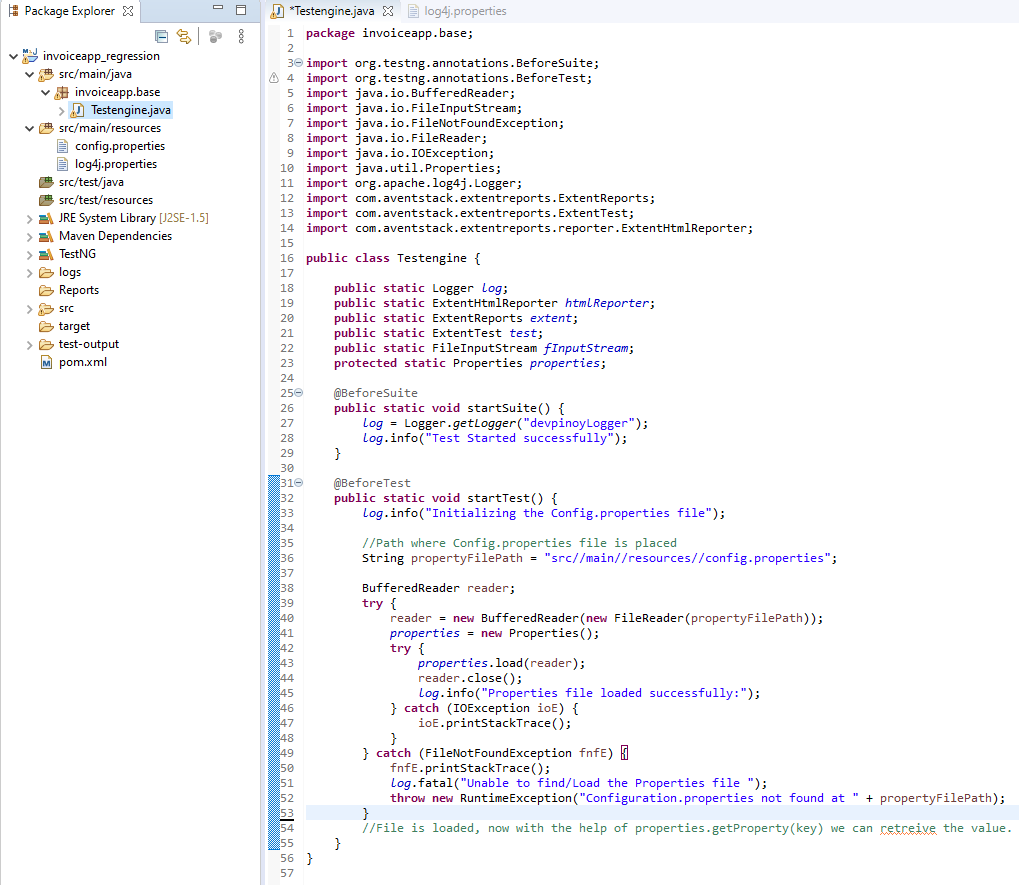
Since, Log and Config.properties are important and those needs to be initialized first, I’m adding some codes for log4j adn Config.

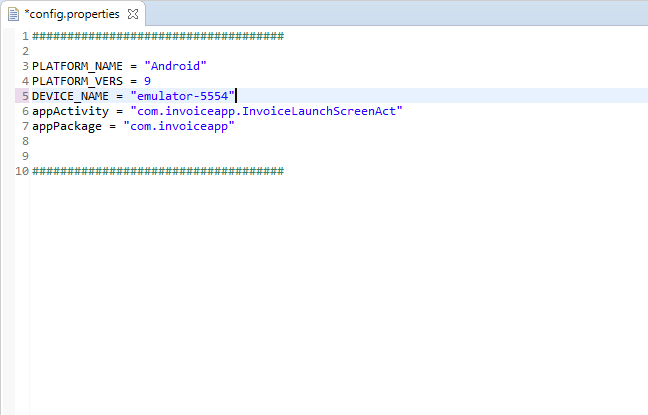
Just placed our config.properties file under “src/main/resources” with desired capability value so it’s time to configure the file in TestEngine class

Declared Log4j , config.properties and Extent reports. (Complete code is available in the bottom of this page). [skipping to explain code for log4j, Extent report and .properties as we are well aware of these]. If not, please take a look at the videos form Naveen AutomationLabs for better understanding and follow the below code.

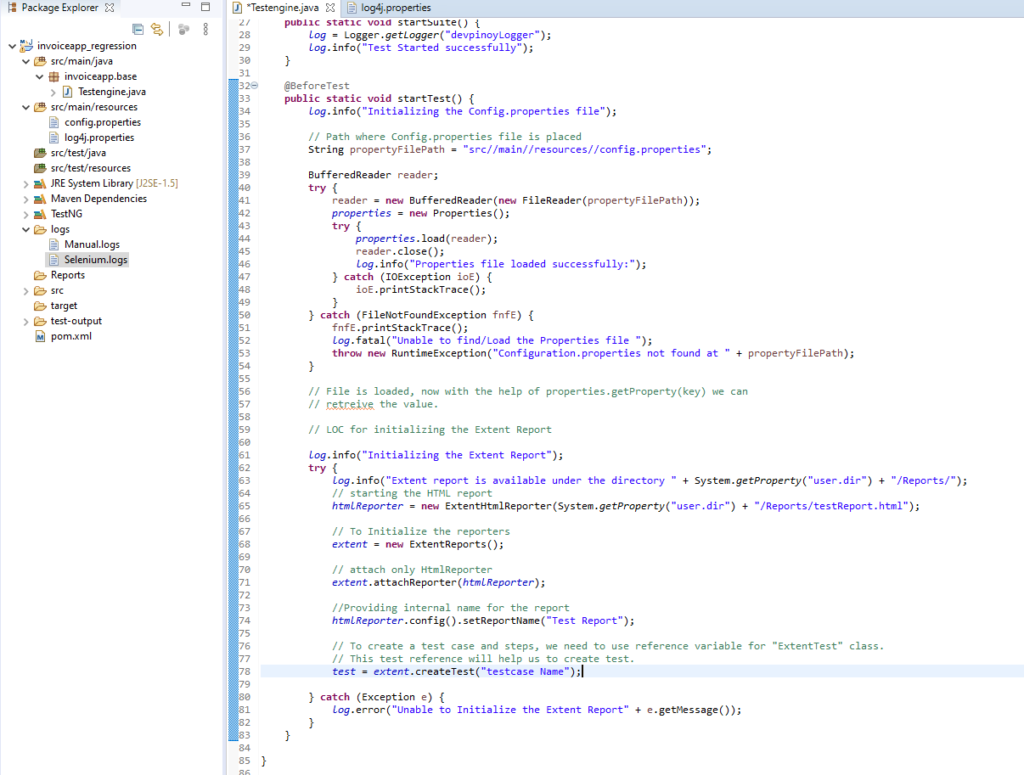
Added code for Extent report.

All Set, now we will add our Appium driver in our TestEngine class.

AppiumDriver is a Class with a parent “RemoteWebDriver” having “AndroidDriver” and “iOSDriver” as its direct subclass. It means if we declare our driver as an AppiumDriver we can either initiate it as an AndroidDriver or iOSDriver based on our need.

For executing Android based devices we will use “AndroidDriver<?>”  can be “AndroidElement”

For executing iOS based devices we will use “IOSDriver<?>”  can be “IOSElement”

We have our AppiumDriver declared as a public and static variable, this is because to inherit the properties of this driver in to inherited classes.

We can also declare the driver as “AndroidDriver” instead of “AppiumDriver”, if we are automating only Android devices.

// Initiating Appium Driver
	public static AppiumDriver<?> driver;

Using a method(user defined) startAppium(), we are invoking the AppiumDriver. We are getting the values for our capabilities from Config.properties file.

public static AppiumDriver<?> startAppium() {
 try {
       DesiredCapabilities cap = new DesiredCapabilities();
	// All Capability values are retrieved from Config.properties file.
	cap.setCapability(MobileCapabilityType.PLATFORM_NAME, properties.getProperty("PLATFORM_NAME"));
	cap.setCapability(MobileCapabilityType.PLATFORM_VERSION, properties.getProperty("PLATFORM_VERS"));
	cap.setCapability(MobileCapabilityType.DEVICE_NAME, properties.getProperty("DEVICE_NAME"));
	cap.setCapability("appActivity", properties.getProperty("appActivity"));
	cap.setCapability("appPackage", properties.getProperty("appPackage"));
	cap.setCapability("autoLaunch", false);
	cap.setCapability(MobileCapabilityType.NEW_COMMAND_TIMEOUT, 500);
	cap.setCapability(MobileCapabilityType.AUTOMATION_NAME, AutomationName.ANDROID_UIAUTOMATOR2);


// Declaring the driver as "Android driver" driver = new AndroidDriver(new URL("http://127.0.0.1:4723/wd/hub"), cap); } catch (Exception e) { driver = null; e.printStackTrace(); } return driver; }

Here for a quick testing of whether Appium driver is initiated properly and it is communicating with Appium Desktop server, I’m using @Test annotation to execute our test.

@Test
public void test001() {
        log.info("Test case started successfully");
	log.info("Trying to launch the Application under Test");
	try{
	 driver.launchApp();
	 log.info("Application launched successfully");
	 }catch(Exception e) {
	     log.info("Unable to launch the application :" +e.getMessage());
         }
 }

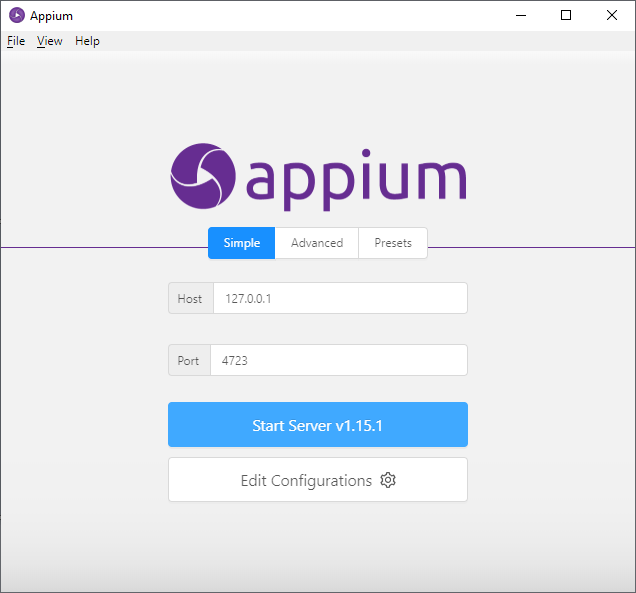
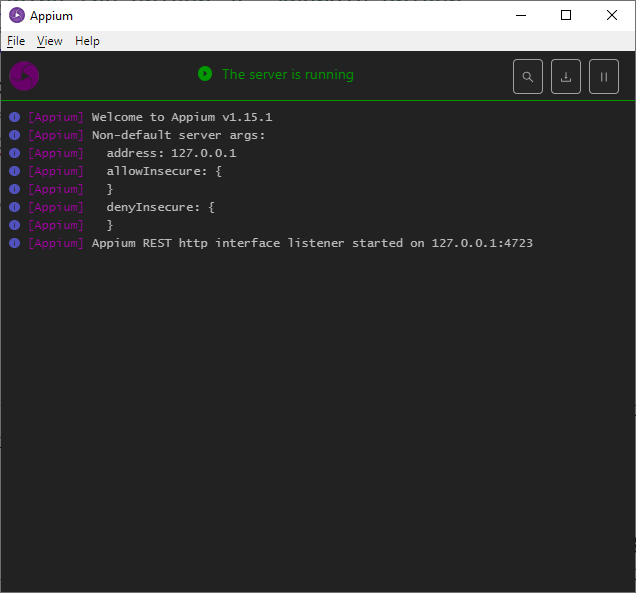
Before starting with the execution, Make sure Appium Desktop is running in the background using the host and Port # same as mentioned in the Java code. For example, My Appium Desktop server is running with the Host & port “127.0.0.1:4723”.

If you are running in physical device, make sure the device is connected properly and verify it once with “ADB Devices” command.

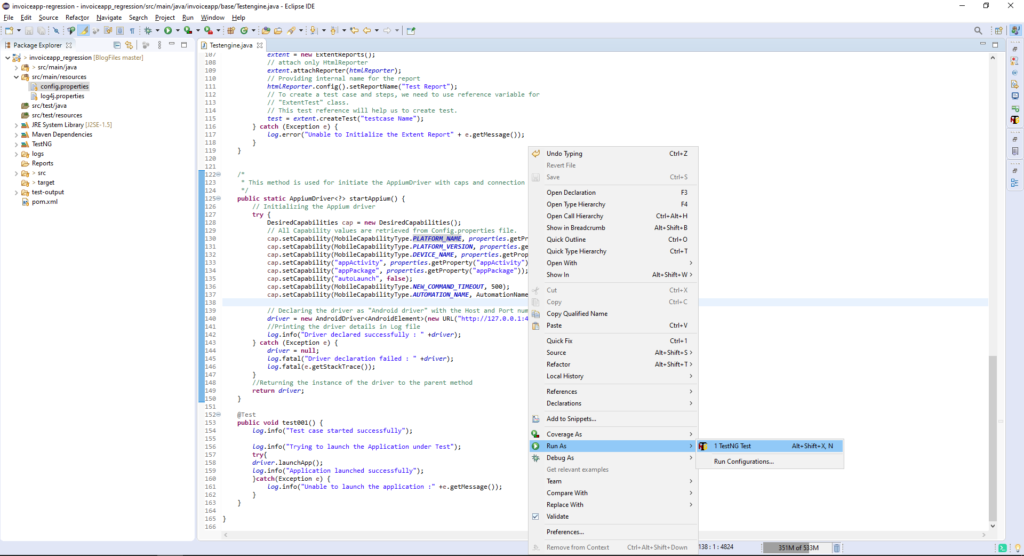
Now, we have our localhost listening at “127.0.0.1:4723”. It’s time to run our code as a “TestNG Test”

Verifying the console, Logs and Appium desktop server

Log:

Logs are printed as expected, You can see the driver instance printed in Line: 4

Appium Desktop server logs:

App launched as expected in my Physical device. You can use the same code to run using emulator. (Make sure device name is changed to emulator name). 

CompleteCode:

package invoiceapp.base;

import org.testng.annotations.BeforeSuite;
import org.testng.annotations.BeforeTest;
import org.testng.annotations.Test;

import java.io.BufferedReader;
import java.io.FileInputStream;
import java.io.FileNotFoundException;
import java.io.FileReader;
import java.io.IOException;
import java.net.URL;
import java.util.Properties;
import org.apache.log4j.Logger;
import org.openqa.selenium.remote.DesiredCapabilities;

import com.aventstack.extentreports.ExtentReports;
import com.aventstack.extentreports.ExtentTest;
import com.aventstack.extentreports.reporter.ExtentHtmlReporter;

import io.appium.java_client.AppiumDriver;
import io.appium.java_client.android.AndroidDriver;
import io.appium.java_client.android.AndroidElement;
import io.appium.java_client.remote.AutomationName;
import io.appium.java_client.remote.MobileCapabilityType;

/***
 * 
 * @author Ragav
 * @date May 10, 2020
 * 
 */

/**
 * 
 * @Usage: This class is used to initiate the Appium Driver and all other
 *         reporting stuffs. All static variables are declared here and
 *         inherited by other classes.
 *
 */

public class Testengine {

	public static Logger log;
	public static ExtentHtmlReporter htmlReporter;
	public static ExtentReports extent;
	public static ExtentTest test;
	public static FileInputStream fInputStream;
	protected static Properties properties;

	// Initiating Appium Driver
	public static AppiumDriver<?> driver;

	/*
	 * This method is used for initializing the Log4j and Config.properties
	 */
	@BeforeSuite
	public static void startSuite() {
		log = Logger.getLogger("devpinoyLogger");
		log.info("Test Started successfully");

		log.info("Initializing the Config.properties file");
		// Path where Config.properties file is placed
		String propertyFilePath = "src//main//resources//config.properties";

		BufferedReader reader;
		try {
			reader = new BufferedReader(new FileReader(propertyFilePath));
			properties = new Properties();
			try {
				properties.load(reader);
				reader.close();
				log.info("Properties file loaded successfully:");
				// Config file is loaded successfully, now with the help of
				// properties.getProperty(key) we can retrieve the value.
			} catch (IOException ioE) {
				ioE.printStackTrace();
			}
		} catch (FileNotFoundException fnfE) {
			fnfE.printStackTrace();
			log.fatal("Unable to find/Load the Properties file ");
			throw new RuntimeException("Configuration.properties not found at " + propertyFilePath);
		}
	}


	/*
	 * This method is used for init the Appium Driver and Extent report
	 */
	@BeforeTest
	public static void startTest() {

		// Getting the driver declared using our Capabilities
		try {
			driver = startAppium();
		} catch (Exception e) {
			log.fatal("Driver is not Initiated as Expected" + e.getMessage());
		}
		// LOC for initializing the Extent Report
		log.info("Initializing the Extent Report");
		try {
			log.info("Extent report is available under the directory " + System.getProperty("user.dir") + "/Reports/");
			// starting the HTML report
			htmlReporter = new ExtentHtmlReporter(System.getProperty("user.dir") + "/Reports/testReport.html");
			// To Initialize the reporters
			extent = new ExtentReports();
			// attach only HtmlReporter
			extent.attachReporter(htmlReporter);
			// Providing internal name for the report
			htmlReporter.config().setReportName("Test Report");
			// To create a test case and steps, we need to use reference variable for
			// "ExtentTest" class.
			// This test reference will help us to create test.
			test = extent.createTest("testcase Name");
		} catch (Exception e) {
			log.error("Unable to Initialize the Extent Report" + e.getMessage());
		}
	}


	/*
	 * This method is used for initiate the AppiumDriver with caps and connection protocol
	 */
	public static AppiumDriver<?> startAppium() {
		// Initializing the Appium driver
		try {
			DesiredCapabilities cap = new DesiredCapabilities();
			// All Capability values are retrieved from Config.properties file.
			cap.setCapability(MobileCapabilityType.PLATFORM_NAME, properties.getProperty("PLATFORM_NAME"));
			cap.setCapability(MobileCapabilityType.PLATFORM_VERSION, properties.getProperty("PLATFORM_VERS"));
			cap.setCapability(MobileCapabilityType.DEVICE_NAME, properties.getProperty("DEVICE_NAME"));
			cap.setCapability("appActivity", "com.invoiceapp.InvoiceLaunchScreenAct");
			cap.setCapability("appPackage", "com.invoiceapp");
			cap.setCapability("autoLaunch", true);
			cap.setCapability(MobileCapabilityType.NEW_COMMAND_TIMEOUT, 500);
			cap.setCapability(MobileCapabilityType.AUTOMATION_NAME, AutomationName.ANDROID_UIAUTOMATOR2);

			// Declaring the driver as "Android driver" with the Host and Port number to communicate with Appium desktop
			driver = new AndroidDriver(new URL("http://127.0.0.1:4723/wd/hub"), cap);
			//Printing the driver details in Log file
			log.info("Driver declared successfully : " +driver);
		} catch (Exception e) {
			driver = null;
			log.fatal("Driver declaration failed : " +driver);
			log.fatal(e.getStackTrace());
		}
		//Returning the instance of the driver to the parent method
		return driver;
	}

	@Test
	public void test001() {
		log.info("Test case started successfully");
		
		log.info("Trying to launch the Application under Test");
		try{
		driver.launchApp();
		log.info("Application launched successfully");
		}catch(Exception e) {
			log.info("Unable to launch the application :" +e.getMessage());
		}
	}

}

Guys, hope now it is clear on the usage of our base (TestEngine) class. In next blog we will see how to inherit the variables from TestEngine class to our child classes and creating a POM for different activies (screens) using AndroidElement and iOSElement. 

I’m very excited to create POM. Hope you too, follow us and stay focused, 

I will commit the codes discussed here in my Github repo. You can clone it and start modifying as per your idea. 

https://github.com/Karthickragu/Appium_Blog

Cheers!

Naveen AutomationLab

Blog Contributors:

Author:  Ragavendran

Ragav, having 10+ years of testing experience on which 7 years of rich experience in automation using UFT, Selenium (Java/Python). Expertise in Web and Mobile automation testing using Appium.

https://www.linkedin.com/in/Ragavendran-Ragav

Reviewer: Naveen Khunteta 

https://www.linkedin.com/in/naveenkhunteta

8. Creating a Framework [Maven project] for Appium – II

What is a Framework and why we need for our Testing?

There are lots of description available for this question. If you ask me I will simply say a framework is nothing but a skeleton for any project.

Just imagine we are now going to automate a mobile app which consist of 15 activities (screens) and 500+ mobile elements. Having said that, in our Automation script

  • How we are going to manage these screens?
  • How and where you can save those mobile elements?
  • How can you easily manage all the dependent jars/binary files?
  • How can you easily manage the associated files like excel, logs and other reporting utilities?

Framework plays a major role here. It allows us to easily manage the code base, data files, Properties file, logs, Reports and everything. Because creating a script is very easy but managing those are the real challenge.

In our previous blog we have seen how to create a Maven project. Maven is also a framework, you can see the pre-defined folder structure (archType) in maven project. Having that in hand, now it’s time to set where to place what as per the best practices.

There are some types of framework available like Keyword driver, BDD, Hybrid and so on, in this tutorial we will focus on “Data Driven framework”.

I will always see framework creation in these 4 approaches,

  1. Configuration section: In this, we will configure all necessary reporting and dependencies.
    1. Maven POM file
    1. Log4J
    1. Extent Report
    1. Config.properties file
    1. Data Utility (Excel/ JSON/ XML)
  2. Implementation section:
    1. Creating a Base class and implementing drivers & initiating all files from “Configuration section”.
    1. Page Object Model for each screen/activity.
    1. Creating a reusable utility
  3. Test Case section:
    1. Creating test cases
    1. Implementing TestNG Listener on our test case class
    1. Creating TestNG XML with different parameters
  4. Execution section:
    1. Creating a .bat file for Maven command line execution

Simple right, this is all about framework guys. Going forward if anyone asks what is a framework? I hope, you can describe well.

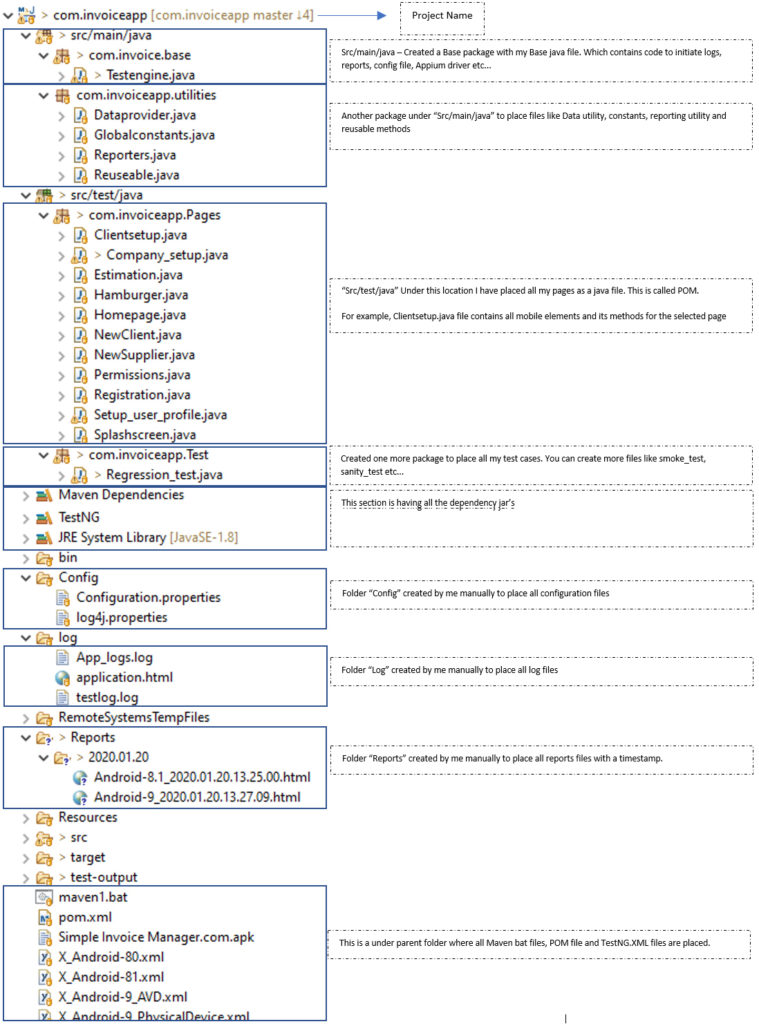
Please find a sample image below to get an idea of how a typical framework looks like.

See, all the files are categorized and placed on its corresponding path/packages. This is framework and this is how we are going to create for our project. Along with that we will also focus on how OOPS logic’s are creating a magic here.

Importance of Configuration section:

There are must have in all project/framework, without all of these a project cannot be fulfilled like Reports, Logs, configuration file, getting input for a method from external sources, Maintaining the necessary files/Jars etc…    

What is Maven POM file?

A Project Object Model or POM is the fundamental unit of work in Maven.

It is an XML file that contains information about the project and configuration to build the project.

This XML file will have lot of tags, most importantly and frequently used tags are and ,  In tag we can specify the needed jar file details. For example,

//This dependency section is for "Log4J"

log4j
log4j
1.2.17


//This dependency section is for "Selenium client"

org.seleniumhq.selenium
selenium-java
3.141.49

Note: The tags , , and are must in a POM file. For our project values will be whatever we have given at the time of creating a Maven project.

While saving the POM file or while compiling the project, Maven will always look for the dependencies to make sure all Jars are available and those are matching with the configuration given under tag. If not, then it will automatically download the necessary Jars and installs it on our project dependency list.

So NO need to download and map them manually. This is an easy and most reliable way to maintain and keep our dependencies up-to date.

In case of any updated build received for any dependency, just a version # change on corresponding tag is all we need to do in POM file.

https://mvnrepository.com/ is the official site for downloading any maven dependencies. Search using the name of the jar we need and simply copy the dependency and paste it in POM file under parent tag.

We will see about tag at the time of configuring Maven.bat file in our future post in detail.

What is Log4J2?

Apache Log4J or Log4j2 (updated version) are used in project to create a log file. Logs are must to track and monitor the execution for current state and mainly for debugging purpose.

Consider, you are running our script in a remote machine, with the help of log files we can easily monitor the progress and errors or warnings if any. Please take a look at the below video to understand how to create a log file for our execution using Log4J.

What is Extent Report?

We all know about Extent report very well, It is one of quite famous reporting tools because it is HTML based, very light weight, elegance and easy to setup. It also allows to configure the report with lot of status for each test step.

What is Config.properties:

Config.properties file is used to store the configurable parameters of an application in the form of Key and Value pair. Main advantage of using this file is for changing configuration at any time since it is not a hardcoded value in our code. For example, we can save the proxy and Host details for Appium in this file instead of hardcoding it in our script.

https://www.youtube.com/watch?v=0XowYwfvbo8

What is DataUtility:

A common term to mention the data source. It can be an Excel sheet, a notepad file, JSON or an XML. Depends on the project need and data source we can write a utility class to fetch the data. For example if we need to fetch a data from excel and pass it to any text field, then we have to write a utility class to fetch the data from excel sheet. We can use ApachePOI or Fillo.

With all these, if we include our Base class, POM class and test class we are done with the Framework.


All set, it’s time to create a Mobile Testing Framework using Appium. 


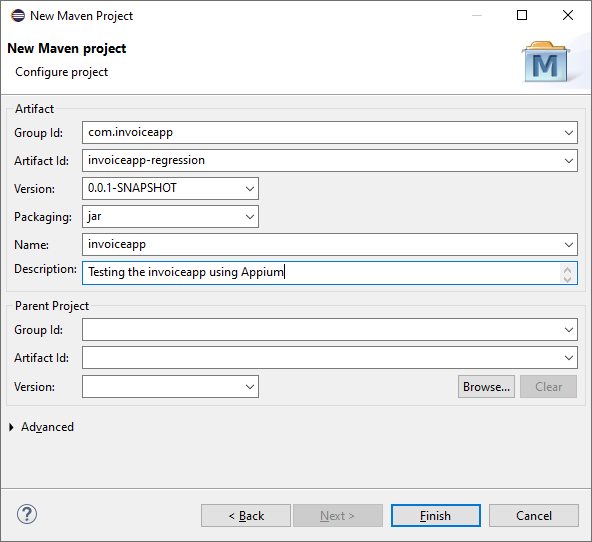
As a first step of Framework creation process, We need to determine the dependencies in POM. Below API’s are needed for our framework

1.       Selenium Java client

2.       Appium Java client

3.       TestNG

4.       Fillo

5.       Log4j

6.       ExtentReport

7.       Apache POI


Please find below for the POM file with all dependencies for our project. 


—————————————————————————

xmlns:xsi=”http://www.w3.org/2001/XMLSchema-instance”
xsi:schemaLocation=”http://maven.apache.org/POM/4.0.0 https://maven.apache.org/xsd/maven-4.0.0.xsd”>
4.0.0

com.invoiceapp
invoiceapp-regression
0.0.1-SNAPSHOT

invoiceapp
Testing the invoiceapp using Appium


    org.seleniumhq.selenium
    selenium-java
    3.141.59


io.appium
java-client
7.0.0


org.testng
testng
6.14.3
test


com.codoid.products
fillo
1.18


log4j
log4j
1.2.17


com.aventstack
extentreports
4.0.9


org.apache.poi
poi-scratchpad
3.17


———————————————————————————–

I am excited, are you?


Cheers!

Naveen AutomationLabs

Blog Contributors:

Author:  Ragavendran

Ragav, having 10+ years of testing experience on which 7 years of rich experience in automation using UFT, Selenium (Java/Python). Expertise in Web and Mobile automation testing using Appium.

https://www.linkedin.com/in/Ragavendran-Ragav

Reviewer: Naveen Khunteta 

https://www.linkedin.com/in/naveenkhunteta

Appium Tutorials

5. Recorder in Appium Inspector


Recorder in Appium Inspector

Recorder option is one of an advanced feature in Appium Inspector, Recorder is used to record an action that is performed on the Inspector window.

Fine, I can understand recorder option is used to record a keystroke. Fact is most of the other tools are also having such features what is great in Appium?

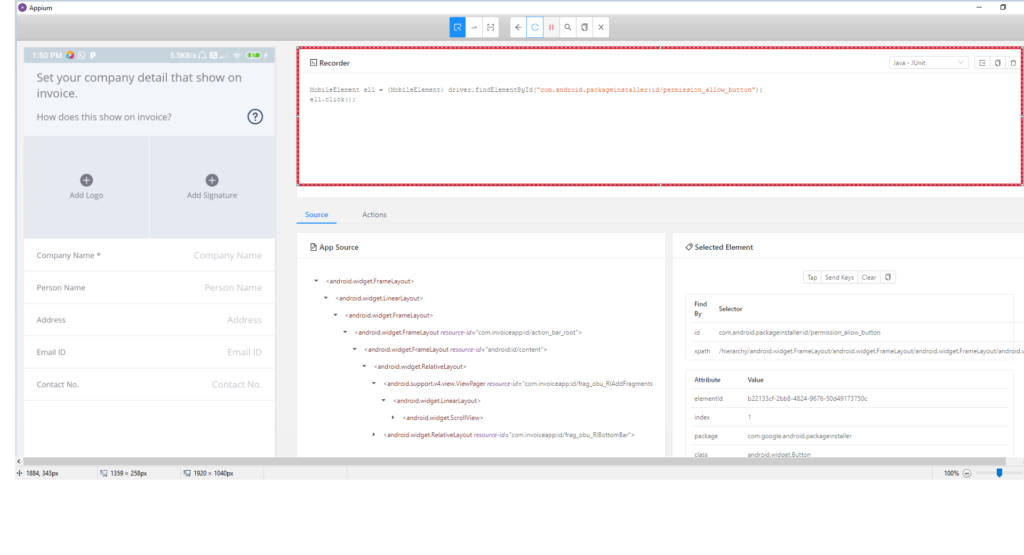
Yes, we have some great features in Appium recorder. It will not only record your actions, also it converts the actions performed to your preferred programming language SYNTAX. For example, if you click on any button it will give you a syntax like below,

MobileElement el1 = (MobileElement) driver.findElementById(“allow_button”);

el1.click();

Powerful right? Please find a sample screenshots below to understand better.

How to use Recorder option in Appium Inspector?

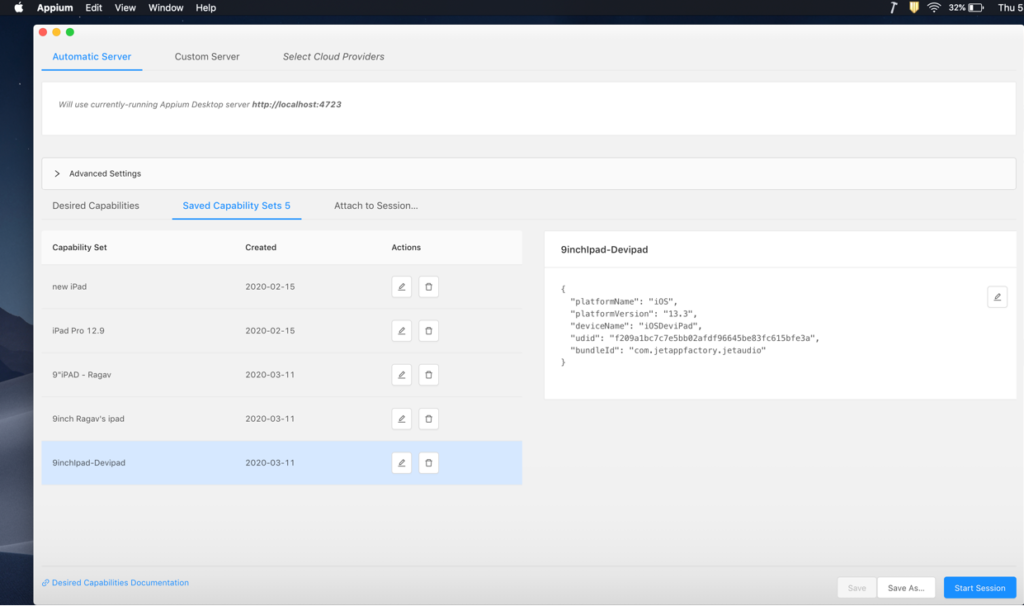
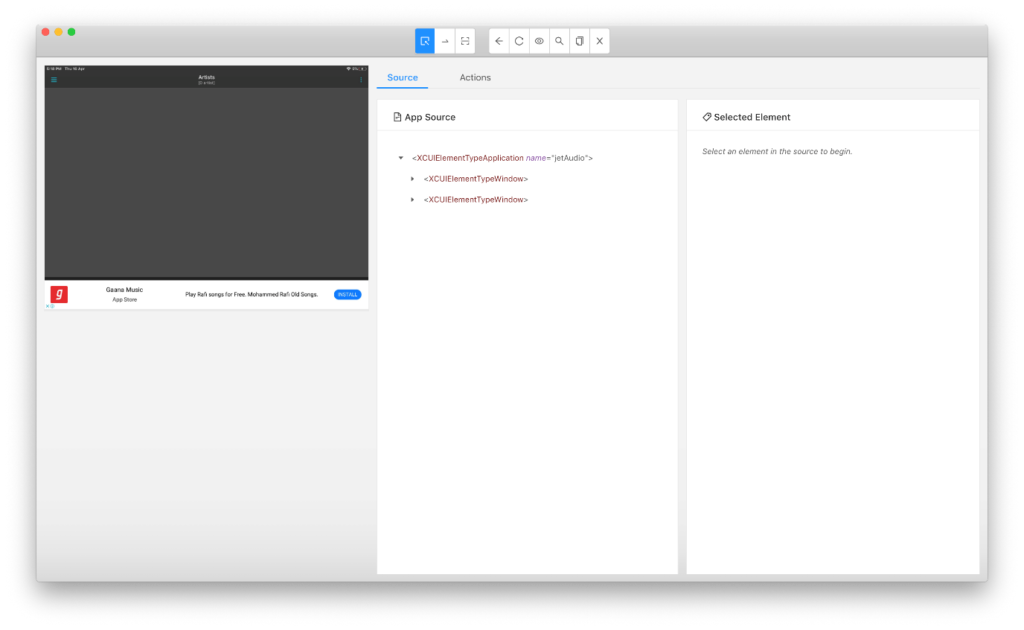
I have connected to my app under test and I’m currently in Inspector window,

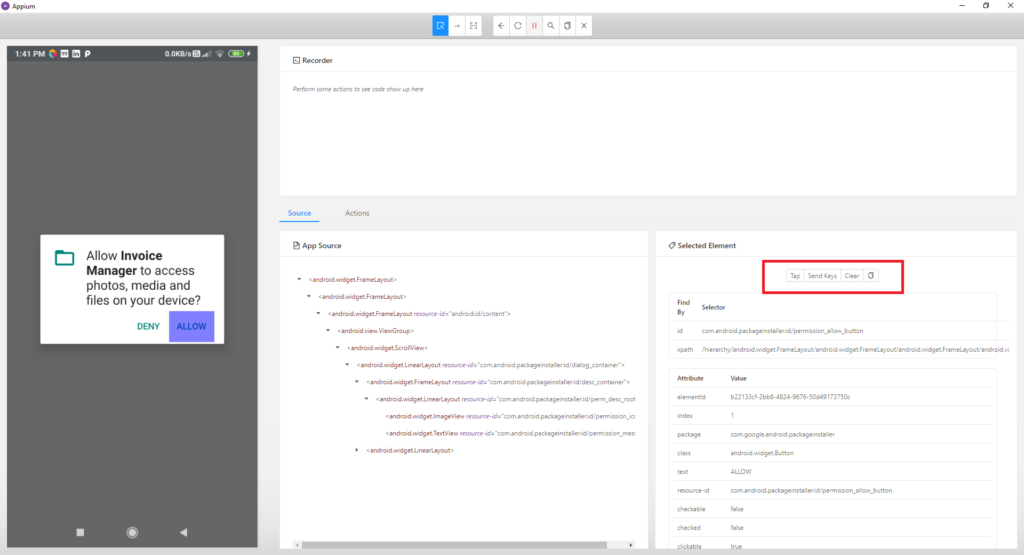
 I have a popup in my mobile screen. I have to either to accept or Deny.

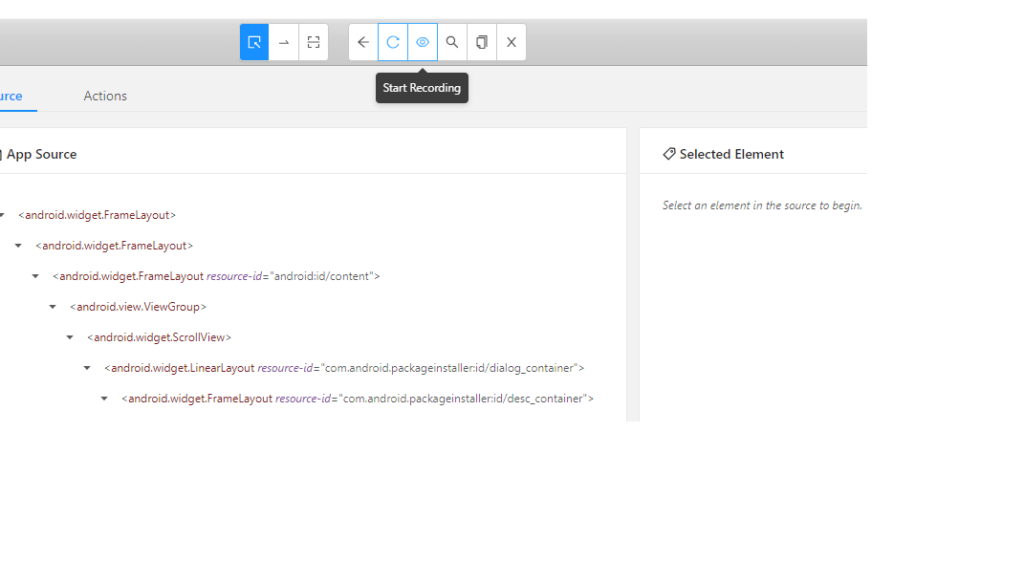
Now, I’m taking a “Start Recording” option so that all my actions will be recorded.

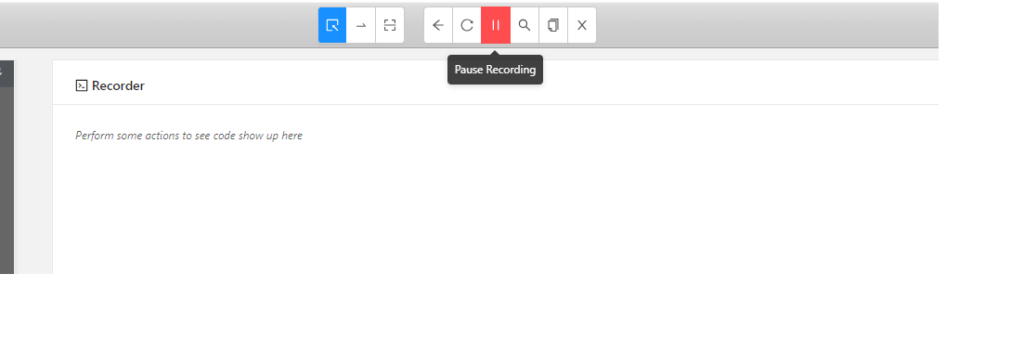
Once you clicked the “Start recording” button, the button image changes from eye to pause button like this,

It states, your actions are now listening by Recorder. I’m now going to click on “Allow” button on popup using Inspector (Not on your mobile phone)

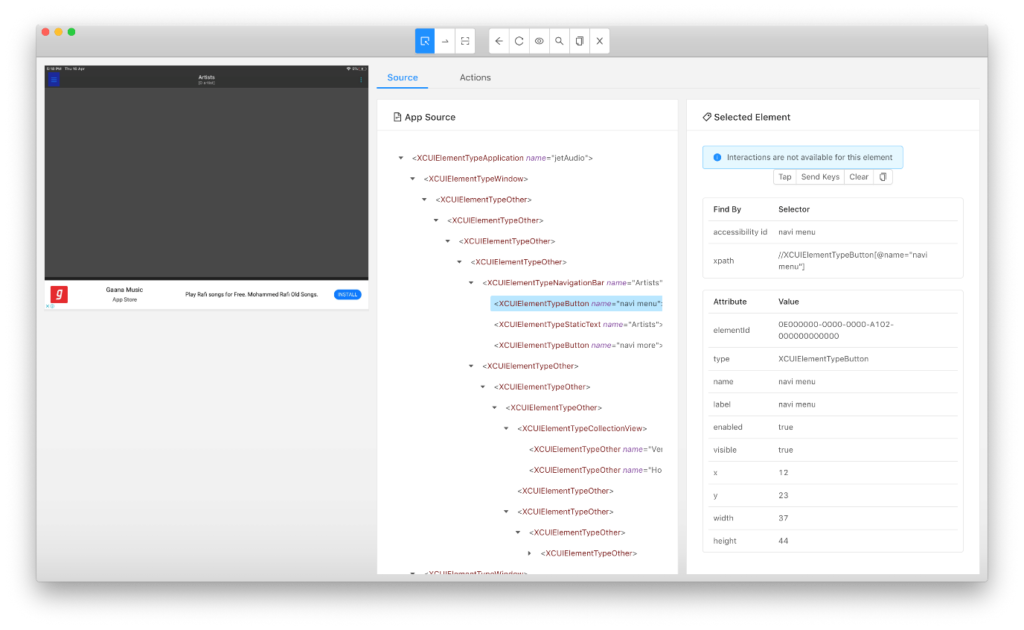
As I clicked the “Allow” button you can now see all list of attributes for the button displayed on the right hand side view

There I’m taking “Tap” option so that the event will be happen in real device and actions will be recorded in the Recorder.

After clicking “Tap” button, you can see the page gets refreshed in the Inspector window and also the recorder is having a small piece of code for the action performed.

Based on the available Location strategy the find element syntax will be generated automatically.

Like this you can add many actions like performing a swipe action, sendkeys on any text box etc…

Supported programming Languages on Recorder

Now, the recorder code is showing as “Java-Junit” program. As Appium supports other programming languages also it should allow the user to see the recorder steps in other languages also right?. Yes this feature is available. Based on your preferred language you can select the same in Appium.

Using the dropdown displaying in the screen for programming language, you can select your preferred language.

Currently Appium can provide the recorder codes using the below langagues,

  • Java Script (JS)
  • JS for WebDriver.io
  • Java- Junit (our regular core java code)
  • Python
  • Ruby
  • Robot Framwork.

I just selected Python as my preferred language and see the code is now displaying in Python.

Using JavaScript for Webdriver.io

What is “Boilerplate” in Appium recorder?

Now comes to the secret section, there is another impressive feature in hidden in Appium that is called, Boilerplate code under Recorder screen. Boilerplate will give you half cooked code on your preferred language.  Once all your actions recordings are over or still in progress, you can use Boilerplate option to see how the code looks like in your SDK.

Boilerplate Icon:

Now see the magic, I have selected to show the code using Boilerplate and Appium gave me some piece of code with Junit annotations. See the fantasy this is what we need to put in our Base class in our framework. (image is cropped and showed here for clear understanding)

See how powerful it is. In just given time Appium created a test case for us with Junit annotations.

You can simply copy paste this in a regular java file in eclipse/NetBeans and execute as a Junit test.

Not only in Java, see the Python code below,

With the help of Recorder option, we can not only record our actions also we can generate codebase for our actions on your preferred language.


Cheers!!

Naveen AutomationLabs

Blog Contributors:

Author:  Ragavendran

Ragav, having 10+ years of testing experience on which 7 years of rich experience in automation using UFT, Selenium (Java/Python). Expertise in Web and Mobile automation testing using Appium.

https://www.linkedin.com/in/Ragavendran-Ragav

Reviewer: Naveen Khunteta 

https://www.linkedin.com/in/naveenkhunteta

4. Appium “Locator strategies”


So far we have seen how to connect our real device/Emulators using Appium. In this session we will focus on how to inspect an object/Element using Appium Inspector.

As I already mentioned in one of my previous blog that, the most important and powerful feature in Appium is Inspector. Because it will help us to find an element and its attributes in simple manner. The Inspector screen is simple and lightweight. One can easily inspect an element and the hierarchy model displayed for the screen will be quite interesting.

Salient features of Inspector:

  1. The hierarchy view of elements
  2. Just a click on preferred element to inspect
  3. You can easily find the element and swipe coordinates
  4. For instant recognition of element, we can use inbuilt buttons like “Tap” and “SendKeys” to click on any particular element and to pass value to any input field. 
  5. Allows to save and modify the Desired Capabilities for future use
  6. On every successful element inspection, attributes like “Name”, “Value”, “Label”, “ID”, “XPath” etc… will be displayed separately in a tabular column
  7. Based on platform, there are lot of location strategy available to find an element like “ID”, “Xpath”, “Class Name”, “UIAutomator Selector”, “Class Chain”, “NSPredicate” etc…

There are list of locator strategy available in Appium based on platforms. Based on its priority level, easy approachability and performance we can select the appropriate locator strategy 

Locator strategies Supported Platform
accessibility id or ID Android and iOS
Name Android and iOS
class Name Android and iOS
Uiautomator selector Android
Predicate string iOS
Class chain iOS
Xpath Android and iOS

Remember: Few Selenium based Locator Strategies like “css selector”, Linktext, tagname, partiallinktext are not supported by Appium API’s because mobile page source (DOM) is not XML based.

ID:

One of the simplest and most commonly used location strategy. In fact every element has an own ID associated with it.

In Android, we can use attributes as ‘ID’ or ‘resource-id’

In XCUI, we can use name or label. [Preferred only for static field values]


AccessibilityID:

This locator is commonly used for iOS based application. In android this locator is recognized as an attribute “content-desc”.  This is one of the best strategy to use for both Android and iOS because it will be same in both the platforms if the app is designed using ReactNative or Xamarin. 

Android: accessibilityid or “content-desc” is always a preferred choice due to its performance.

XCUI: accessibilityid should be used carefully, because for dynamic fields, id will change as per value of the field. So preferred only for static fields.

Syntax:

driver.findElementByAccessibilityId(String selector);

driver.findElement(MobileBy.AccessibilityId(String selector));

driver.findElementById(String selector);

driver.findElement(MobileBy.id(String selector));

@iOSXCUITFindBy(accessibility = “selector”)

@AndroidFindBy(accessibility = “selector”)


Name:

This is one of a common locator strategy in Appium or selenium. Element will be identified using the name of the field.

Syntax:

            driver.findElement(MobileBy.name(String selector));

            driver.findElementByName(String selector);


ClassName:

As we already seen, the “Appsource” hierarchy in Inspector tags are nothing but a className.

For IOS it is the full name of the XCUI element and begins with XCUIElementType.

For Android it is the full name of the UIAutomator2 class and begins with android.widget.

Example: XCUIElementTypeButton and android.widget.Button

Syntax:

driver.findElement(MobileBy.className(String selector));

driver.findElementByClassName(String selector);

@iOSXCUITFindBy(className  = “selector”)

@AndroidFindBy(className = “selector”)


UIautomator selector:

UIAutomator API is an Android native way of finding element, it uses UISelector class to locate elements. In Appium you send the Java code, as a string, to the server, which executes it in the application’s environment, returning the element or elements.

Syntax:

driver.findElement(MobileBy.AndroidUIAutomator(“new UiScrollable(new UiSelector().scrollable(true).instance(0)).scrollIntoView(new UiSelector().textContains(\””+ find_text + “\”).instance(0))”));

Appium allows user to use some list of attributes with UiSelector(). Few listed below,

UiSelector().resourceId(“resourceid”);

UiSelector().text(“text”);

UiSelector().className(“classname”);

We can use UIautomator strategy with UiScrollable function for some complex operations like, auto scrolling and finding an element with the given conditions.


Predicate string:

This locator strategy is in my favorite list when it comes to XCUI automation. This is a NativeJS search approach powered by Apple for its own SDK (XCode) and you can design it more like an XPath query.

There are lot of logical and comparative operators are available for Predicate sting. Please go throw the site

“http://appium.io/docs/en/writing-running-appium/ios/ios-predicate/”

Syntax:

@iOSXCUITFindBy(iOSNsPredicate = “type == ‘XCUIElementTypeStaticText’ AND name BEGINSWITH[c] ‘Shipping Address:'”)

or

driver.findElement(MobileBy.iOSNsPredicateString(“iOSNsPredicateString”));


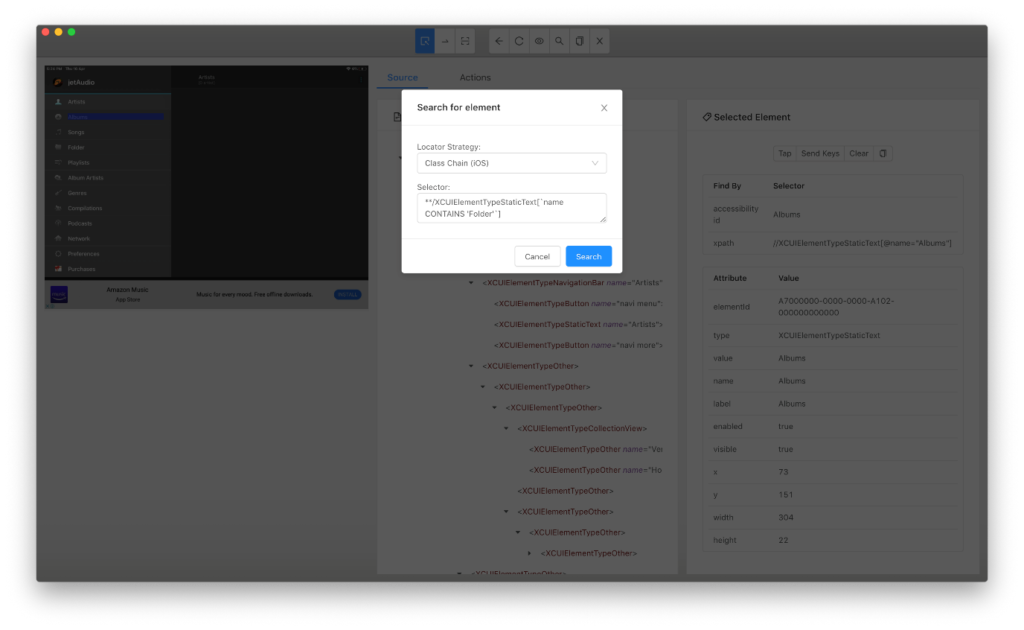
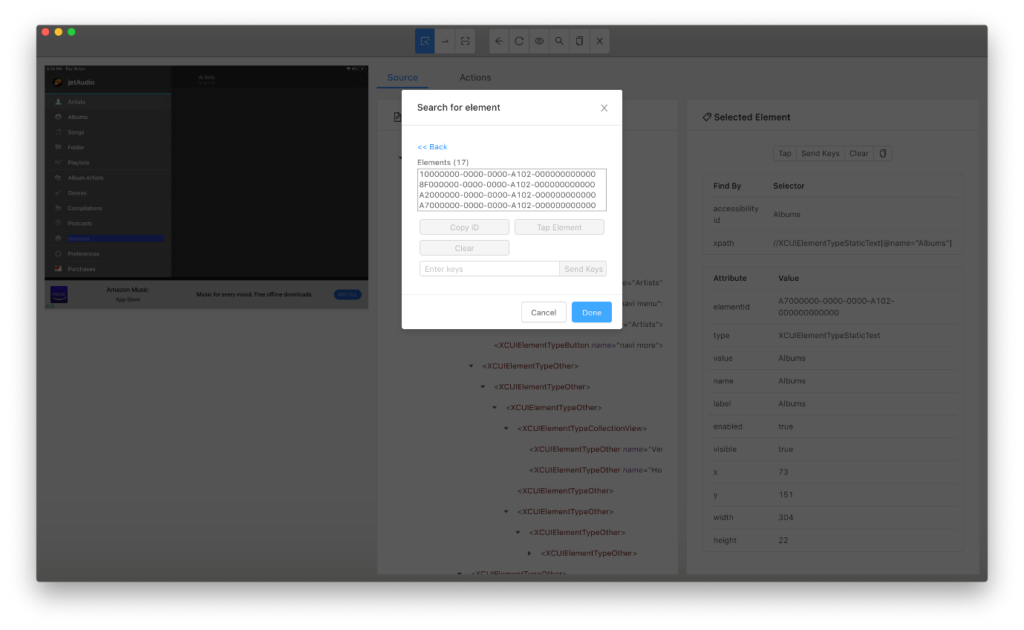
Class chain

One of a best and powerful locator strategy designed to replace Xpath and for quick digging and finding the hierarchical elements. This is designed by Appium team. This locator strategy is in my favorite list when it comes to XCUI automation.

Syntax:

@iOSXCUITFindBy(iOSClassChain = “**/XCUIElementTypeTable[2]/XCUIElementTypeStaticText[1]”)

or

driver.findElement(MobileBy.iOSClassChain(“iOSClassChainString”));


XPath:

We all know XPath very well, a commonly used and powerful strategy especially for dynamic elements, no need to explain much as we all much use to it.

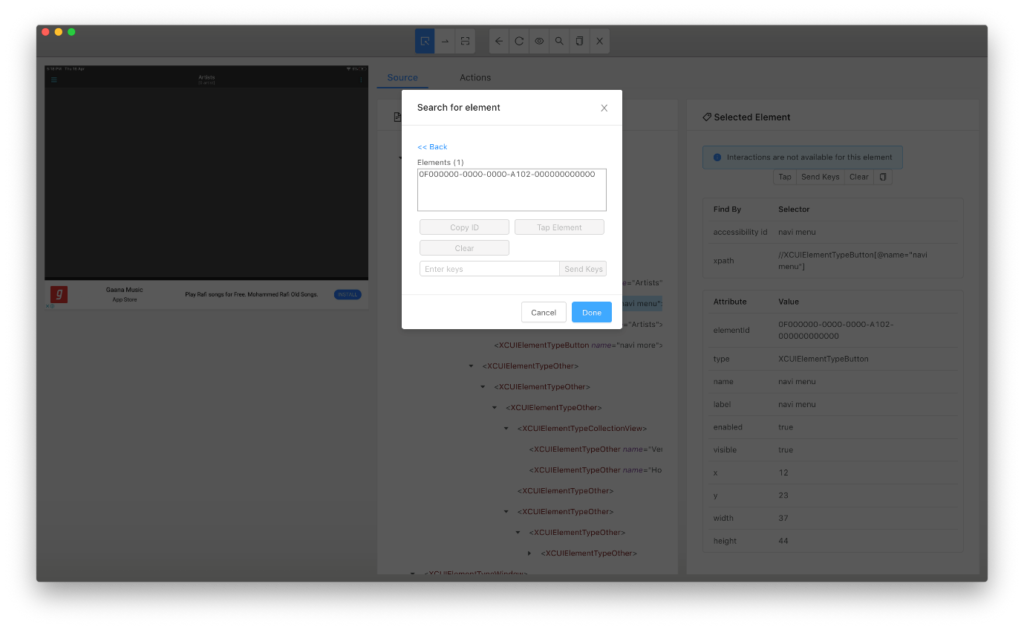
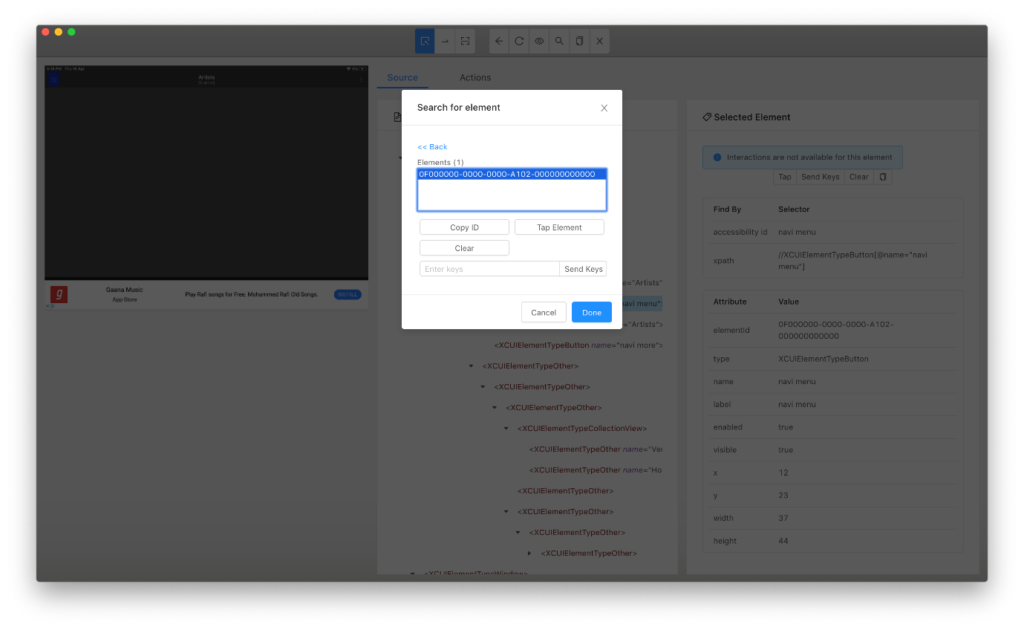
Web testing without XPath is unimaginable. Also xpath is considered to be the unreliable location strategy.

Appium allows user to use XPath for certain conditions but it is not recommended due to its performance also for some other good reasons like.

  • Due to dynamic changing of elements in mobile, path hierarchy will not be same all the time
  • XPath will take lot of time to find an element (depends on number of elements in the page)
  • Mobile native is not having its DOM as XML. You can find that in Appium Inspector
  • Leads to StaleElementException in many cases

In Android you can see some moderate performance using XPath, but in XCUI it is highly not recommended instead we can go for Predicate String or Class Chain strategy.

How to find an Element by navigating via AppSource?

Now let’s enter into the practical way of Inspecting Elements. Please follow the below steps,

Step 1: To inspect an element we need to know how to enter Desired Capabilities and how to launch the Appium session. If not then please refer to my previous blogs for details.

All set and connection is established successfully, once the mobile phone screen got captured on Appium Inspector you can start spying the elements.

For this tutorial I have selected “JetAudio” media player application for XCUI. You can select any of your preferred application. Come let’s see how to inspecting Elements for XCUI.

My Desired Capabilities are

I have selected “Start Session” and my connectivity established successfully.  So that you can see my mobile phone screen on Inspector.

Take a look on how the “App Source” is getting displayed here. There are two entries in the name of “XCUIElementTypeWindow”. The 1st entry is the entire application frame and the second entry is for the footer section (the advertisement that is displaying in the footer). You can expand the 1st row to find out all the parent and child elements of the selected screen.

See the expanded view of App source, the splendor here is all the displaying in the App Sources are nothing but a Class name of an element/frame. Impressive right?

You can also see that, all element attributes are getting displayed in the right side view of Inspector for the selected element. This is why I have mentioned it is one a powerful feature of Appium.

Okay all fine. I can see all the attributes of the element… But my question is How to inspect an element? How can I do that?

Yes, let me clarify. Once you can see the app view in Inspector, All you need to do is just a click on the chosen element from the screenshot. For example in the below screen shot, I can see the home page of jetaudio player and I have simply clicked on the Hamburger menu (blue highlighted).

On click of the element, Appium will automatically detects and display’s all the attributes of the element including xpath. It will also display the hierarchical view in “App Source” like below.

Now we have all the attributes in hand, with the help of these attributes we can easily write location strategies in our code. For example the screen shows the “accessibility id” as “navi menu” so that I can write my location identification strategy using “ID”.

driver.find_element_by_id(‘navi menu’) or driver.findElementById(“navi menu”);

How to inspect an element using locator and Selector?

Okay now we will see how to find an element using locator? Finding an element using locator made simple in Appium. Clicking on the icon “Search for elements” will give you list of locators applicable to use with selenium.

locator strategy can be an ‘ID’ or ‘xpath’ or ‘Name’ and we have to enter the Selector value as per the locator selected.

Select the needed locator strategy and enter the Selector (value) in the screen and click on “Search”.

I have selected “ID” as a locator and entered the Selector as “navi menu”

On click of “Search” button the next screen will appear if the given selector is valid and found in the screen. Inspector will always shows the elementID as a search result.

On click of the elementID the searched element will get highlighted in the background screen so that we can recognize and confirm whether the highlighted element is what we are looking for.

We can use the same way for inspecting elements using other locator strategy like UIAutomator, xpath, classchain or Predicate.

One should know how to frame a UIAutomator selector, Predicate string queries. So that it will become easier to inspect element using Inspector.

Just showcasing how to find element using Predicate/ Class chain in the below screens,

For example, if you want to select a complete list of elements belongs to a single class name, then you can query without giving any selection criteria like

  • **/XCUIElementTypeButton   -> class chain
  • Type == “XCUIElementTypeButton”    -> PredicateString

So that this class chain query will fetch complete List of elements having the class name “XCUIElementTypeButton” and returns a List

This query returns a list of 17 MobileElements. And clicking on each elementID’s from search result will highlight the corresponding element in the background.

We will see how to capture these list of MobileElements using Java List and how to iterate/assert the values in upcoming sessions.

Hope it is clear now on how to inspect an element using Appium Inspector.


Cheers!!

Naveen AutomationLabs

Blog Contributors:

Author:  Ragavendran

Ragav, having 10+ years of testing experience on which 7 years of rich experience in automation using UFT, Selenium (Java/Python). Expertise in Web and Mobile automation testing using Appium.

https://www.linkedin.com/in/Ragavendran-Ragav

Reviewer: Naveen Khunteta 

https://www.linkedin.com/in/naveenkhunteta

2. Appium on Macintosh(Mac)


In this chapter we will find out the prerequisites for connecting iOS real device/ Simulator with Appium 

Prerequisites for Appium on Mac:

  • To automate iOS for mobile or iPAD OS for tablets, it is must to have a Mac machine.
  • XCode should be installed properly to get the SDK files for connectivity
  • XCode should be kept upto date to get the latest iOS/iPAD OS support
  • You must have a valid Apple developer ID for provisioning profile
  • NODEjs must be installed in the device

What is WDA ?

WDA stands for WebDriverAgent. As the name says this is the bridge/agent for Appium to send or receive Proxy commands to a real device/ simulators.

WDA was developed by Facebook for their hybrid app testing. Later it was acquired by Appium and now it is managed by Appium team. Still the WDA’s bundle ID is “com.facebook.bundleID” with few facebook libraries imported. WDA is designed using Objective C you can see the code by opening the WDA framework in XCode.

Don’t get confuse with XCode and XPath. Usually happens for me while talking J just kidding…

It is a good practice to change the WDA bundleID from “com.facebook” to some generic name like “com.UIAutomation” or something. Else if you are using any client provided enterprise Apple DEV ID for compilation, then you can see facebook.com all over bundleID’s which may create IT auditing issues. Don’t worry changing BundleID cannot stop you from compiling or building the WDA codebase.

How to download WDA ?

  1. WDA comes with Appium desktop, so no need to download separately
  2. You can find WDA as a framework and not as an app.
  3. It is our responsibility to compile the WDA framework and installing it in the device for test
  4. Once installed make sure you have given trust access for the WDA from “Device and Management” option from General settings screen. Else it will be considered as an untrustworthy app and it will become inaccessible from Appium. (Only for Real devices)

Where to find the WDA framework in Mac machine?

  1. Go to Finder and Applications,
  2. Search the Appium application and take right click on Appium icon
  3. Take “Show Package Contents” option from right click menu
  4. Navigate to the path “Contents/Resources/app/node_modules/appium-webdriveragent/”
  5. Open the file “WebDriverAgent.xcodeproj” in Xcode.

How to compile the WebDriverAgent.xcodeproj in XCode ?

Open the file WebDriverAgent.xcodeproj in XCode, so that you can see the WDA program in XCode like below,

Make sure you have selected the proper device from the “Devices” list

Make sure you are using your AppleID on build settings under “Provisioning Profile” on xcode version <=10 and “Signing & Capabilities” on xcode version >=11. Now, go to “Product” click on “Build”

I have selected the option “iPad Pro (12.9 inch)(3rd Generation) simulator, it means I’m going to install WDA on simulator now

If you face any compilation issues you can find that in the left hand side menu like this

You can ignore the warnings but not error’s (please refer the topic “Common WDA compilation issues” below if you face any error) and now Once Build is successfully compiled, go to “Product” and take option “Test”. This option will start the Simulator and install WDA as an App

Now the selected simulator will be opened and the app will start installing on the simulator

WDA installed successfully on the Simulator

Limitation in using Appium on MAC Machine?

As we all know Appium is a platform independent tool. We can run Appium on Windows/ Mac/ Linux. But yes there are few limitations when it comes to device platform.

  1. Using Appium, you can automate Android phones using any Windows/ Mac machine(Android SDK is must).
  2. You cannot automate iOS application using Appium from Windows/Linux based machines.

Why Automating iOS devices are not possible with a Windows machine?

There are lot of reasons we can list out, few most common reasons are

  • Windows by default will not have support for advanced iOS operations. You can perform only basic file data transfer option but installation of any app or debugging options are not available from Windows.
  • XCode which is a commonly used SDK for iOS app. XCode support is not available for windows-based OS. 
  • Without XCode you cannot install WDA (WebDriver Agent) to iOS devices, so from windows it is impossible.

Commonly facing WDA installation/ compilation issues:

  1. Provisioning Profile:

If you are using your personal Apple development ID for more than 2 devices then you will definitely face provisioning profile issues while compiling. The solution is either you need to untag few devices from your apple dev account or you need to change the apple ID in your app build settings. FYI… Provisioning profile is applicable only for real devices

  • ‘RoutingHTTPServer/RoutingConnection.h’ file not found

For the first time if you are building WDA then you have to face this issue for sure. This is happening because of missing “bootstrap” script configuration. To overcome this issue, open Terminal and open the path where WDA project file exist, (“/Applications/Appium.app/Contents/Resources/app/node_modules/appium-webdriveragent/”) and type the command “./Scripts/bootstrap.sh -d”. This command will help you to resolve the h file not found issue.

  • CocoaAsyncSocket.h not found

Again a common and must face issue while compiling WDA, This needs no action to be taken. Just close the XCode and open the WDA project again.

This issue may come if you have installed Appium CLI. Because the CarthageKit that installed as a part of Appium CLI may cause issue. If restarting XCode didn’t solve the issue then uninsall/remove CarthageKit from terminal using the below command

rm -rf ~/Library/Caches/org.carthage.CarthageKit

One more major issue/concern in WDA is, auto clean-up while initiating the Appium connectivity. We will discuss about this topic in upcoming sessions.

Blog Contributors:

Author:  Ragavendran

Ragav, having 10+ years of testing experience on which 7 years of rich experience in automation using UFT, Selenium (Java/Python). Expertise in Web and Mobile automation testing using Appium.

https://www.linkedin.com/in/ragavendra

Reviewer: Naveen Khunteta 

https://www.linkedin.com/in/naveenkhunteta
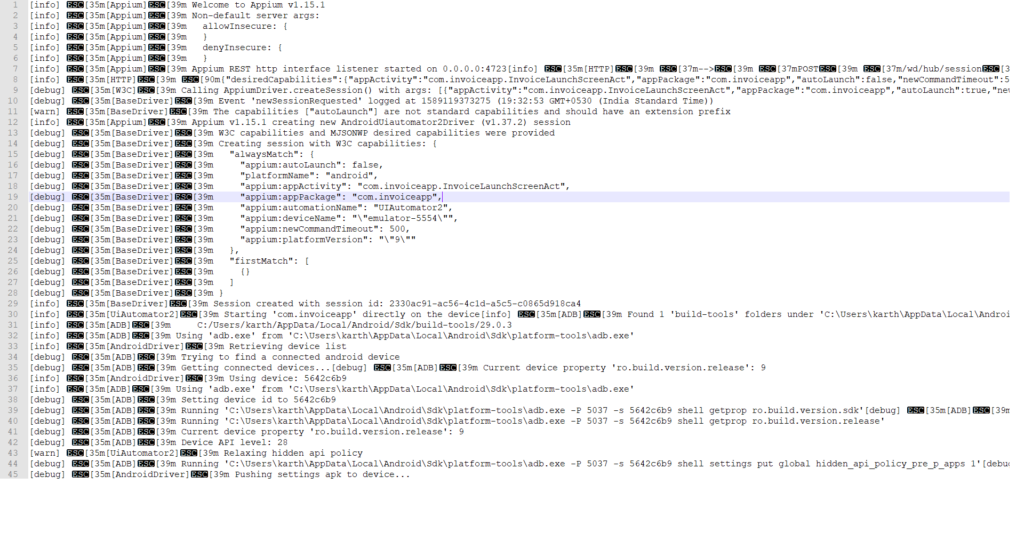
« Older posts