1. Overview
In this short article, we’ll be focusing on various Navigation commands that allow the browser to move forwards, backwards in the browser’s history.
2. Difference Between the driver.get(“url”) and driver.navigate().to(“url”);
On the basis of Method Calls:
driver.get() used to launch a particular website url, whereas driver.navigate().to() is also used to launch the particular website by passing the URL but we can use forward and backward button to navigate between the pages during test case writing.
If you want to use back() and forward() method after driver.get() method, but you need to use it with Navigation Methods only.
Both are exactly same, both are synonyms of each other. In fact navigate.to() method is calling get() method internally.
On account of Server API Calls:
driver.get() method internally sends HTTP POST request to Selenium Server Standalone.
driver.navigate().to method sends HTTP POST request to Selenium Server Standalone.
Both are calling HTTP POST method: /session/:sessionId/url
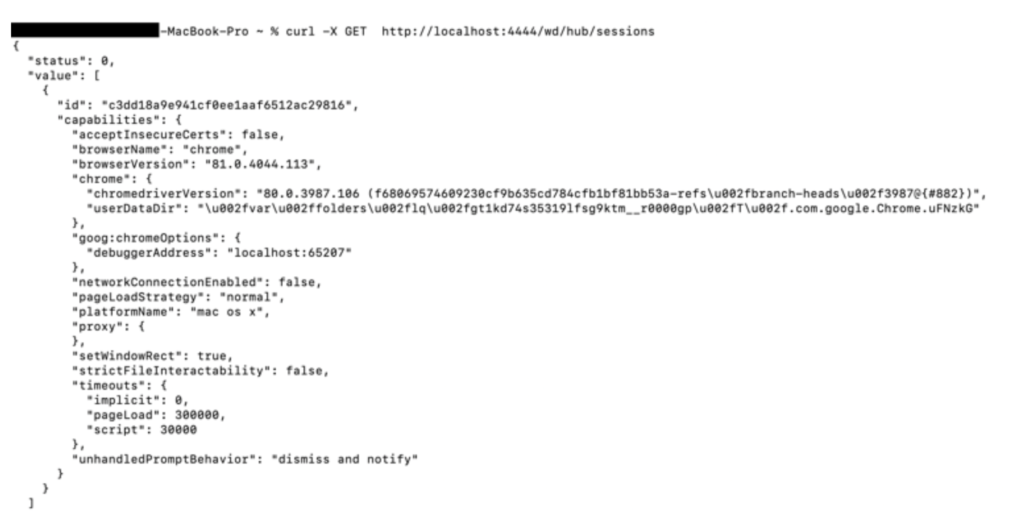
| GET | /session/:sessionId/url | Retrieve the URL of the current page. |
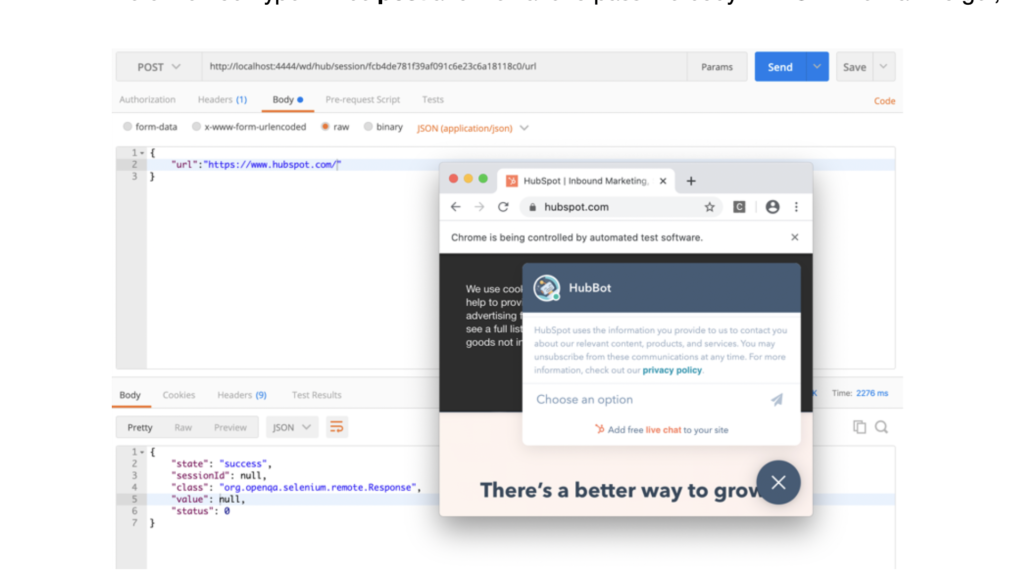
| POST | /session/:sessionId/url | Navigate to a new URL. |
3. Method Explanation
All Navigation methods are defined in RemoteNavigation class which is implementing Navigation Interface.
Note:
- navigate.to() method is overloaded method as referred below.
- It can take String url or URL url as a parameter.
- get() method takes only String url.

Now, to access the navigation methods, just type driver.navigate(). like below:
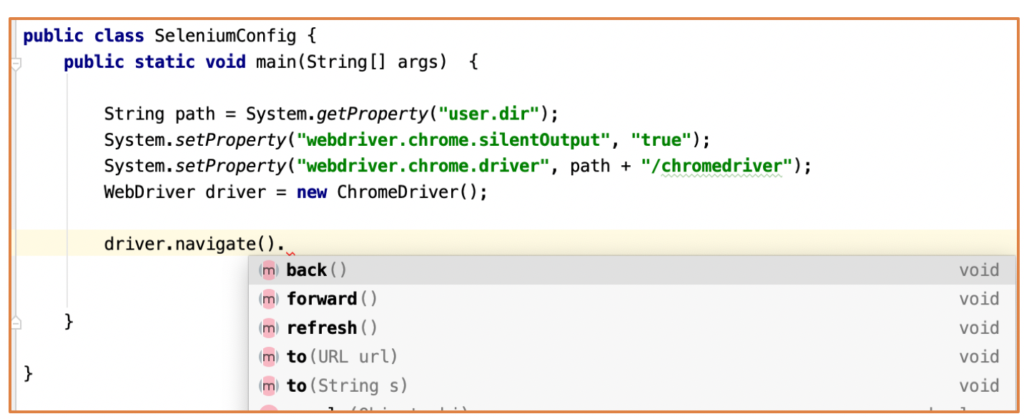
Let’s try to understand these methods in detail:
- Navigate To Command – driver.navigate().to(“url”)
There are two ways to define this method:
This method Loads a new web page in the current browser window. It accepts a String parameter and returns void.

This method accepts URL class instance by importing package import java.net.URL; and returns void.

2) Forward Command – driver.navigate().forward();
This method enables the web browser to click on the forward button in the existing browser window, it takes you forward by one page on the browser’s history. It neither accepts nor returns anything.

3) Back Command– driver.navigate().back();
This method enables the web browser to click on the back button in the existing browser window. it takes you backwards by one page on the browser’s history. It neither accepts nor returns anything.

4) Refresh Command- driver.navigate().refresh();
This method refreshes the current page. It neither accepts nor returns anything.

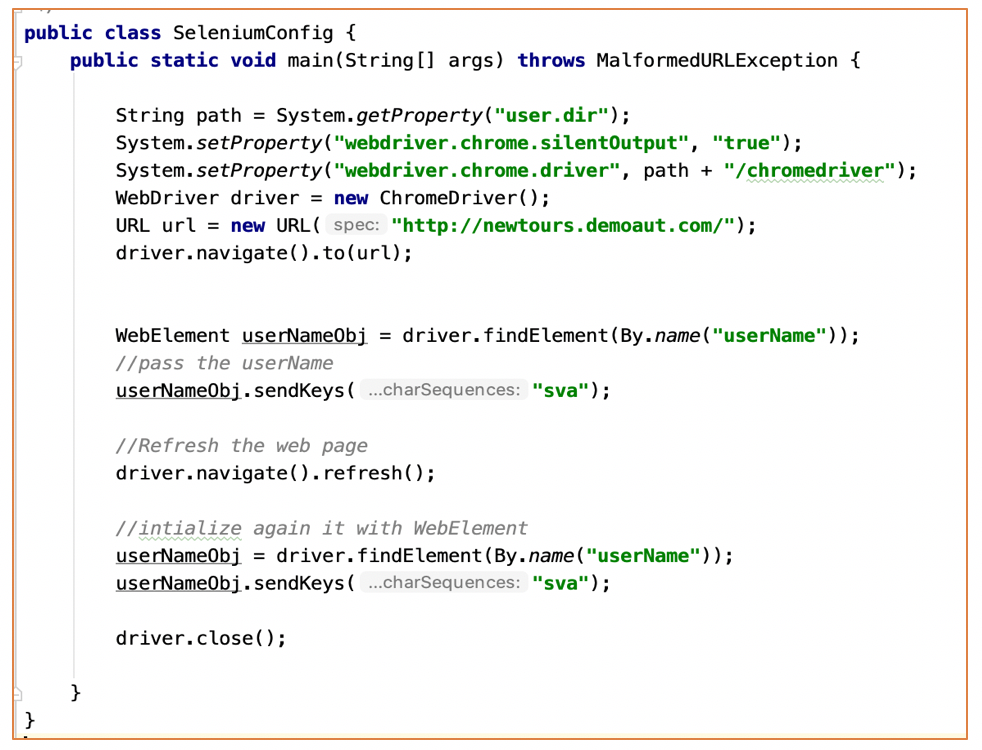
Let’s look at this function in more details with below code snippet:

Upon executing the above code, we will get the output on console similar to:

Now many of us would be wondering why this exception occurs?
Let’s break down our answer to get a deeper understanding:
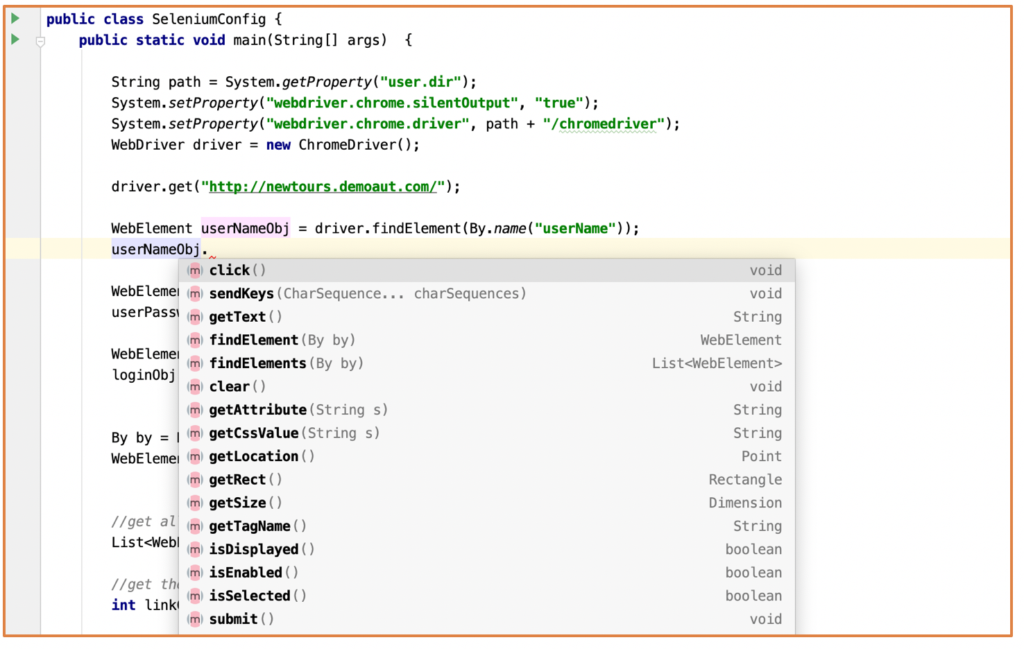
- When WebDriver executes the above code then it assigns an internal id to every WebElement and it refers this id to interact with that element and now we are refreshing our web Brower with driver.navigate().refresh();
- It refreshes the entire page due to which the section of the DOM also gets refreshed and so is the element. In this scenario the internal id(something like “id =725541f2-6c3b-4a31-acd5-7c14ef0f8f97” as shown in below snapshot ) which WebDriver was using has become stale(old), so now for every operation on this WebElement, we will get StaleElementReferenceException .

To overcome this problem, the most recommended way is to reinitialize the element again and this time WebDriver will assign a different Id to this element, and example for this has been done for you below :
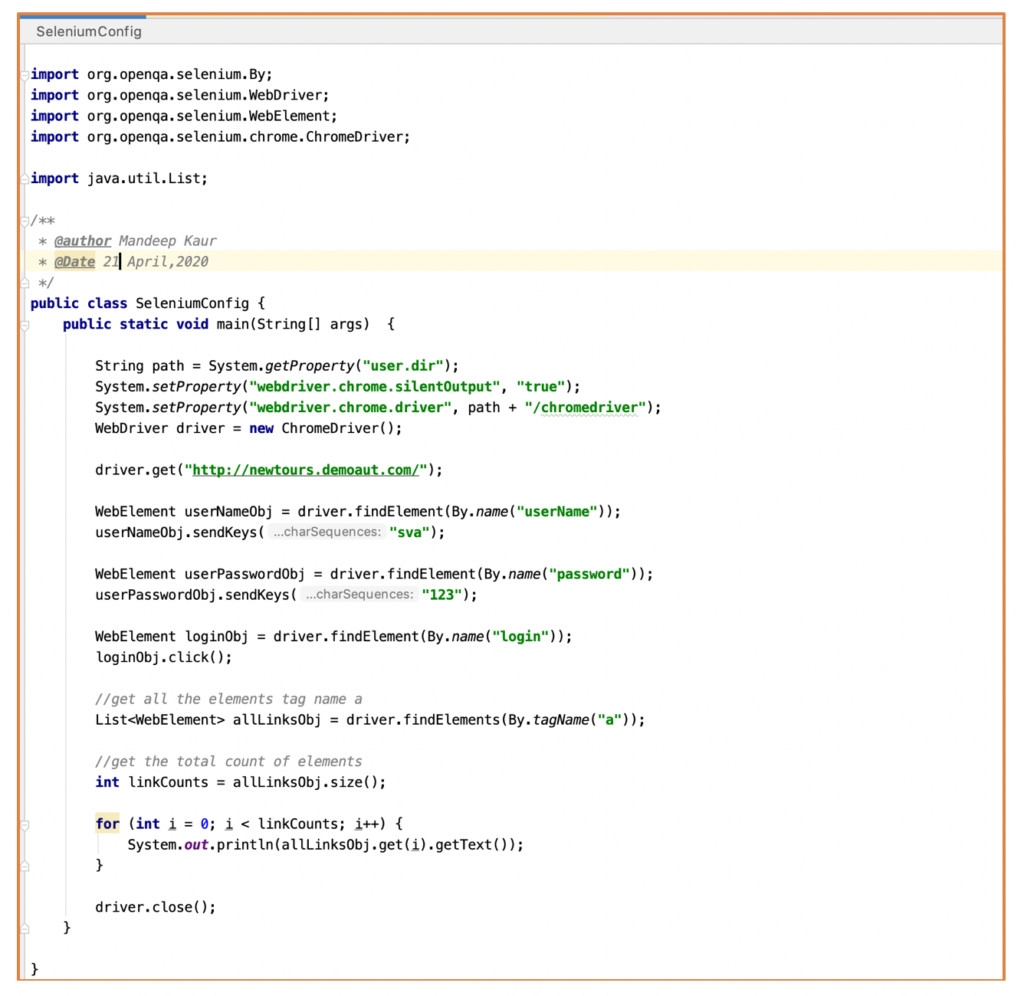
Let’s see complete code with all the navigate operations together:
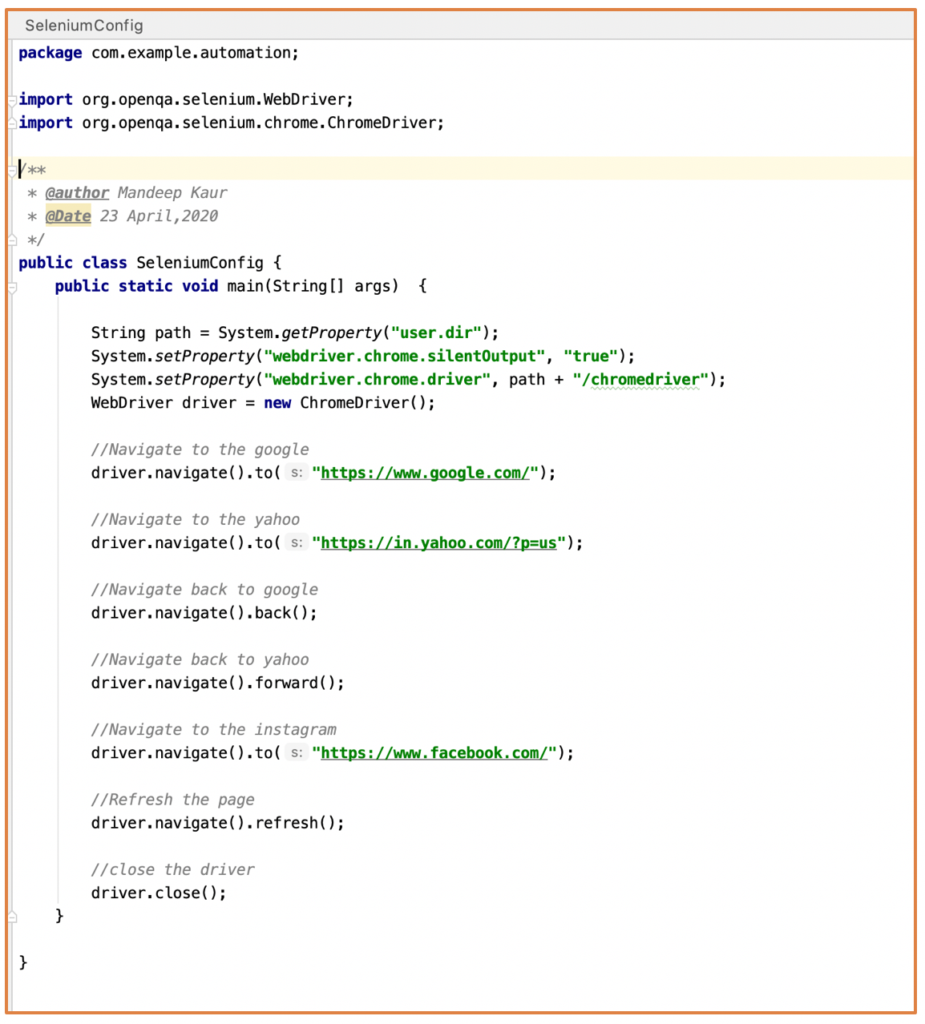
package com.example.automation;
import org.openqa.selenium.WebDriver;
import org.openqa.selenium.chrome.ChromeDriver;
/**
* @author Mandeep Kaur
* @Date 23 April,2020
*/
public class SeleniumConfig {
public static void main(String[] args) {
String path = System.getProperty(“user.dir”);
System.setProperty(“webdriver.chrome.silentOutput”, “true”);
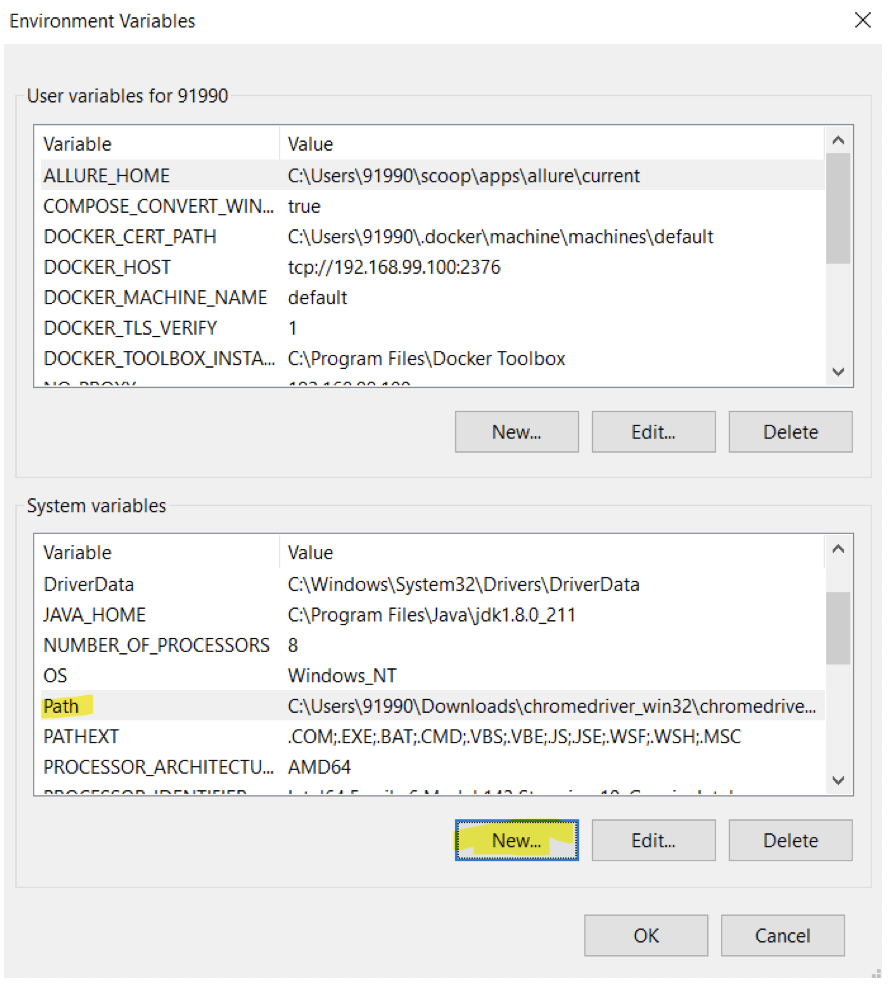
System.setProperty(“webdriver.chrome.driver”, path + “/chromedriver”);
WebDriver driver = new ChromeDriver();
//Navigate to the google
driver.navigate().to(“https://www.google.com/”);
//Navigate to the yahoo
driver.navigate().to(“https://in.yahoo.com/?p=us”);
//Navigate back to google
driver.navigate().back();
//Navigate back to yahoo
driver.navigate().forward();
//Navigate to the instagram
driver.navigate().to(“https://www.facebook.com/”);
//Refresh the page
driver.navigate().refresh();
//close the driver
driver.close();
}
}
4. Conclusion
In this article, we learnt about various selenium navigation commands.


 – Basics To Advanced (Coming Soon)")