Where we learn technology

Author: naveen (Page 1 of 3)

API/WebServices – BackEnd Manual & Automation Testing – Regular Batch – 30th Jan 2025 – 8 PM IST / 9:30 AM EST / 6:30 AM PST / 2:30 PM UK/Europe)

WebServices – Back End API Manual & Automation Training Course Content

Starting Date: Jan 30th, 2025

API Testing Training/Boot Camp:

The API testing batch/boot camp training for API/WebServices – Back End Manual & Automation Testing is a crucial training for individuals who want to enhance their skills in API testing. This training will cover essential topics related to API testing such as HTTP methods, RESTful APIs, JSON/XML, authentication, authorization, error handling, and much more. Candidates will learn both manual and automated testing methods for APIs.

Who can attend this training?

This training is perfect for software testers, quality assurance engineers, developers, and anyone interested in gaining knowledge and skills in API testing. Candidates will learn how to test APIs effectively, identify defects, and ensure that APIs are functioning as expected.

Additionally, this training will help individuals gain a competitive advantage in their careers by acquiring new skills and knowledge.

Why should I join this?

By attending this training, individuals will be better prepared for API testing interviews as they will have a solid understanding of API testing concepts, methods, and tools. They will be able to apply their knowledge to real-world scenarios and will have hands-on experience with various testing tools used in the industry. Overall, this API testing batch/boot camp training is an excellent investment for individuals looking to enhance their career opportunities and take their skills to the next level.

Next Batch Starting from: 30th Jan, 2025

Duration: 9-10 Weeks

Location: Online (zoom meeting) 

Duration: 3 days in a week (1.5 hrs) – Mon – Wed – Thursday

Timings

    • 8:00 PM IST (Indian Time)
    • 9:30 AM EST (USA Eastern Time)
    • 6:30 AM PST (USA Pacific Time)
    • 8:30 AM CST (USA Central Time)
    • 2:30 PM UK TIME

Registration Fee:

  • For Candidates in India : 3000 INR
  • For Candidates in USA/UK/NZ/AUS/Europe : 55 USD

Remaining Course Fee

    • 12000 INR (For Candidates in India)

    • 200 USD (For Candidates in US/UK/NZ/AUS/Europe)

Note:

    • There will be 2 demo sessions. If you don’t want to proceed with the training, full Registration amount will be refunded to you.

    • After 2 demo sessions, remaining amount (12000 INR/200 USD) must be paid accordingly.

    • For any query, whats app at: +91-9902233400.

 
Here I’m sharing the payment details. Please send me the screenshot of receipt once you make the payment without fail. 
You need to mail me at : naveenanimation20@gmail.com

 Payment Options:

CANDIDATES IN INDIA:
1. Pay by Credit/Debit Card:
If you want to use credit card/debit card, please use this secured stripe payment link:

REGISTRATION FEE (3000 INR):
https://buy.stripe.com/28obL2bjD6Ww5RC4hC

REMAINING FEE(12000 INR):
https://buy.stripe.com/4gwcP60EZ4Oocg015j

Or you can pay total fee (15000 INR):  
https://buy.stripe.com/00g16o3Rb3Kk93O9BR
2. BANK TRANSFER:

Bank Details:
Payee name: NAVEEN KHUNTETA
Name of the Bank: ICICI bank
Address of the Bank: Bhandarkar Road, Pune
Bank Account Number: 624001553272
IFSC Code(11 Digit Code): ICIC0006240

3. Pay by GPay/PhonePe/Paytm/UPI:
ph: 9902233400 / 9828866542
======================================
CANDIDATES IN USA/CANADA/UK/EUROPE/AUS/OTHERS:
1. If you want to use credit card/debit card, please use this secured stripe payment link:
REGISTRATION Fee (55 USD):
https://buy.stripe.com/5kA5mEgDX4Oodk44hD
Remaining Fee(200 USD): 
https://buy.stripe.com/fZe5mEfzTeoY6VGdSe
You can pay full amount (255 USD):
https://buy.stripe.com/3cscP63Rb0y84Ny15t
2. Bank Transfer:

Please find below bank details. You can make the transaction directly to the given account or make it via Western Union (only via bank transfer) / Xoom/ Remitly or any other remittance.

Bank Details:

Name: Naveen Khunteta
Bank Account Number:  1015794367401
IBAN Number:  AE520260001015794367401
City/Country: Dubai, UAE
Swift Code: EBILAEAD
Address: Naveen automation labs FZCO, Scaltiy, building 9W, DAFZA, Dubai, UAE - 000001
3.  Paypal:
Total payment: 265 USD
Use this PayPal id: https://paypal.me/naveenautomation
Check out with PayPal
Note: If you are paying through PayPal, You need to pay 265 USD (10 USD will be the PayPal Fee).


Syllabus Course Content:

Course Content:

 Testing of WebServices/API:

  1. Introduction of API and WebServices:
    1. What is API
    2. What is WebService
    3. What is Backend Architecture
    4. Rest vs SOAP APIs
    5. What is CRUD operation with different examples
    6. What are different HTTP Calls – GET/POST/PUT/Delete/PATCH/HEAD/OPTIONS
    7. Different Live Projects Examples
  2. Postman:
    1. Introduction
    2. How to call Rest API in Postman
    3. How to pass path parameter in Request
    4. How to pass query parameter in Request
    5. How to set Headers in Postman
    6. How to pass JSON/XML Payload
    7. How to check response status code
    8. How to check JSON/XML response messages
    9. What is response header
    10. Cookies manipulation
    11. Header Presets
    12. API History in Postman
    13. Postman Environment Variables
    14. Postman Test Scripts using Javascript and  Chai Assertions
    15. Run Automated Test Cases in Postman and generate the results
  3. Advance Postman/Newman:
    1. Introduction of Newman
    2. Newman installation/setup
    3. How to run collections from Newman
    4. Newman command line options
    5. Generate HTML Test Report
    6. Create a collection and folders
    7. Create a collection from API Specification or API Schema
    8. maintenance of API collections
    9. Postman Console and logs
    10. Test Script in postman
    11. Pre Request Script in postman
    12. Test Code snippet in postman
    13. Monitoring of APIs
    14. API Documentation
    15. API Documentation/CODES in different programming languages
    16. Publish Documentation
    17. Setup Environment – Local and Global
    18. Collection Runner
    19. Collection Test Summary
    20. Creating a Mock Server for APIs
    21. How to create a team workspace
    22. How to create individual workspace
    23. Import in Postman
    24. Basic and Advanced Settings in Rest Client
    25. Running postman collection with Docker
    26. Running postman collection with Jenkins
  4. How to check APIs at the network layer using developer tools of browser:
    1. How to check Backend services – APIs running behind
    2. What is developer tool in Chrome
    3. How to check request/response of any API in Firefox/Chrome browsers
  5. What are different HTTP Status Response Codes:
    1. 1xx series
    2. 2xx series
    3. 3xx series
    4. 4xx series
    5. 5xx series

Automation Testing of Back End/APIs:

  1. Learn various HTTP Client libraries :
    1. Tools/Library: JDK 11 – HTTP Client
    2. All CRUD – GET/POST/PUT/Delete Calls
    3. How to send Request with Payloads
    4. How to send Query Parameters and Path Parameters
  1. Learn Rest Assured DSL Java Client API:
    1. Introduction of Rest Assured
    2. Rest Assured methods: GET/POST/PUT/Delete/Patch
    3. Handle different payloads using POJO and JSON/XMLs:
    4. Request with Simple JSON format
    5. Request with Complex JSON format
    6. Handle Authentication using: Basic Auth, Preemptive Auth, Digestive Auth, Bearer Token, Authorization Token, Client ID, Client Secret, API Key, API Secret, OAuth1 and OAuth2, JWT Token, API KEY
    1. All core features of Rest Assured Library:
      1. GET/POST/PUT/DELETE – Inbuilt BDD Approaches
        1. What is BDD GIVEN/WHEN/THEN/AND methods
        2. What is LOG and ALL methods
        3. How to ASSERT in Rest Assured
        4. How to verify Status Code, Response Body and Headers
        5. How to use QUERY PARAMETERS and PATH PARAMETERS
        6. What is ResponseBuilderSpec and RequestSpecification Concept
        7. What is JSON PATH/XML Path
        8. How to create a JSONPath to get the data from a complex JSON response using JAYWAY JsonPath library.
        9. How to create a XMLPath to get the data from a complex JSON response using RestAssured XMLPath library.
        10. What is EXTRACT method
        11. How to send a POST CALL with JSON String, JSON File and using Java (POJO) Class.
        12. What is Serialization and De-Serialization
        13. How to use HAMCREST – Assertion Library
      2. GET/POST/PUT/DELETE – NON-BDD Approaches
    2. New End to End Framework using Rest Assured using different real time APIs:
      1. How to setup a Maven Project for APIs
      2. Folder Structure
      3. API Test Automation Design and components
      4. Rest Client Libraries
      5. Write API Automated Tests with TestNG
      6. Data Providers with Parameterization
      7. Data Driven Testing with Excel Files – using Apache POI API
      8. Test Runners with testng.xml
      9. Various Constants Files for Errors, Status Codes, Validation, and Success Messages
      10. Create a GIT Repo for Test Automation project:
        • Create a New Repo
        • Clone a Repo
        • GIT PUSH
        • GIT PULL
        • GIT Check OUT
      11. Integration with Jenkins – CI CD Pipeline and Automation Job
      12. Create the docker Image of API Test Automation
      13. Host/Register docker image to Docker HUB
      14. Download the docker image and Run it on any machines
      15. Advanced Reporting : Extent Report/TestNG Report/Allure Report
      16.  Maven: Build Automation Tool: Run your API Automation Framework from Maven
      17. TestNG Framework for API test cases

8. Docker Implementation:

  1. What is Docker: Setup and Installation
  2. Docker important commands
  3. How to create Postman Collection image with Docker
  4. How to create Rest Assured Framework Images with Docker
  5. Build Docker Custom Images of API Framework
  6. Mounting Docker Images to Centralized Docker Hub Registry
  7. How to pull custom framework Docker images from Docker Hub
  8. How to run it on different machines or cloud servers

9. Mocking APIs using WireMock library:

  1. Define the dummy APIs
  2. Define API Mock Behaviour for GET/POST/PUT/DELETE Calls
  3. Call Mocking APIs in your framework
  4. Integrate mocking in your Test Automation

10. GraphQL APIs:

  1. What is GraphQL
  2. How GraphQL is different from REST APIs
  3. How to call GraphQL APIs in Postman and GraphQL Playground
  4. What is Query and Mutation in GraphQL
  5. Real Time GraphQL API examples
  6. GraphQL API Automation with Rest Assured library

11. Real Time API Examples:

  1. GORest APIs with Authentication
  2. ReqRes.in
  3. Booker APIs
  4. Weather APIs
  5. IMDB APIs
  6. Weather/Forecast Real Time APIs
  7. OAuth APIs: Oauth1, Oauth2
  8. GIT HUB APIs
  9. Twitter APIs
  10. API with Swagger
  11. Hosura GraphQL APIs

12 . Life Time Free Access on all the Videos/Recordings/Codes/Notes/PDFs/Cheat Sheets.

 
Cheers!
Naveen AutomationLabs
 

Selenium & Java Training Course Content – Regular Batch (5th Dec 2024 – 8:30 AM IST / 7:00 PM PST (Registration open now)

Selenium & Java Training – Regular Batch (5th Dec 2024)

PLEASE FILL THIS REGISTRATION FORM:

Hi Folks,

This time I’m introducing some amazing content on Java, Selenium and some different approaches on Framework Designing with some really complex real time use cases.

This will be a very different content from my YouTube channel. 

After a very high demand on Java+Selenium, here I’m going to start next batch from 5th Dec 2024 [ 8:30 AM IST / 7 PM PST /  10 PM EST /  9 PM CST]

 
Thanks for registering “Selenium & Java with end to end Framework & Test Dev Ops” By Naveen AutomationLabs.


Next Batch Starting from: 5th Dec, 2024
Duration: 16 weeks (4 days in a week)

(India: Mon to Thursday

USA: Sunday to Wednesday)


As per the further registration process, you need to pay the registration fee:
For Candidates in India: 3000 INR
For Candidates in USA/UK/Europe/Aus: 50 USD


Total Fee: 

  • 17,000 INR (for Candidates in India) – including Registration Fee

  • 320 USD (for Candidates in USA/UK/AUS/Europe) – including Registration Fee

Location: Online (Zoom Meeting) – 1 hr + 15 mins + doubts session (Everyday)

Class Timings:

(India: Mon to Thursday

USA: Sunday to Wednesday)

    • 8:30 AM IST (Indian Time)
    • 10:00 PM EST (US Time)
    • 7:00 PM PST (US Time)
    • 9:00 PM CST (US Time)

Note:

  • There will be 2 demo sessions (first two classes are demo sessions).

  • Demo Meeting link will be shared one day before the session.

  • After 2 demo sessions, pending amount must be paid.

  • 14,000 INR – for candidates in India
  • 270 USD – for candidates in USA/UK/AUS/CANADA
  • In case of any query on training:
    Please mail me at: naveenanimation20@gmail.com
    What’s app me at: +91-9902233400

Please fill this training registration form after making the payment.

 Payment Options:

Here I’m sharing the payment details. Please send me the screenshot of receipt via email once you make the payment without fail. 
mail me at : naveenanimation20@gmail.com 

CANDIDATES IN INDIA:

1. Pay by Credit/Debit Card:
If you want to use credit card/debit card, please use this secured stripe payment link:
 
REGISTRATION FEE (3000 INR):
REMAINING FEE(14000 INR):
Or you can pay total fee (17000 INR):
 
2. BANK TRANSFER:
Bank Details:
Payee name: NAVEEN KHUNTETA
Name of the Bank: ICICI bank
Address of the Bank: Bhandarkar Road, Pune
Bank Account Number: 624001553272
IFSC Code(11 Digit Code): ICIC0006240
 
3. Pay by GPay/PhonePe/Paytm/UPI:
ph: +91-9902233400 or +91-9828866542 
(You can scan the following scanner)
 
======================================

CANDIDATES IN USA/CANADA/UK/EUROPE/AUS/OTHERS:

 
1. Payment link using secured stripe:
Pay by Credit/Debit Card:
If you want to use credit card/debit card, please use this secured stripe payment link:
2. Bank Transfer:
Please find below bank details. You can make the transaction directly to the given account or make it via Western Union (only via bank transfer) / Xoom/Remitly or any other remittance.
 
Bank Details:
Name: Naveen Khunteta
Bank Account Number:  1015794367401
IBAN Number:  AE520260001015794367401
City/Country: Dubai, UAE
Swift Code: EBILAEAD
Address: Staybridge, DIFC, Dubai (UAE) – 500001
 

3.  Paypal:

Check out with PayPal

Note: If you are paying through PayPal, You need to pay 330 USD (10 USD will be the PayPal Fee).


Imp Note:

  • There will be 2 demo sessions. In case If you don’t want to proceed with the training. Full Registration amount will be refunded back to you after 2 demo sessions.
  • Candidate has to inform immediately after two demo sessions via email (in case of refund, else refund won’t be possible).
  • After 2 demo sessions, pending amount must be paid.
  • Zoom Meeting link and password will be shared to join the session before the session everyday.

Course Content:

Selenium WebDriver is a leading web automation testing tool in industry. It is one of the most popular tool. Selenium WebDriver jobs are on a rise and are highly paid and highly valued. Industry is shifting towards automation rapidly.
 
Today, every start up, product based and service based companies need Automation QA Engineer to automate their web apps.
 
With more and more applications becoming accessible through browser it becomes very important to learn Selenium WebDriver.
This course is designed to teach in depth concepts of Selenium WebDriver4.x and Java. We focus on the basics first and then move towards the advance concepts of Selenium, Java and framework development.
Note: This training will be covered with latest Selenium 4.x version.
 
Part -1: Basics of Java & Selenium
 
1) Automation : A brief introduction to automation and the need for automation. How automation will enable you to beat competition and make you get the better jobs in market.
• What is Automation Testing
• Use of automation Testing
• Tools for Automation Testing
• Why automation is important for you career?
• What is Selenium
• Advantage of Selenium
• Introduction to WebDriver

2) Core Java/Programming : This class will set you up for understanding Basic OOPs and java concepts. These concepts will be extremely important for you to become a good Automation tester. This section is specially designed so that can be followed by any Manual test very easily.

  • Data Types and Variables
  • String Class
  • Arithmetic Operators & Concatenation operators
  • Conditional & Decision Making
  • Single Dimensional Array
  • Loops (For, While)
  • Classes and Objects
  • Class Constructors
  • Functions in Java
  • Function Input Parameters
  • Function Return Types
  • Exception Handling
  • Inheritance
  • Polymorphism
  • Encapsulation
  • Data Hiding
  • Method Overloading
  • Method Overriding
  • Abstract class
  • Interface
  • Super/This Keywords
  • Final/Finally/Finalize Keywords
  • Concept of Garbage Collector and System.gc
  • Wrapper Classes
  • String Manipulation
  • Collections Basics (Array List, HashMap, Set, Hashtable)

3) Eclipse IDE : This topic might seem little off place here but it’s very important topic to understand the tool you are using. Eclipse will the primary choice of development environment and we will discuss features of eclipse here.

• How to use Eclipse
• How to run, stop, pause
• How to debug in Eclipse
• Understanding console output
• How to put a break point
• How to add Watch variables
• How to find errors from Problem window
• Usage of step into and Step over debug functionality
  • Interview Questions
4) Set up Eclipse : We will start with setting up WebDriver, so that every participant start flaunting off their newly learnt skills by writing some cool test programs:
• Download and install java
• Download and start Eclipse
• Download and configure WebDriver java client
• Set up a project
• Create packages
• Create a First Java test case
• Import WebDriver Source file
  • Interview Questions
Note: This training will be covered with latest Selenium 4.x version.
5) WebDriver Interface : This topic will make you familiar with the concept of browsers in WebDriver and how to launch basic Firefox browser using WebDriver. Here we will also talk about WebDriver & WebElement interface which will enable us to answer many complicated Interview Questions about WebDriver Implementation.
• Architecture of WebDriver
• WebDriver Interface
• WebElement Interface
• Launching Firefox/Chrome/Safari
  • Interview Questions
6) Browser & Navigation Commands : This is something which everybody do very first thing when they learn Selenium. Opening & closing of browser and some navigation function on top of it.
• How to Open a URL
• Verify Page title
• Strategy to get the Page Source 
• Difference between Close & Quit
• Ways to Navigate Back & Forward
• How to Refresh Page
• Another way of Navigating to specific Page
  • Interview Questions
7) WebElement Commands : An important and basic need of Selenium Automation. This part enables every participant to start writing automation test in their organizations. These are the most commonly used operations on any website.
• Difference between FindElement & FindElements
• Enter & Clear text from Input field
• How Click action works differently on different elements
• Managing Input fields, Buttons & Links
• Finding all links on the Page
• Extracting More than one object from a page 
• Extracting Objects from a specific area of a web page 
• Check if element is Present, Displayed, Enabled or Selected
  • Interview Questions
8) Locators : In this class we will start learning about HTML, how elements are defined inside HTML document and what are the different attributes that are associated with an HTML element. We also try to find elements based on its attribute values.
• What are locators
• HTML Basics
• HTML language tags and attributes 
• ID, Name, Xpath, CSS etc
• Difference between Absolute & Complete Xpath
• Finding your first element
• WebElement Commands
  • Interview Questions
9) Element Identification : This part explains the lifesaver Add-Ons & tools for Selenium. Finding elements are the most common activity carried out in Selenium. These tools give us power to easily identify complex elements and help us in saving lot of time.
 Element Inspector in Mozilla, Chrome and IE
• Element locator tool for FF
• Various HTML locator strategies
• XPath Helper Plug-in for Chrome
• Selection of Effective XPath
• Handling Dynamic objects/ids on the page
  • Interview Questions
10) Tables, Checkboxes & Radio buttons : Many applications involve use of web tables and list boxes. These skills will help participant to get the expertise on complex tables structures and write effective automation test.
• Identify table rows and columns
• Extracting values from a cell
• Dynamically Identify Tables Data
• Select class in Selenium
• Drop Down Handle
• Select multiple values from the list
• Select & Deselect operations by Index, Value & Visible Text
  • Interview Questions
11) Selenium Waits, Alert & Switch Windows : A little complexity will start now onwards. To use Waits effective is very important for every automation tester. Wait helps us in switching windows, handling pop-ups, operating alerts correctly.
• Implicit and Explicit waits
• How to use Expected Conditions with Waits
• PageLoadTimeout & SetScriptTimeout property
• Simple use of Thread Sleep
• Concept of Fluent Wait in Selenium 
• Strategy to poll for an object
• WebDriverWait and its uses 
• Different WaitUntil Conditions 
• Managing Ajax based components 
• Ways to handle Simple, Confirmation & Prompt Alert
• Concepts of Set Interface in Java 
• Difference between Window Handle & Handles 
• Switching & Closing Windows, Tabs & PopUps
• Concept of window ID 
• Extracting window IDs with Selenium Object reference
  • Interview Questions
12) Actions Class
This gives us power on recently build Application with latest and complex object features. Hovering mouse or simulate Mouse and Keyword operations can be done by using Action Class. A necessary thing to learn in Selenium journey.
• What is Action Class & What can we do with Action Class
• Mouse Hover & Mouse Movement with Action
• Drag and Drop Action
  • Right Click (Context click
  • Click and SendKeys using Actions Class
  • Interview Questions
13) Browser Profile: Different types of browser profiles and user authentication models with examples will be discussed in this class. You will need these to test secured websites and user authenticated websites.
• What is Browser Profile
• How to set up ChromeOptions and Firefox Options
 
14)Complex UI Scenarios:
  • Handle Ajax components
  • Handle Complex Calendars
  • Handle WebTable with Paginations
  • Handle infinite Page Loading like infinite page scrolling on linkedin, facebook, food delivery web apps
  • Complex ShadowDOM, SVG Elements
  • Complex Frames/iFrames
  • Complex Psuedo Elements
  • Page Wait use cases
  • Element Wait use cases
 
Part -2: Advanced Selenium
 
14) TestNG and Cucumber BDD Framework
TestNG is a wonderful off the shelf framework that can be used directly to create your test framework. We will learn about this framework here.
• What is TestNG
• Benefits and Features of TestNG
• How to download TestNG
• Annotations in TestNg
• How to run Test Suite in TestNG
• Groups in TestNG
• Depend On in TestNG
• Test Case sequencing in TestNG
• TestNG Reporters
• TestNG Assets
• TestNG Parameters
• Multi Browser testing in TestNG
• Parallel testing in TestNG

Cucumber – BDD Framework:
• What is Cucumber/ BDD
• Given/When/Then/And – Gherkin language
• How to create a right Feature File
• Cucumber Step Definitions/Glue
• Cucumber Test Runner using JUnit and TestNG
• How to run test cases in parallel mode using Cucumber plugins
• How to integrate Cucumber with Selenium WebDriver
• Page Object Model(POM) with Cucumber BDD
• Cucumber Reporting 
 
  • Interview Questions
15) Automation Framework (End to end Project)
This class will cover the concepts of Frameworks. After this the participant would got to know that which type of Framework works best for their Application and the pros & cons of the selected framework. Knowledge of frameworks is key skill to learn.
• What is Automation Framework
• Features of Automation Framework
• Benefits of using Automation Framework
• What is Data Driven Framework
• What is Hybrid Framework
  • What is Page Object Model Design Pattern with Non Page Factory (By Locators) with OOP concepts
  • Interview Questions
16) Real Time Live PROJECT On EComm Application– Selenium Hybrid Framework (POM)
In this class we will explore some major frameworks by looking at the code and understanding the key component of the framework. 

A real time web application will be taken and framework will be built on top of that which will simulate actual project scenarios. We follow the best practices for framework development, this is what we do in real time projects.
• Introduction and Component of Frameworks
• Designing Test Data Provider (Excel)
• Designing Run Data Provider (Text/Property file) 
• Setting up Maven Build Tool
• Data Provider Design
• Creating Page Objects & Object repository
• Writing Test Script and Fetching Test Data
• Designing Test Runner for Framework
• Asserts, Test Fails & Error logging
• Reporters, TestNG Listeners and Log file Generation
• Running test with different Test Data
• Generating the HTML reports : Extent Report, Allure Report, TestNG Report

17) Dev Ops & Continuous Integration 

  • Jenkins Setup Basics
  • Running Script via Jenkins
  • Jenkins PipeLine – Classic View
  • Jenkins PileLine – Blue Ocean
  • Jenkins PipeLine Syntax
  • Jenkins Report Generation using Extent Report, Allure and TestNG Report
  • Git WebHook with NGRok Proxy to trigger the build automatically
  • GIT Repo/GIT HUB
  • Learn how to use commit command
  • What is cloning in GIT
  • what is GIT Fork
  • My First Code Check-in to GIT
  • GIT PULL Request Process (PR, Merge Request)
  • GIT CheckOut
  • GIT Branching (Local branching Concept)
  • What to do when you join a new team – how to use GIT commands properly
  • GIT best practices
  • GIT Merge
  • GIT Commit
  • GIT ADD
  • GIT Push, Fetch & Pull Commands
  • GIT Merge Conflicts
  • GIT Stash
  • Git Stash Pop
18). Maven Life Cycle
  • Maven Commands
  • Maven Life Cycle stages
  • Create -> Compile -> Run Tests -> Package -> Install -> Deploy
  • Creating build JAR
  • Generation of FAT JAR using Assembly plug-in
  • Maven Nexus Deployment using maven deploy plugin

19). Docker

  • What is Docker
  • What is Docker Container
  • How to create account on Docker Hub
  • Selenium Grid Configuration on Docker Hub
  • Run your test cases on Dockerized Selenium Grid Hub – Node setup
  • Setup Infrastructure using Docker Compose yml 
  • Scale up the browsers at the run time
  • Shut down the Docker Infrastructure
  • Selenoid Grid Setup
  • Selenoid with docker-compose and browsers.json
  • Cross Browser with specific version using Aerokube Selenoid Dockerized Grid
  • Setup your own Browsers Lab with different browser versions
20). AWS – Amazon Web Services – 
  • Introduction
  • Setup Account
  • Create new EC2 Instance on AWS
  • Create AMI, Security Group, VPC and Subnets
  • Selenium Dockerized GRID Setup on AWS – EC2 machine
  • Run Selenium test cases on AWS machine
  • Setup complete dockerized grid on AWS cloud using Selenoid GRID and Docker
21). Life Time Access on all recorded Videos, Free Code Repos, and Java Code, important notes, pdfs and e -books.

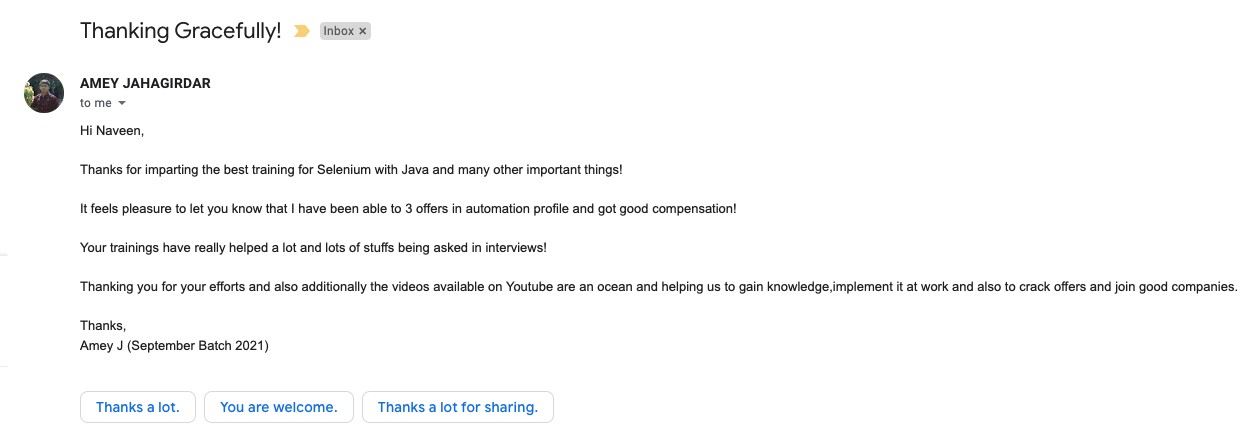
Some of the reviews from my previous batch candidates, most of the students either got promoted  to test automation or got their dream automation jobs.


Frequently Asked Questions:

Q1: Will I get the recordings for these sessions?
Ans: Yes, you will get the recording daily basis for the specific topic after the session.

Q2: Is this training useful for freshers?

Ans: 100% useful for freshers, who are looking for to start their career into automation QA field.

Q3: Is this training useful for Manual Testers?

Ans: 100% useful for Manual QA folks, it will surely help to trigger your interest from manual to Automation QA. After this training, you will become an expert in automation. 

Q4: Can I justify my automation knowledge, after this training?

Ans: Yes, training will help you to learn right automation with proper guidance. You have to practice accordingly to justify your automation knowledge.

Q5: Can I crack selenium interviews after this training?

Ans: Yes, 100% guarantee. 

Q6: What is the duration of this course?

Ans: I never compromise in training content and syllabus. It depends how exactly we are going with this training. Ideally it should take around 15 weeks. It might take more than 15 weeks also.

Q7: Who will be the trainer?

Ans: Only Naveen from Naveen AutomationLabs. We don’t allow other trainers to take sessions.

Q8: Will this training be different from existing YouTube videos?

Ans: Yes, it will be more in-depth training and more topics will be covered with different scenarios along with one end to end framework as per industry standards (no copy paste) with full Infrastructure and dev ops setup.

Q9: What if I miss any session?

Ans: You will get each session recording daily basis. You can cover that topic after watching the recordings.  You will have the recordings with the lifetime access.

Q10: Will assignments be shared for covered topics?

Ans: for almost every important topic, I have assignments and will be shared daily basis. 

Q11: Can I improve my programming skills after this training?

Ans: I am 100% sure, it will drastically improve your coding skills and logical thinking for writing the best optimized code.

Q12: How will you cover the topics? Is it only theory or any real time experience?

Ans: I always try to relate the topics with real time scenarios, how exactly test automation works in real time projects and I hardly copy paste the code. I strongly prefer to write the code during the session. No COPY PASTE. NO Power Point Slides, No Boring Theories.
 
Q13: Do you provide any certification?
Ans: We can provide Course completion certification but this is just a certification. We never claim that this certification is globally recognized. You need to submit the coding assignments and GIT Repository URLs to get the course completing certification.

In case of any questions: Feel free to ping me on whats app : +91-9902233400.
Thanks for enrolling for Java and Selenium Training – By Naveen Automation Labs.

This batch is different from other previous batches, as I have some more new content in Java and Selenium with new style of framework designing part and much more.
I’m sure you will learn a lot of new things from this training. “A lot to know – A lot to learn”.
This course is huge and we really need to maintain the pace of the course, so that you all can learn the things within the given time frame. We never compromise in terms of content and quality of the training.
Few important points to remember before joining the training session:
  1. It will be online training and sessions will be recorded daily basis. Please try to join before 5-10 mins of the session time.
  2. I want you to be on mute during the session so that session should not get disturbed due to any background noise. Otherwise, it will break my rhythm as well as it will disturb the entire class.
  3. If you have any questions, you can ask in goto meeting chat section. If you have any background noise, please don’t unmute yourself. Please attend these sessions at a quite place with good internet connectivity and with good headphones.
  4. Best option is to write your question/query in chat section. I always believe, if it’s a pin drop silence, classroom decorum will be maintained properly. 
  5. After the session, recording will be shared by EOD – daily basis.
  6. You can access these recordings with Life Time Access. Downloading of the videos are strictly not allowed.
  7. It’s strictly not allowed to share these videos with anyone, if it is found, the respective candidate account will be terminated immediately.
  8. It’s not allowed to create any whats app/telegram group for this training batch. If you have any suggestions or feedback, feel free to reach me out. I would love to hear from you.
  9. Session will be there for 60 mins (+30 mins extra for doubts).
  10. We will have two demo sessions, if you don’t want to continue with the training, registration money will be refunded back.
  11. After demo sessions, pending amount has to be paid as per the fee structure.
“Happy Learning” 🙂

Cheers!!

Naveen AutomationLabs

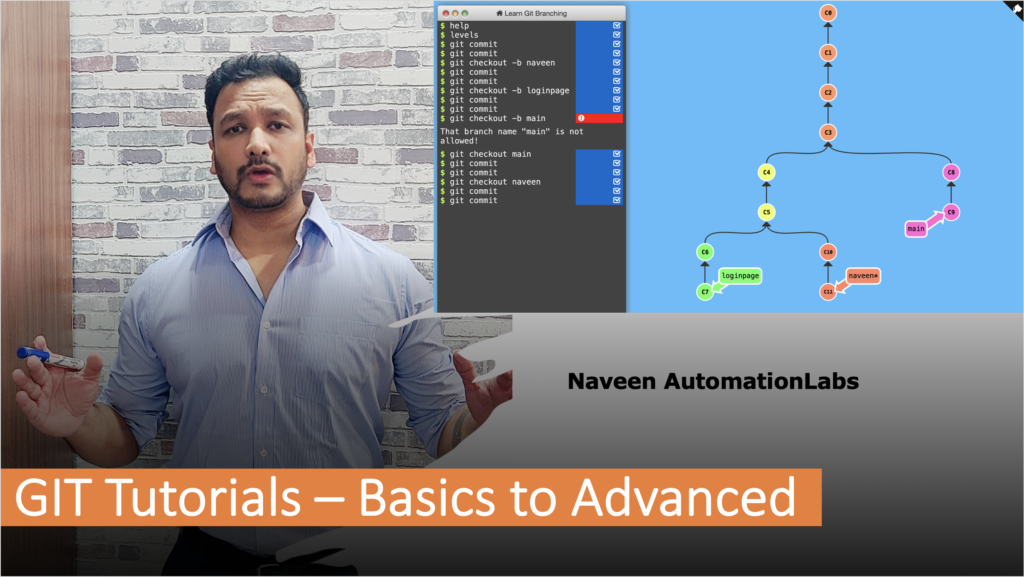
GIT Paid Course – Basics to Advanced

GIT –

By far, the most widely used modern version control system in the world today is Git. Git is a mature, actively maintained open source project originally developed in 2005 by Linus Torvalds, the famous creator of the Linux operating system kernel.

Developers who have worked with Git are well represented in the pool of available software development talent and it works well on a wide range of operating systems and IDEs (Integrated Development Environments).

Having a distributed architecture, Git is an example of a DVCS (hence Distributed Version Control System). Rather than have only one single place for the full version history of the software as is common in once-popular version control systems like CVS or Subversion (also known as SVN), in Git, every developer’s working copy of the code is also a repository that can contain the full history of all changes.

In addition to being distributed, Git has been designed with performance, security and flexibility in mind.

These are the paid videos (not the live training). You will get all the videos from Box repository with life time access. You just need to send me the mail once you make the payment. Please send the details at : naveenanimation20@gmail.com Mail Subject Line: GIT Course Payment Receipt – Your Full Name Click here to BUY:

Discounted Price: 1299 INR (20 USD)

Actual Price: 2250 INR (35 USD)

Course Content:

1. What is GIT (Introduction)

2. GIT Installation on Windows/MAC
  • GIT global configuration
3.  GIT Architecture
  • What is working copy (workspace)
  • What is stage/index
  • What is local repo/branch

4. GIT first commit

  • Create new git hub account on git hub cloud
  • git init
  • git remote add origin
  • git add .
  • git add
  • git add <folder/dir>
  • git push origin master (push your first code to git repo at remote)
  • setup git username, email id and password
  • git authorization
  • Git Hub Overview
  • Git HUB – remote repo creation
  • Practical Implementation with live examples

5. GIT – 2nd commit

  • Add a new file
  • Update a file
  • Delete a file
  • add -> commit -> push it again to remote branch
  • Practical Implementation with live examples

6. GIT logs/history

  • git logs
  • git logs with various options
  • git logs with filters
  • git logs with different options
  • git view commit
  • check commit
  • check commit history
  • Practical Implementation with live examples

7. GIT diff

8. GIT blame/ GIT short log

9. GIT local branching process

  • Complete workflow
  • Deep understanding of stage/index and local repo
  • How to cut a feature branch
  • git checkout
  • git checkout vs git switch
  • git checkout with git branch
  • git branch (create a new branch)
  • git add . (add working copy objects to stage/index)
  • git add <file/folder>
  • How to commit a code
  • git commit -m
  • git push origin
  • Practical Implementation with live examples

10. PR (Pull Request) Process

  • What is PR (Pull Request)
  • git merge at remote side
  • PR – review 
  • PR – feedback
  • PR – request changes (rejected)
  • PR – mail notification
  • PR – approval
  • Update PR
  • PR transaction between developers
  • PR comments
  • PR best practices
  • Practical use cases of PR
  • Practical Implementation with live examples

11. GIT various branching commands:

  • Create branch
  • Delete branch
  • Branch list
  • Local branch list
  • Remote branch list
  • Checkout/Switch branch
  • Practical Implementation with live examples

12. GIT Clone vs GIT Fork

  • What is git clone
  • How to clone
  • Why to clone
  • Import cloned repo to current working copy in editor (eclipse, IntelliJ)
  • Git forking process
  • How to fork any repo at remote side
  • Practical Implementation with live examples

13. GIT Local Merge

  • Git local merge use cases
  • git merge
  • git merge master to feature branch
  • git merge feature to master branch
  • git merge best practices
  • git merge and no merge branches
  • Practical Implementation with live examples

14. GIT Tag and Releases

  • What is tag
  • What is release
  • How to tag a git commit with a specific version
  • How to push the tag to remote
  • How to create various tags for different features in your project
  • How to create a release version from the specific tag
  • How to create a latest release from tag at remote side
  • Release notes
  • Practical Implementation with live examples

15.  GIT Fetch vs PULL

  • What is git pull
  • What is git fetch
  • Diff between fetch and pull
  • Why git pull = git fetch + merge
  • Practical example of git fetch and git pull
  • Practical Implementation with live examples

16. GIT Merge vs Rebase

  • What is actual merge
  • git merge and how it works
  • git merge with visual design diagrams
  • git rebase
  • git rebase with visual design diagrams
  • Main diff between merge and rebase
  • When to use git merge and rebase
  • Best practices
  • Practical Implementation with live examples

17. GIT Cherry-Pick

  • What is cherry-pick
  • How to perform cherry-pick merge from master to feature branch
  • How to perform cherry-pick merge from feature to master branch
  • Why cherry-pick is popular
  • Cherry-pick practical examples
  • Practical Implementation with live examples

18.  GIT Stash

  • What is stash
  • How to perform git stash
  • git stash
  • git stash pop
  • git stash list
  • Practical Implementation with live examples

19. GIT Merge Conflict

  • What is conflict
  • Why do we get conflict
  • Merge conflict with git stash
  • Merge conflict with git pull
  • Merge conflict with various use cases
  • How to understand git conflict
  • How to resolve git conflict
  • How to check git conflicts in editor
  • Stash changes in merge conflict
  • Latest pull changes in merge conflict
  • Practical Implementation with live examples

20. GIT Aliases

  • What is git alias
  • How to create custom global git alias
  • Various shortcut alias examples
  • git log alias
  • git checkout alias
  • git status alias
  • git switch branch alias
  • git commit log alias
  • Practical Implementation with live examples

21. Comparing two commits

  • Comparing two commits using git diff
  • Practical example of git diff to compare various commits in local 
  • Practical Implementation with live examples

22. GIT Reset

  • What is git reset
  • git reset options
  • git –soft reset
  • git –mixed reset
  • git –hard reset
  • git reset workflow
  • git reset design
  • How to delete a commit history
  • How to delete a file from stage
  • How to delete a commit history from local repo
  • How to delete a commit history from local repo and delete file from stage
  • Un-stage a file
  • How to delete a file from working copy using git hard reset
  • git force push to remote
  • Reset remote changes
  • Practical Implementation with live examples

23.  GIT Revert

  • What is git revert
  • How to perform git revert
  • Diff between git reset and git revert
  • Practical Implementation with live examples

Buy Now:

Grab it in just:

Discounted Price: 1299 INR (20 USD)

Actual Price: 2250 INR (30 USD)

Payment Options:

Here I’m sharing the bank account details.

Please send me the screenshot of the receipt once you make the payment without fail. 


Please send the details at : naveenanimation20@gmail.com

Subject Line: GIT Course Payment Receipt – Your Full Name

You can make the payment via payment link:

Pay via Debit/Credit Card – Click on link  

OR Via Bank Transfer:

Please find below bank details: 

You can make the transaction directly to the given account or make it via Western Union Or Xoom.

Bank Details:

Full Name: NAVEEN KHUNTETA
 
Contact No.: 9902233400
 
Payee name: NAVEEN KHUNTETA
 
Name of the Bank: ICICI bank
 
Address of the Bank: Bhandarkar Road, Pune
 
 Bank Account Number: 624001553272
 
 IFSC Code(11 Digit Code): ICIC0006240
 

You can send via PayPal or Xoom also:

PayPal Payment:  https://paypal.me/naveenautomation

Xoom Payment:

https://www.xoom.com/india/send-money

You can also make the payment via Tez (Google Pay) OR PhonePe :

UPI to this number: +91-9902233400

UPI: naveenanimation20@okicici 

OR Google IDnaveenanimation20@gmail.com

PING ME AT +91-9902233400, IN CASE OF ANY ISSUES.

For Candidates in India:

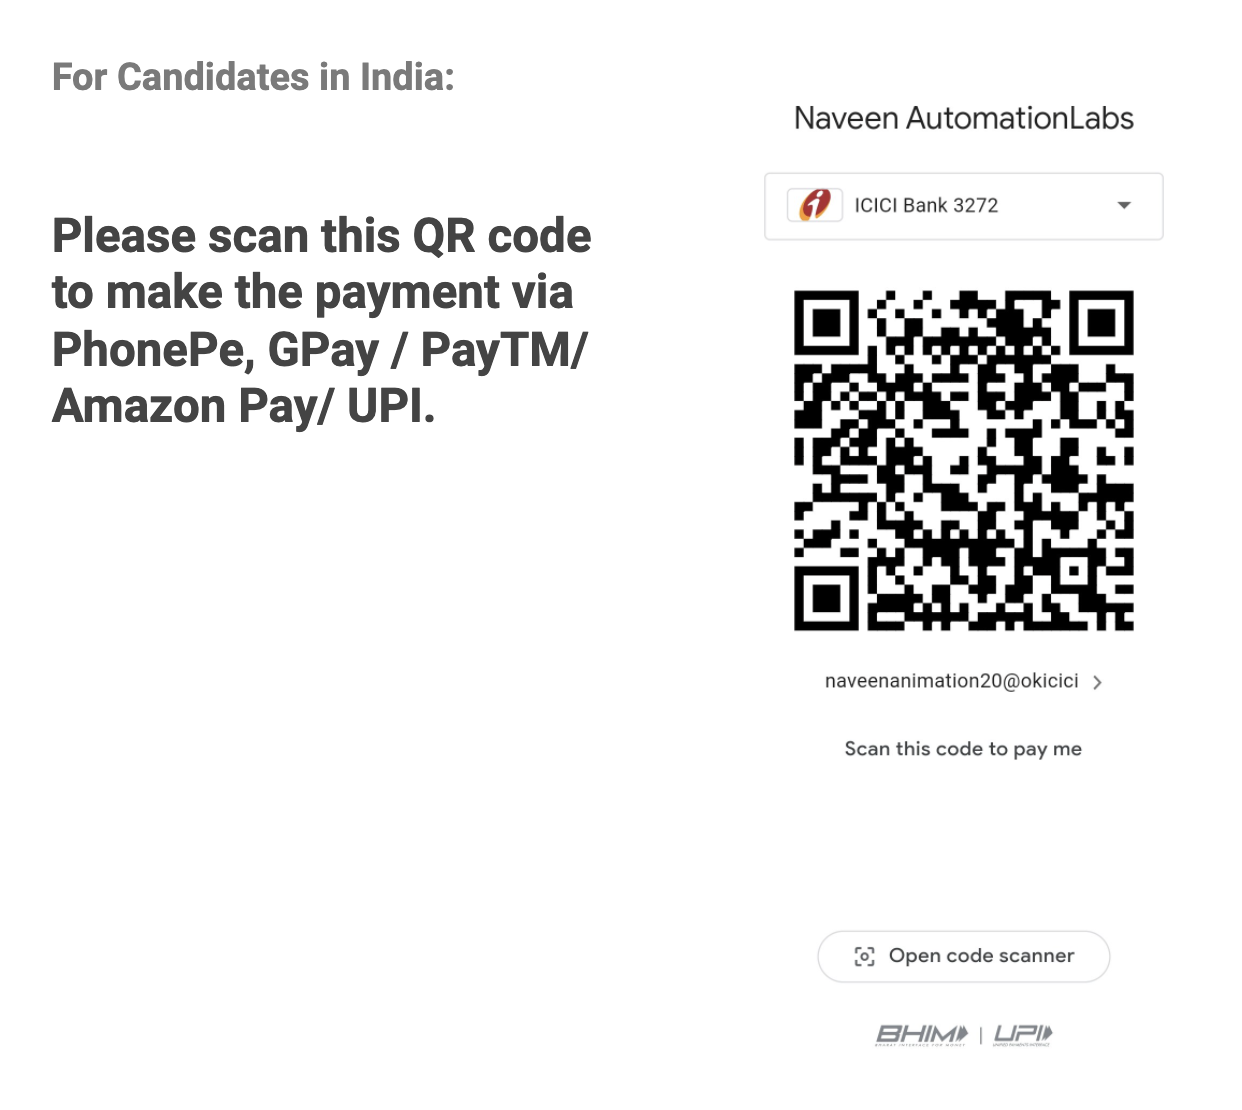
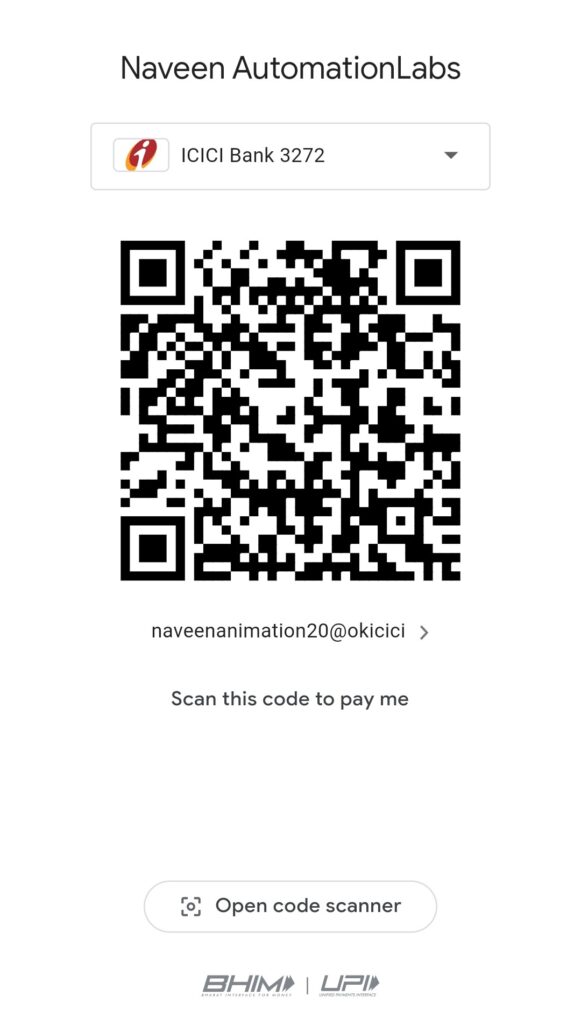
Please scan this QR code to make the payment via PhonePe, GPay / PayTM/ Amazon Pay/ UPI.

Note:

  • Once you make the payment, please send me the payment screenshot to:

         naveenanimation20@gmail.com

  • All the paid videos will be shared via Box drive.

Terms & Conditions:

1. For the paid course, refund is not applicable.

2. In case of any need of resume, you can mail me or tag me in Box comments section.

3. You can mail me or tag me in Box in case of any technical questions and doubts.

4. Response time of the queries within 24 hrs. 

5. Technical queries won’t be resolved over whats app messages. 

6. Feel free to ping me, in case of any Box issues.

7. This is strictly not allowed to share your credentials with anyone, if any account is found, it will be deactivated and account will be terminated.

Cheers!

Happy learning!

Naveen AutomationLabs

Scrum 2020 Guide — New Changes

                          SCRUM GUIDE 2020 UPDATES


CELEBRATING 25 YEARS OF SCRUM


It’s been 25 years since the launch of the Scrum Guide. With contributions from the Scrum community, Dr. Jeff Sutherland and Ken Schwaber have made updates to make it crisper, leaner and more transparent.

NoSuchElementException and NotFoundException in Selenium || Common Exceptions in Selenium

There is no ElementNotFoundException as such in selenium, if you are talking in #Selenium context. We have NotFoundException which is extended by :
Direct Known Subclasses as:
NoAlertPresentException, NoSuchCookieException, NoSuchElementException, NoSuchFrameException, NoSuchWindowException

Please refer this Java API Doc: https://jar-download.com/artifacts/org.seleniumhq.selenium/selenium-api/3.141.59/documentation

NoSuchElementException extends NotFoundException” 

and 

NotFoundException extends WebDriverException“. 

This is thrown when???
1. Element could not be found in the DOM – or may it never. exists.
2. The page is still being loaded and you’ve already finished your WebElement search
3) AJAX Element has not returned yet on the page

If you encounter this exception, you may want to check the following:
>Check your selector used in your find_by…
>Element may not yet be on the screen at the time of the find operation, (webpage is still loading) apply WebDriverWait() for an element to be appeared on the page. 

Exceptions that may happen in all the webdriver code.

Common Exceptions in Selenium:

exception selenium.common.exceptions.ElementClickInterceptedException

(msg=Nonescreen=Nonestacktrace=None)[source]

The Element Click command could not be completed because the element receiving the events is obscuring the element that was requested clicked.

exception selenium.common.exceptions.ElementNotInteractableException

(msg=Nonescreen=Nonestacktrace=None)[source]

Thrown when an element is present in the DOM but interactions with that element will hit another element do to paint order

exception selenium.common.exceptions.ElementNotSelectableException (msg=Nonescreen=Nonestacktrace=None)[source]

Thrown when trying to select an unselectable element.

For example, selecting a ‘script’ element.

exception selenium.common.exceptions.ElementNotVisibleException

(msg=Nonescreen=Nonestacktrace=None)[source]

Thrown when an element is present on the DOM, but it is not visible, and so is not able to be interacted with.

Most commonly encountered when trying to click or read text of an element that is hidden from view.

exception selenium.common.exceptions.ErrorInResponseException

(responsemsg)[source]

Thrown when an error has occurred on the server side.

This may happen when communicating with the firefox extension or the remote driver server.

exception selenium.common.exceptions.ImeActivationFailedException

(msg=Nonescreen=Nonestacktrace=None)[source]

Thrown when activating an IME engine has failed.

exception selenium.common.exceptions.ImeNotAvailableException

(msg=Nonescreen=Nonestacktrace=None)[source]

Thrown when IME support is not available. This exception is thrown for every IME-related method call if IME support is not available on the machine.

exception selenium.common.exceptions.InsecureCertificateException

(msg=Nonescreen=Nonestacktrace=None)[source]

Navigation caused the user agent to hit a certificate warning, which is usually the result of an expired or invalid TLS certificate.

exception selenium.common.exceptions.InvalidArgumentException

(msg=Nonescreen=Nonestacktrace=None)[source]

The arguments passed to a command are either invalid or malformed.

exception selenium.common.exceptions.InvalidCookieDomainException 

(msg=Nonescreen=Nonestacktrace=None)[source]

Thrown when attempting to add a cookie under a different domain than the current URL.

exception selenium.common.exceptions.InvalidCoordinatesException

(msg=Nonescreen=Nonestacktrace=None)[source]

The coordinates provided to an interactions operation are invalid.

exception selenium.common.exceptions.InvalidElementStateException

(msg=Nonescreen=Nonestacktrace=None)[source]

Thrown when a command could not be completed because the element is in an invalid state.

This can be caused by attempting to clear an element that isn’t both editable and resettable.

exception selenium.common.exceptions.InvalidSelectorException

(msg=Nonescreen=Nonestacktrace=None)[source]

Thrown when the selector which is used to find an element does not return a WebElement. Currently this only happens when the selector is an xpath expression and it is either syntactically invalid (i.e. it is not a xpath expression) or the expression does not select WebElements (e.g. “count(//input)”).

exception selenium.common.exceptions.InvalidSessionIdException

(msg=Nonescreen=Nonestacktrace=None)[source]

Occurs if the given session id is not in the list of active sessions, meaning the session either does not exist or that it’s not active.

exception selenium.common.exceptions.InvalidSwitchToTargetException

(msg=Nonescreen=Nonestacktrace=None)[source]

Thrown when frame or window target to be switched doesn’t exist.

exception selenium.common.exceptions.JavascriptException

(msg=Nonescreen=Nonestacktrace=None)[source]

An error occurred while executing JavaScript supplied by the user.

exception selenium.common.exceptions.MoveTargetOutOfBoundsException

(msg=Nonescreen=Nonestacktrace=None)[source]

Thrown when the target provided to the ActionsChains move() method is invalid, i.e. out of document.

exception selenium.common.exceptions.NoAlertPresentException

(msg=Nonescreen=Nonestacktrace=None)[source]

Thrown when switching to no presented alert.

This can be caused by calling an operation on the Alert() class when an alert is not yet on the screen.

exception selenium.common.exceptions.NoSuchAttributeException

(msg=Nonescreen=Nonestacktrace=None)[source]

Thrown when the attribute of element could not be found.

You may want to check if the attribute exists in the particular browser you are testing against. Some browsers may have different property names for the same property. (IE8’s .innerText vs. Firefox .textContent)

exception selenium.common.exceptions.NoSuchCookieException

(msg=Nonescreen=Nonestacktrace=None)[source]

No cookie matching the given path name was found amongst the associated cookies of the current browsing context’s active document.

exception selenium.common.exceptions.NoSuchElementException

(msg=Nonescreen=Nonestacktrace=None)[source]

Thrown when element could not be found.If you encounter this exception, you may want to check the following:

  • Check your selector used in your find_by…
  • Element may not yet be on the screen at the time of the find operation, (webpage is still loading) see selenium.webdriver.support.wait.WebDriverWait() for how to write a wait wrapper to wait for an element to appear.

exception selenium.common.exceptions.NoSuchFrameException

(msg=Nonescreen=Nonestacktrace=None)[source]

Thrown when frame target to be switched doesn’t exist.

exception selenium.common.exceptions.NoSuchWindowException

(msg=Nonescreen=Nonestacktrace=None)[source]

Thrown when window target to be switched doesn’t exist.

To find the current set of active window handles, you can get a list of the active window handles in the following way:

exception selenium.common.exceptions.RemoteDriverServerException

(msg=Nonescreen=Nonestacktrace=None)[source]

exception selenium.common.exceptions.ScreenshotException

(msg=Nonescreen=Nonestacktrace=None)[source]

A screen capture was made impossible.

exception selenium.common.exceptions.SessionNotCreatedException

(msg=Nonescreen=Nonestacktrace=None)[source]

A new session could not be created.

exception selenium.common.exceptions.StaleElementReferenceException

(msg=Nonescreen=Nonestacktrace=None)[source]

Thrown when a reference to an element is now “stale”.

Stale means the element no longer appears on the DOM of the page.Possible causes of StaleElementReferenceException include, but not limited to:

  • You are no longer on the same page, or the page may have refreshed since the element was located.
  • The element may have been removed and re-added to the screen, since it was located. Such as an element being relocated. This can happen typically with a javascript framework when values are updated and the node is rebuilt.
  • Element may have been inside an iframe or another context which was refreshed.

exception selenium.common.exceptions.TimeoutException

(msg=Nonescreen=Nonestacktrace=None)[source]

Thrown when a command does not complete in enough time.

exception selenium.common.exceptions.UnableToSetCookieException

(msg=Nonescreen=Nonestacktrace=None)[source]

Thrown when a driver fails to set a cookie.

exception selenium.common.exceptions.UnexpectedAlertPresentException

(msg=Nonescreen=Nonestacktrace=Nonealert_text=None)[source]

Thrown when an unexpected alert is appeared.

Usually raised when when an expected modal is blocking webdriver form executing any more commands.

exception selenium.common.exceptions.UnexpectedTagNameException

(msg=Nonescreen=Nonestacktrace=None)[source]

Thrown when a support class did not get an expected web element.

exception selenium.common.exceptions.UnknownMethodException

(msg=Nonescreen=Nonestacktrace=None)[source]

The requested command matched a known URL but did not match an method for that URL.

exception selenium.common.exceptions.WebDriverException

(msg=Nonescreen=Nonestacktrace=None)[source] vBase webdriver exception.


Reference taken from: 

https://www.selenium.dev/selenium/docs/api/py/common/selenium.common.exceptions.html

Cheers!!

Naveen AutomationLabs

What is OAuth 2.0?

What is OAuth 2.0?

First Question that will come to everyone’s mind “is it Authentication or Authorization”?


Well, it is Authorization, to be precise Authorization between services. Now next doubt that would arise is why the services would be communicating with each other, generally in API environment what happens is, it is actually user and API exchange information or vice-versa. 

But hold on, when there are two or more services along with the user involved in communication, then there should be some way so that the services should know each other at least an introduction!! to whom they are dealing with and this introduction happens on behalf of user with the help of “Token” and this whole process in known as OAuth2.0.

Example:

Let say there are three entities user, App1 and App2 User wants to use one feature of App1 but that feature in App1 will require some input data(say file, videos etc). This data is actually stored in App2(suppose in google drive). 

Now the user wants that App1 should directly communicate with App2 take the required data from there and use it, what the user is actually interested is “End Result”.

Given the scenario now we can dive in to more technical aspect.
Resource Owner -> The user is resource owner.

Client – > App1 is the client because it is actually using some features/services of App2.


Client ID -> It is the unique identifier by which App2 remembers App1. It is used to keep track of an api because there may be times when App2 will be communicating with different api’s.


Client Secret -> It is like a password of a particular client ID store at App2.
Resource Server -> It is primarily used to generate Access token requested by any api so that particular api can use this access token in order to request to access a resource from target api.


AuthServer -> what is this??? his name was mentioned in our example. This server is actually sometimes is part of Resource Server. It is responsible to generate the “Token” used for Authorization. 

Auth server is sometimes part of api and sometimes not it totally depends upon the architecture of api. As a real time example of this – When we try to login to any website using google/facebook login, in backend this auth server is used for Authorization purpose.

Grant Types – There are generally two types of grant types in OAuth2.0


a) Authorization Code – The Authorization code grant type is used by confidential and public clients to exchange an Authorization code for an access token.

b) Client Credentials – It is used by clients to obtain an access token outside of context of a user. This is typically used by clients to access resources about themselves rather than to access a user’s resources.

c) Refresh Token – The Refresh Token grant type is used by clients to exchange a
refresh token for an access token when the access token has expired. This allows clients to continue to have a valid access token without further interaction with the user.


d) Device Flow – It is used for Authorizing apps on devices that don’t have a web
browser.


In this blog we will be discussing Authorization code grant type which is most widely used in
general. 

Please refer below diagram for the same:


  1. User sends a request to App1 to do some task.
  2. App1 need some input from App2 so it will contact Authorization
    server (Auth Server) to have access for the same.
  3. Auth Server will say to App1 wait who are you I don’t you, let me
    check with my user.
  4. User will check the message from Auth Server and will say yes it is
    a legit request from App1 please do the needful.
  5. Auth Server will say Ok, fine and it will give one “Auth Token” to
    App1. One important point here “By Auth token App1 is only
    authorized to use the neccessary functionality/api of App2 i.e. to get
    some data required here, it is not entitled to access anything extra”.
  6. App1 – Thanks for the Authorization Auth Server, App1 will contact
    Resource Server in order to have Access token to access a particular
    resource in App2.
  7. Resource Server – Sure, please find your “Access Token”.
  8. Using this access token App1 will sent a request to App2.
  9. App1 will finally get the response from App2.
    ** Here Access Token for more security point of view else it can happen that these auth
    token can be used by some other applications.
    ** The Access token are not mandatory to use in Javascript applications.

Real time examples of OAuth2.0:


Let us go to bookmyshow.com and try to sign in –

Here we are seeing an option like Connect via Google or Connect via Facebook. Suppose if we click on Connect via Google, will be redirected to –

This is all based on OAuth2.0 mechanism, if we sign in to our google account we are giving access to bookmyshow to use our information. Similarly there are other websites which works on the same principle like makemytrip, cleartrip etc.


What are Bearer Tokens?
Bearer token are simple String which are used for authentication for API’s request and is sent in Header of a request. These tokens doesn’t require cryptographically signing of each request (this is the case in OAuth1.0) and are more easier way of making api request. 

As bearer token consists of simple plain text and can be vulnerable to security that’s why it is always recommended that API requests consisting of bearer token should be made over an HTTPS protocol.

Difference between OAuth1.0 and OAuth2.0?

We will see differences between these Authorization framework on basis of below
parameters:

  1. Authentication & Signatures:
    OAuth1.0 is based on cryptographically signing each request and is more complex to implement. OAuth2.0 is based on bearer token and is easier to implement.
  2. User Experience and alternative token issuance options:
    Initially OAuth1.0 has three flows i.e for web apps, desktop clients and mobile devices. But it was turned out that it only worked out fine with web apps. OAuth2.0 address this problem by introducing multiple flows called the grant types.
  3. ** Flows – The methods of obtaining an access token are called flows.
  4. Performance: OAuth2.0 performs better than OAuth1.0 when the api is scaled up.
  5. Bearer Tokens:
    OAuth1.0 have two parts in access token a public and a private string. Private string was used while signing the request, never sent across to other api.
    OAuth2.0 has only Bearer token which is a simple public string which is used in API requests.
  6. Life of Tokens:
    OAuth1.0 had long-lived tokens.
    OAuth2.0 have short-lived tokens and a long lived refresh token (this allows apps to obtain new access tokens without involving the user again).
 
Hope you got idea about OAuth2.0 Authorization.


Cheers!!
Naveen AutomationLabs

Blog Contributors:

This blog is written by Shobhit Varshney.

https://www.linkedin.com/in/shobhit-945298101

Reviewer: Naveen Khunteta

« Older posts