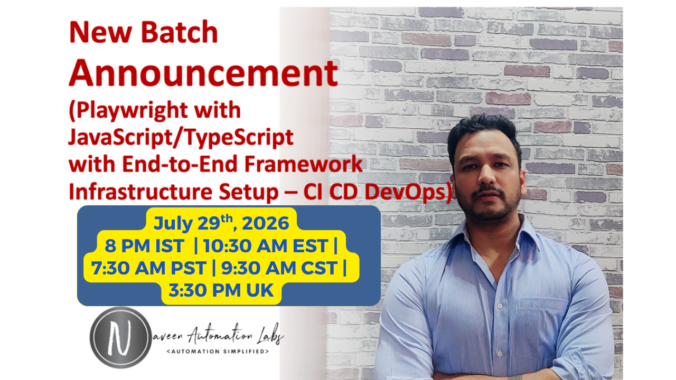
Playwright Javascript Training – Regular Batch (29th July 2026)
Hi Folks,
This time I’m introducing some amazing content on Playwright Javascript, Typescript and some different approaches on Framework Designing with some complex real time use cases.
After a very high demand on Playwright + Javascript, here I’m going to start next batch from 29th July 2026 [ 8 PM IST / 10:30 AM EST ]
Next Batch Starting from: 29th July, 2026
Duration: 4 Months (3 days in a week – Monday, Wednesday & Thursday)
As per the further registration process, you need to pay the registration fee:
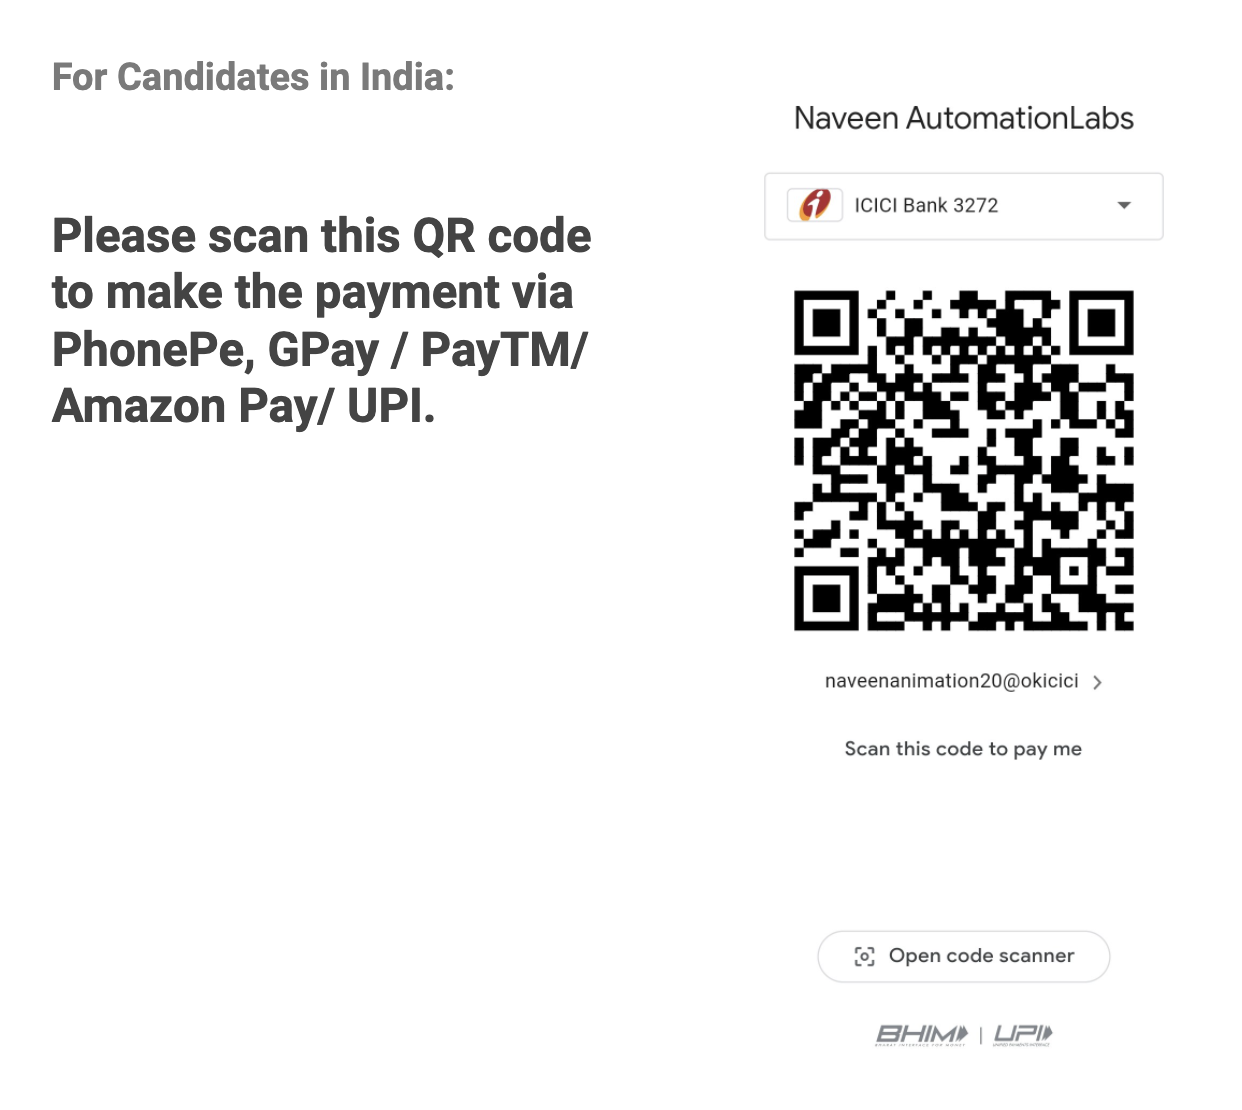
For Candidates in India: 3000 INR
For Candidates in USA/UK/Europe/Aus: 50 USD
Total Fee:
- 17,500 INR (for Candidates in India) – including Registration Fee
- 330 USD (for Candidates in USA/UK/AUS/Europe) – including Registration Fee
Location: Online (Zoom Meeting) – 1 hr + 30 mins with doubts session
Class Timings:
India: (Monday, Wednesday, Thursday)
- 8 PM IST (Indian Time)
USA: (Monday, Wednesday, Thursday):
- 10:30 AM EST (US Time)
- 7:30 AM PST (US Time)
- 9:30 AM CST (US Time)
- 3:30 PM (UK Time)
Note:
- There will be 2 demo sessions (first two classes are demo sessions).
- Demo Meeting link will be shared one day before the session.
- After 2 demo sessions, pending amount must be paid.
- 14,500 INR – for candidates in India
- 280 USD – for candidates in USA/UK/AUS/CANADA
- In case of any query on training:
Please mail me at: naveenanimation20@gmail.com
What’s app me at: +91-9902233400
Payment Options:
Mail me at : naveenanimation20@gmail.com
CANDIDATES IN INDIA:

CANDIDATES IN USA/CANADA/UK/EUROPE/AUS/OTHERS:
Note: If you are paying through PayPal, You need to pay 340 USD (10 USD will be the PayPal Fee).
Imp Note:
- There will be 2 demo sessions. In case If you don’t want to proceed with the training. Full Registration amount will be refunded back to you after 2 demo sessions.
- Candidate has to inform immediately after two demo sessions via email (in case of refund, else refund won’t be possible).
- After 2 demo sessions, pending amount must be paid.
- Zoom Meeting link and password will be shared to join the session before the session everyday.
Please fill this training registration form after making the payment.
Playwright JavaScript/TypeScript Training Course Content
Part 1: Basics of JavaScript/TypeScript & Playwright
1) Automation: A Brief Introduction
- What is Automation Testing
- Use of Automation Testing
- Tools for Automation Testing
- Why automation is important for your career
- What is Playwright
- Advantages of Playwright over other tools
- Introduction to Playwright Architecture
2) JavaScript + TypeScript Essentials for Test Automation
(Only the required programming concepts for automation, focusing on TypeScript usage in Playwright)
JavaScript Basics (for non-programmers)
Variables (
let,const,var)Data types (Number, String, Boolean, Array, Object)
Operators & Expressions
Conditional Statements (
if,else,switch)Loops (
for,while,forEach)Functions & Arrow Functions
Arrays and Objects (push, pop, map, filter, etc.)
- Key Features of ES6:
- Modules: Export and Import
- Template Literals
- Default Parameters and Destructuring
- Spread / Rest
...arguments - Classes and Objects
- Sync/Async Programming
- Promises: Native async handling
- Callback Hell Pyramid
- Async/Await
MapandSet: Collection types
TypeScript for Automation Engineers
What is TypeScript and why use it in automation?
Setting up TypeScript project with Playwright
Types vs Interfaces
Type Annotations and Inference
Enums and Union Types
Classes and Objects in TypeScript
Access Modifiers –
public,private,protectedConstructor functions
Inheritance
Optional Chaining (
?.)Promises and
async/awaitpattern
3) VS Code IDE
- Setting up VS Code for Playwright development
- Essential VS Code plugins for Playwright
- Debugging in VS Code
- Understanding console output
- Setting breakpoints
- Using watch variables
- Finding and resolving errors
- Step into and step over debugging functionality
4) Set up Playwright
- Installing Node.js
- Installing VS Code
- Setting up a Playwright project
- Installing Playwright using npm
- Configuring browsers (Chromium, Firefox, WebKit)
- Creating your first test script
- Running your first test with Playwright Test Runner
- Understanding Playwright configuration file
5) Playwright Architecture
- Understanding Playwright’s multi-browser architecture
- Browser contexts and isolation
- Pages and frames
- Playwright Test vs Playwright Library
- Test fixtures and how they work
- Playwright Inspector tool
- Trace Viewer for debugging
6) Browser & Navigation Commands
- Launching browsers (Chrome, Firefox, Webkit Safari, Chromium, Opera, Brave )
- Opening URLs
- Verifying page titles
- Getting page content
- Browser context management
- Multi Users Testing (RBAC – Permission based)
- Automate Chat Window with Multi Users
- Page lifecycle (close vs context close)
- Navigation (back, forward, reload)
- Multiple tabs and windows management
7) Element Commands
- Locating elements with Playwright
- Text input and clearing fields
- Click operations on different elements
- Working with input fields, buttons, and links
- Finding multiple elements on a page
- Extracting elements from specific areas
- Checking element states (visible, enabled, checked)
- Auto-waiting mechanisms in Playwright
8) Locators
- Introduction to HTML structure
- Understanding CSS selectors
- Playwright’s locator engine
- Text-based locators
- CSS and XPath locators
- Role-based locators (Accessibility first approach)
- getByRole
- getByText
- getByAlt
- getByPlaceholder
- getByLabel
- Filter and has locators
- Chaining locators for precision
9) Element Identification
- Using Playwright Inspector for element selection
- Codegen tool for automatic test generation
- Browser Developer Tools integration
- Best practices for selector stability
- Handling dynamic elements
- Creating robust selectors
- Recording and playing back user interactions
10) Tables, Checkboxes & Form Elements
- Working with web tables
- Extracting data from table cells
- Dynamic table handling
- Checkboxes and radio buttons
- Dropdown and select elements
- Multi-select operations
- Form submission
11) Playwright Waits & Dialogs
- Auto-waiting mechanism in Playwright
- Explicit waits with waitForSelector
- Custom waiting conditions
- Timeout configuration
- Handling alerts, confirmations, and prompts
- Page dialogs (alert, beforeunload, dialog)
- File dialogs and file uploads
12) Actions Class Equivalent
- Mouse actions (hover, click, double-click)
- Keyboard actions and shortcuts
- Drag and drop operations
- Right-click (context click)
- Pressing keys and key combinations
- Scrolling and viewport manipulation
- Touch/mobile gestures
13) Browser Contexts & Authentication
- What are browser contexts
- Creating persistent contexts
- Configuring browser contexts
- Handling cookies and local storage
- Authentication strategies
- Saving and reusing authentication states
- HTTP authentication
14) Complex UI Scenarios
- Handling AJAX components
- Working with complex calendars
- Managing web tables with pagination
- Infinite scrolling implementation
- Shadow DOM handling
- SVG elements interaction
- Working with iframes
- Handling pseudo-elements
- Network request timing and synchronization
Part 2: Advanced Playwright
15) Test Frameworks with Playwright
- Playwright Test built-in test runner
- Test annotations and fixtures
- Test grouping and organization
- Test dependencies and sequencing
- Parameterized testing
- Test filtering and focusing
- Reporting capabilities
- Parallel test execution
- Cross-browser testing setup
- Visual comparison testing
16) Automation Framework (End-to-End Project)
- What is an Automation Framework
- Features and benefits of frameworks
- Page Object Model (POM) with Playwright
- Data-driven testing approaches
- Hybrid framework design
- Creating reusable components
- Best practices for framework development
17) Real-Time Live PROJECT on E-Commerce Application
- Building a Playwright framework for an e-commerce application
- Setting up the project structure
- Creating page objects and fixtures
- Designing test data providers
- Implementing configuration management
- Writing test scripts with proper assertions
- Error handling and logging
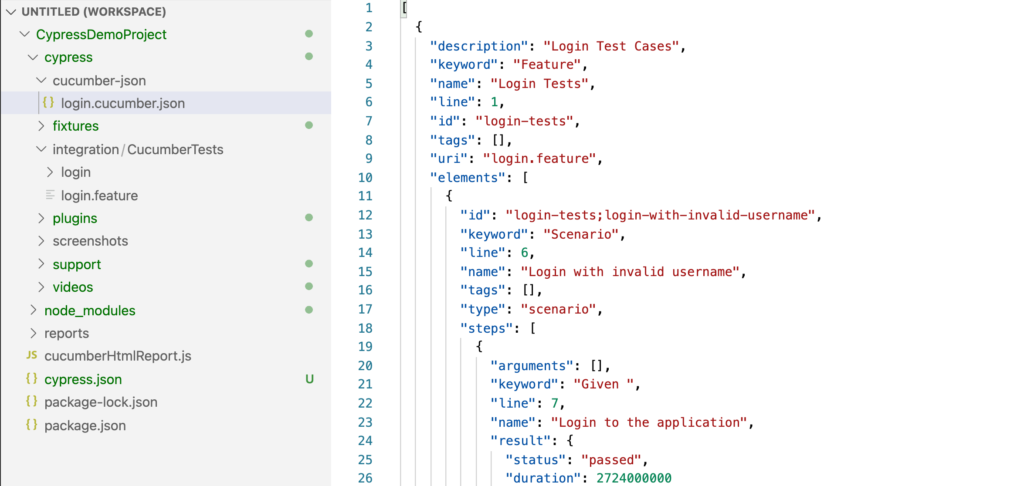
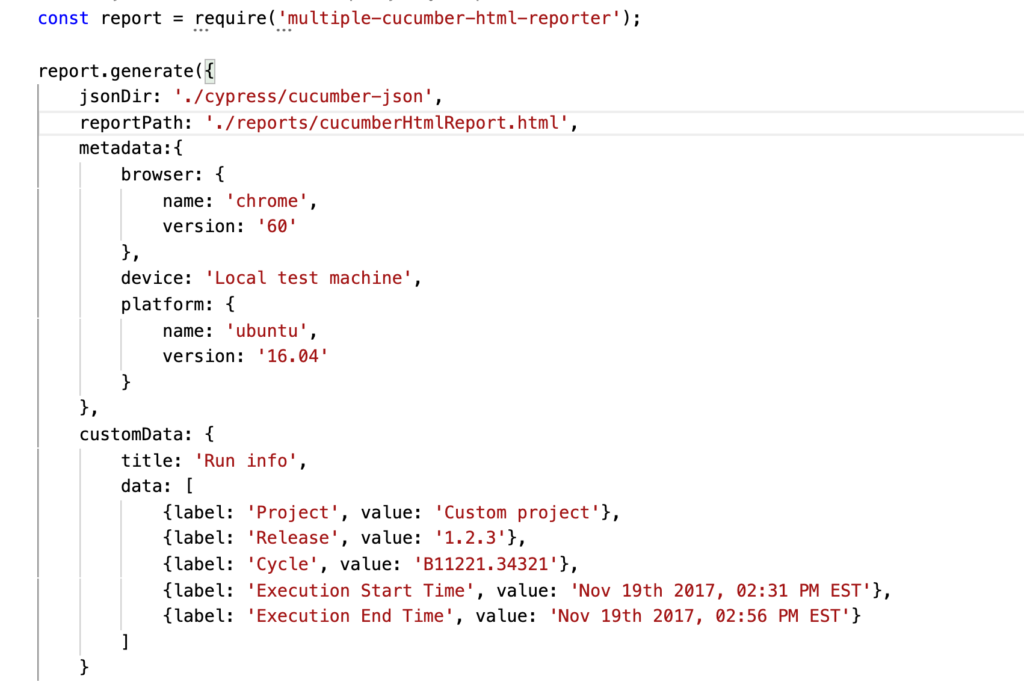
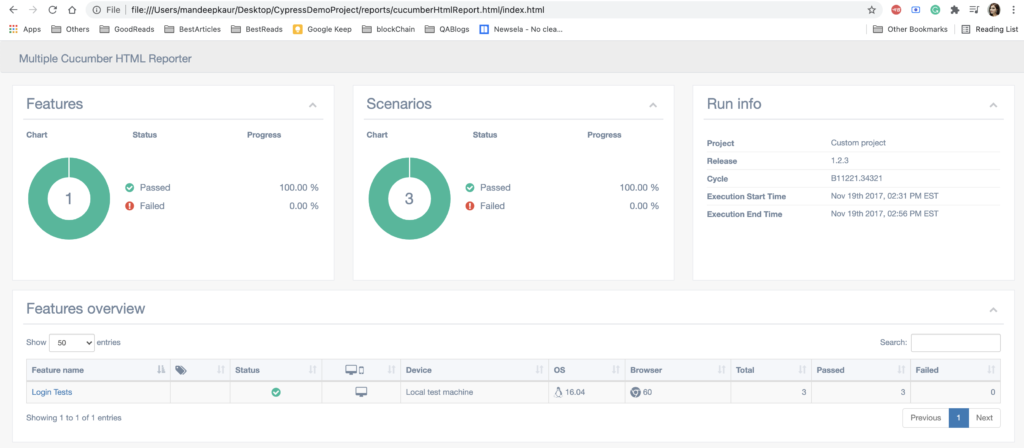
- Test reporting with built-in HTML reporter
- Custom reporting with Allure and other tools
- Handling global setup and teardown
- Cross-browser testing implementation
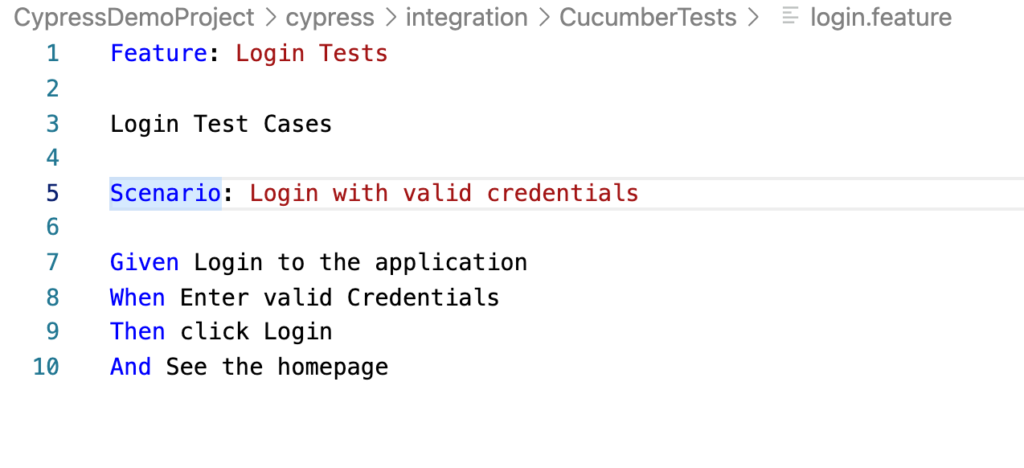
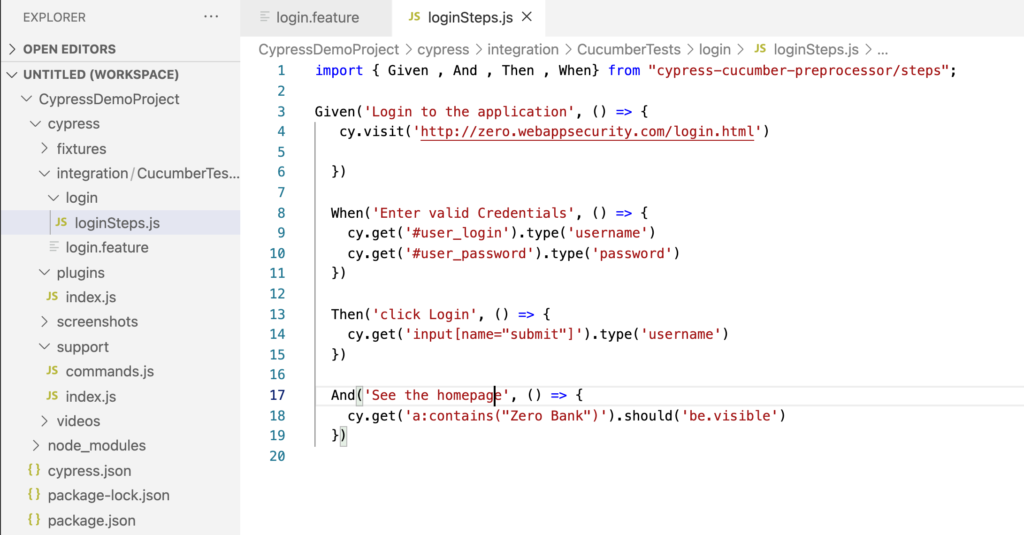
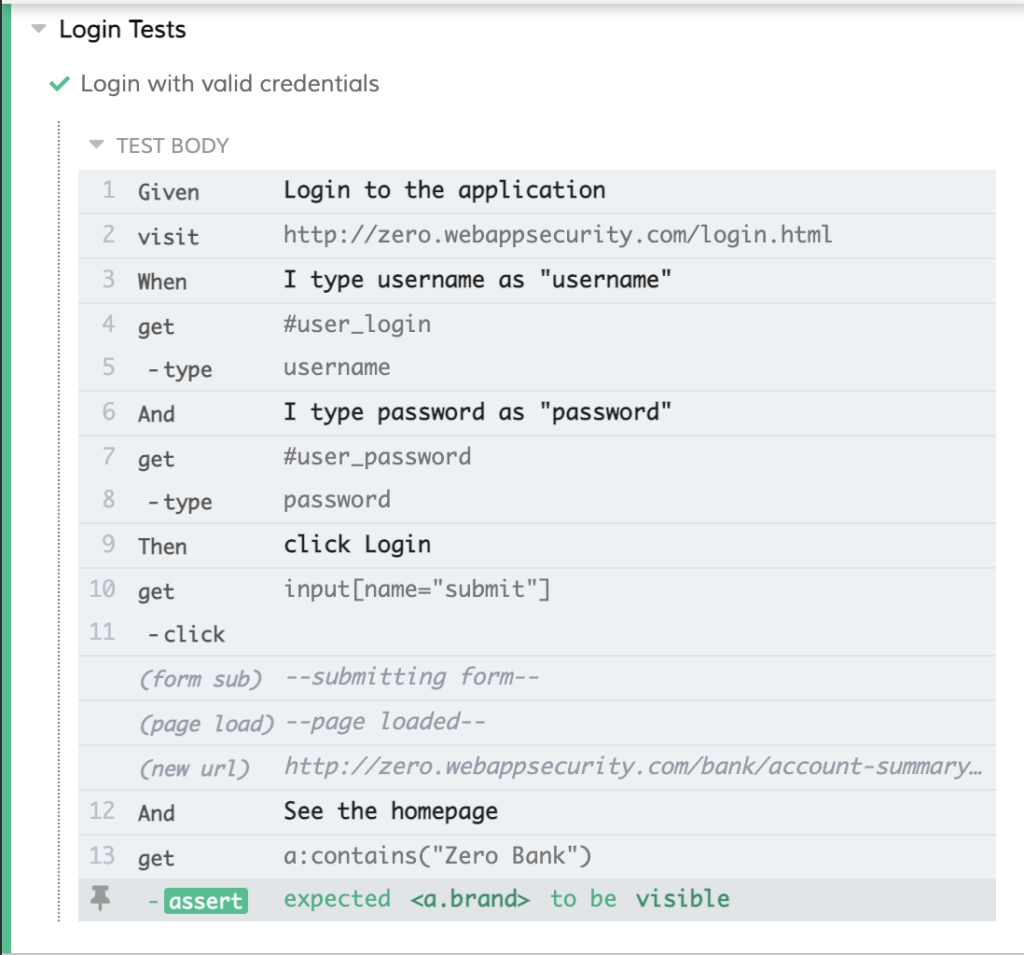
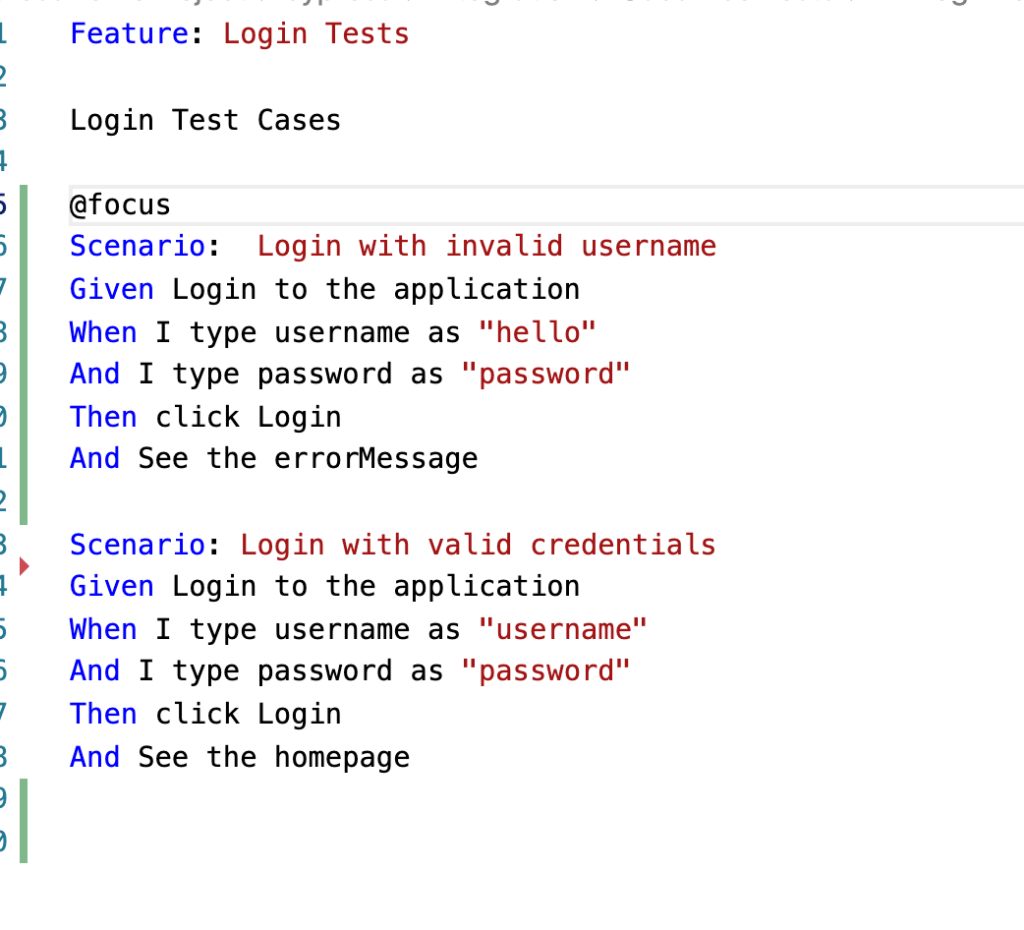
- Cucumber BDD integration with Playwright
- Cucumber advantages and dis-advantages with Playwright
- Why cucumber BDD is not recommended to use with Playwright?
- Note: Only 2-3 sessions will be covered with Cucumber as its not a recommended to use Cucumber with Playwright (Recordings will be shared for Cucumber BDD + Playwright)
18) DevOps & Continuous Integration
- Jenkins setup for Playwright
- Running Playwright tests through CI CD pipelines
- Jenkins Pipeline configuration
- GitHub Actions integration with multiple workflows
- Individual job workflow
- Master CI CD workflow
19) Node.js & npm Ecosystem
- Understanding package.json
- npm scripts for test automation
- Managing dependencies
- Creating reusable npm packages
20) Dockerized Testing
- What is Docker
- Creating Dockerfile for Playwright tests
- Running Playwright in containers
- Docker Compose for multi-browser setup
- Scaling test environments
- Best practices for containerized testing
- Playwright’s Docker images
21) Advanced Playwright Features: API + Sharding
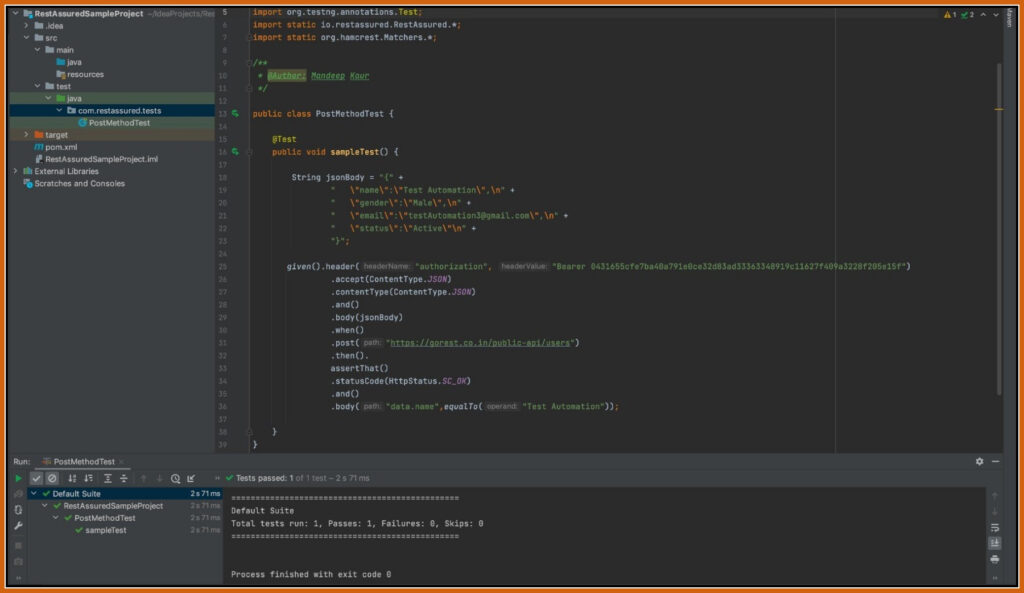
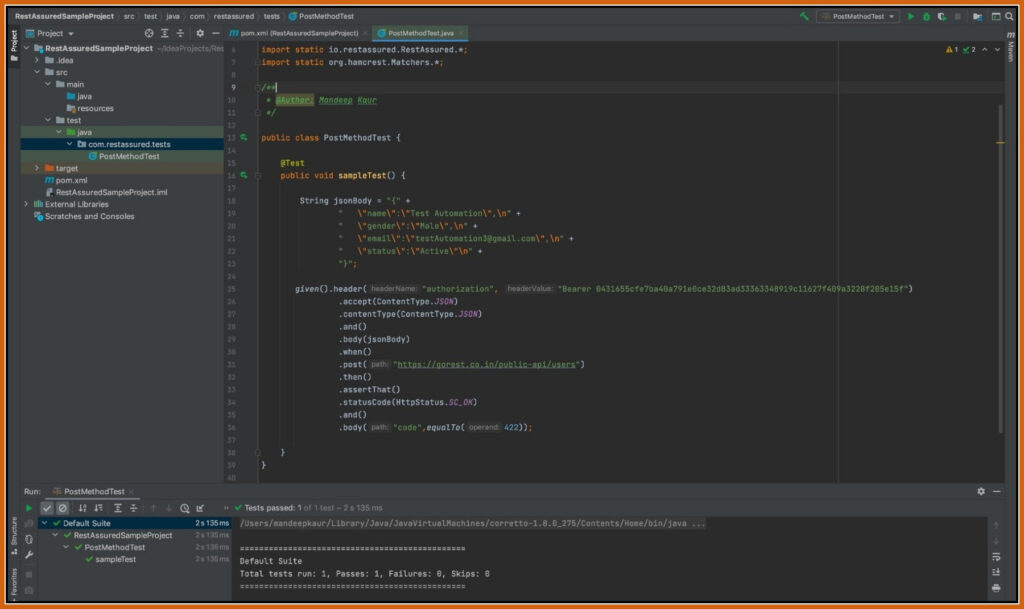
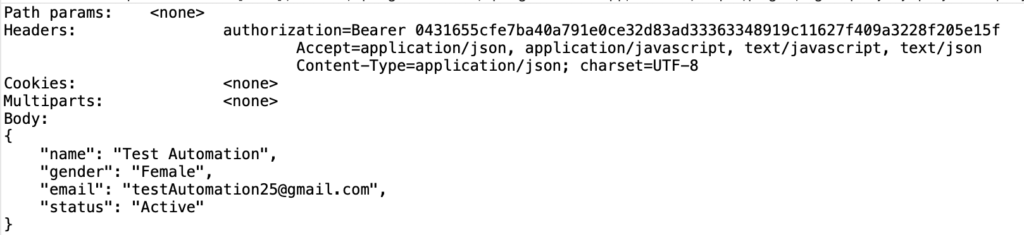
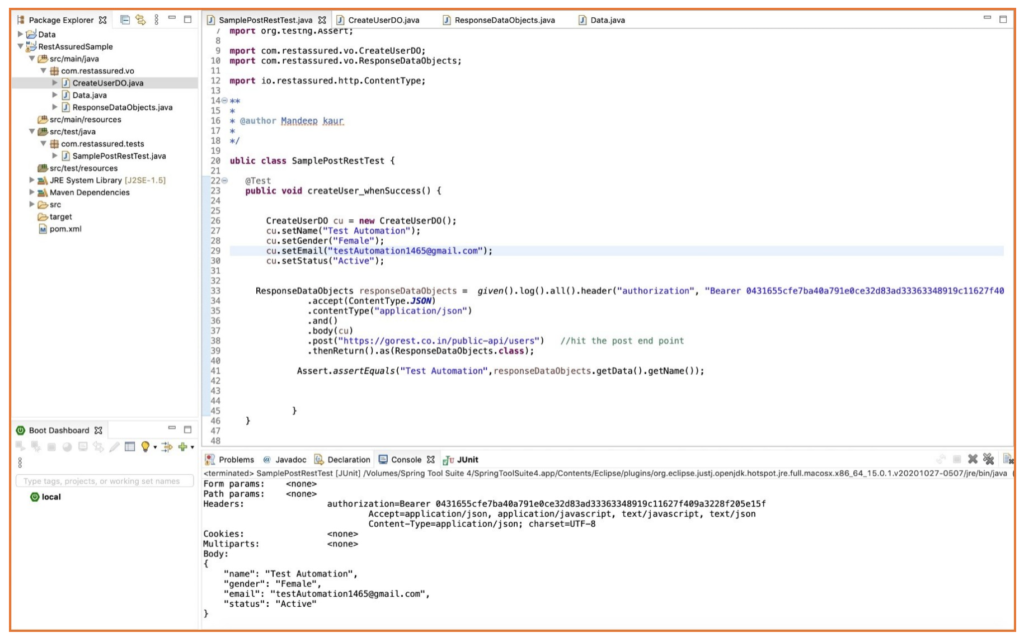
- API testing with Playwright : GET/POST/PUT/DELETE with Authentication
- Mock API responses
- Playwright with Shards – Test Distribution with multiple Shards
- Sharding with local execution
- Sharding with Docker execution
- Sharding with Github Actions
22) Agentic AI
LLM Foundations for Test Automation Engineers
- What is an LLM — next token predictor, not a database
- Tokens, tokenization, and context windows
- Temperature, determinism, and why same prompt gives different outputs
- Hallucinations — why models invent selectors that don’t exist
- Model families overview — Claude, GPT, Gemini, open-source models
- When to use which model for testing tasks
- Cost math — input vs output tokens, why calls get expensive
Introduction to Agentic AI
- What is AI, MCP, AI Agents
- Difference between workflows and agents
- Agent loops — Plan, Act, Observe, Reflect
Prompt Engineering for Playwright
- Anatomy of a good prompt — role, context, task, constraints, examples
- Few-shot prompting with Playwright locator examples
- Chain-of-thought prompting for better test generation
- Structured output with JSON schema
- Prompt templates for common testing tasks:
- Test generation prompt
- Locator healing prompt
- Bug reproduction prompt
- Test data generation prompt
- Debugging and iterating on prompts
- Common failure modes
Playwright With AI Agents
- Planner
- Generator
- Healer
Playwright MCP / LLM / AI Models
- Playwright MCP architecture
- Working with different LLM providers
- Model selection for different testing scenarios
Create your own MCP Server and Agent
- Building custom MCP servers
- Designing tool schemas for testing
- Publishing MCP servers to npm
- Real-world example — locatorlabs-mcp walkthrough
MCP Integration with Development Tools
- Install MCP in Visual Studio Code
- Install Copilot in Visual Studio Code
- Integrate MCP with Claude Code
- Playwright CLI with AI Agents with Claude Code with different LLM Models
Evaluating AI-Generated Tests (SDET Focus)
- Why AI-generated tests need evaluation
- The trust problem — how do you know a healed locator is correct?
- Deterministic checks vs golden dataset comparison
- LLM-as-judge for grading generated test quality
- Metrics — pass rate, flake rate, selector stability, false positives/negatives
- Human-in-the-loop patterns — when to trust auto-heal vs require review
Claude Skills vs MCP vs CLI — Choosing the Right Approach
- What are Claude Skills — folder-based, on-demand instructions
- MCP vs Skills vs CLI — honest comparison:
- MCP — stateful, protocol-based, powerful for complex tools
- Skills — stateless, filesystem-based, great for prompts and workflows
- CLI — simplest, most transparent, best for deterministic CI/CD tasks
- Playwright CLI vs Playwright MCP — practical differences
- When to use CLI vs MCP vs Skills for testing scenarios
- Token usage and consumption comparison across approaches
- Cost, latency, and developer experience tradeoffs
23) Lifetime Access
- All recorded videos
- Complete code repositories
- JavaScript and TypeScript examples
- Important notes and documentation
- PDFs and e-books
- Updates for future Playwright versions
- Community support and forums
Q1: Will I get the recordings for these sessions?
Ans: Yes, you will get the recording daily basis for the specific topic after the session.
Q2: Is this training useful for freshers?
Ans: 100% useful for freshers, who are looking for to start their career into automation QA field.
Q3: Is this training useful for Manual Testers?
Ans: 100% useful for Manual QA folks, it will surely help to trigger your interest from manual to Automation QA. After this training, you will become an expert in automation.
Q4: Can I justify my automation knowledge, after this training?
Ans: Yes, training will help you to learn right automation with proper guidance. You have to practice accordingly to justify your automation knowledge.
Q5: Can I crack test automation interviews after this training?
Ans: Yes, 100%, if you put your efforts and attend the training regularly with proper practice.
Q6: What is the duration of this course?
Ans: I never compromise in training content and syllabus. It depends how exactly we are going with this training. Ideally it should take around 16 weeks. It might take more than 16 weeks also.
Q7: Who will be the trainer?
Ans: Only Naveen from Naveen AutomationLabs. We don’t allow other trainers to take sessions.
Q8: Will this training be different from existing YouTube videos?
Ans: Yes, it will be more in-depth training and more topics will be covered with different scenarios along with one end to end framework as per industry standards (no copy paste) with full Infrastructure and dev ops setup.
Q9: What if I miss any session?
Ans: You will get each session recording daily basis. You can cover that topic after watching the recordings. You will have the recordings with the lifetime access.
Q10: Will assignments be shared for covered topics?
Ans: Yes, for almost every important topic, I have assignments and will be shared daily basis.
Q11: Can I improve my programming skills after this training?
Ans: I am 100% sure, it will drastically improve your coding skills and logical thinking for writing the best optimized code.
Q12: How will you cover the topics? Is it only theory or any real time experience?
Ans: I always try to relate the topics with real time scenarios, how exactly test automation works in real time projects and I hardly copy paste the code. I strongly prefer to write the code during the session. No COPY PASTE. NO Power Point Slides, No Boring Theories.
In case of any questions: Feel free to ping me on whats app : +91-9902233400.


 – Basics To Advanced (Coming Soon)")