We are now in “Configuration section” in our framework creation procedure. So far we have seen and created a maven project, discussed about the folder structure in Maven, Discussed about the importance of Log and config.properties file. Also created a POM file by adding the dependencies.
As a next step we will create a Base file, to access Log and Config.properties.
It’s time to know how a typical framework works with TestNG, What comes first? And how to maintain the flow?
We all know the importance of TestNG annotations and how to use it. Below listed are the most used TestNG annotations,
@BeforeSuite and @AfterSuite
@BeforeTest and @AfterTest
@BeforeClass and @AfterClass
@BeforeMethod and @AfterMethod
@Test
We will see TestNG in a separate session, now let me give you some important tips to understand the usage, this may change as per the design, but in common we can have an understand like this,
@BeforeSuite will execute first and only once in the hierarchy, so we are going to initialize Log4 under this annotation/method. It is must to start the logging as soon as the execution started that’s why log4j is initialized in Beforesuite.
@BeforeTest will execute second and only once in the hierarchy, so we are going initialize “Config.properties” and “WebDriver” under this annotation/method. To get the must needed values for the execution to proceed further.
@BeforeClass will execute third and only once in the hierarchy, so we are going initialize “Pagefactory” and “Data Utility” under this annotation/method.
@BeforeMethod will execute in an iteration with @Test, i.e. once for each test, so we are going to add our prerequisites for testcase here. Example: creating a test in extent report
@Test, here we will add our test case
@AfterMethod: Post processing of test case, example: Flushing the extent report ect.. and rest of the @After we will see while progressing
Creating a Base File:
Base file is an important file in our framework. This acts as a parent class for most of the class files in our framework. Being said that we need to design this carefully and in most efficient way.
Base class holds the initialization of WebDriver, any properties file, reporting and so on, also in this class we are going to implement TestNG annotations like @BeforeSuite, @BeforeTest, @BeforeMethods and @AfterSuite, @AfterTest, @AfterMethods.
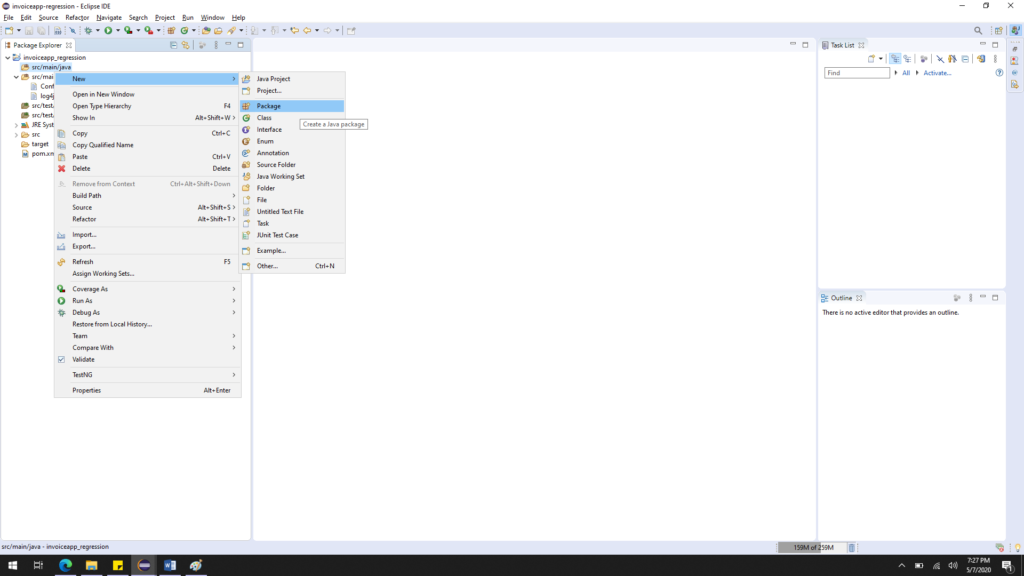
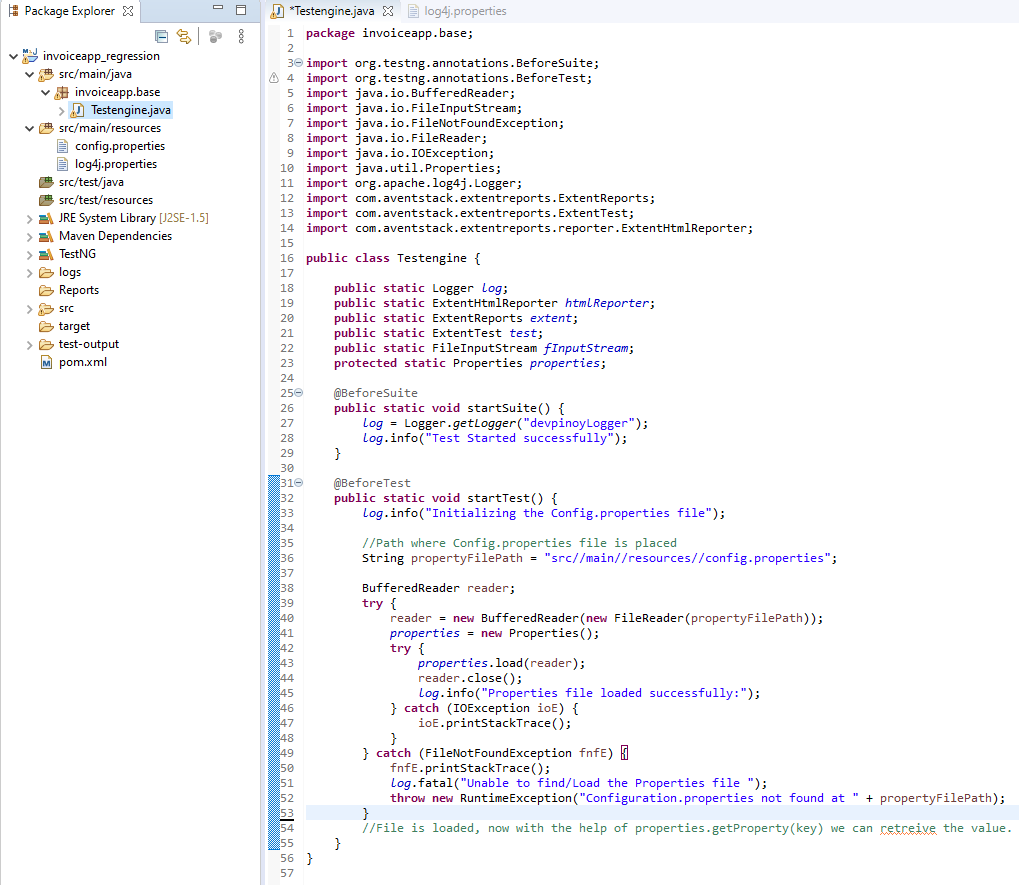
Create a package under “src/main/java” and name it as “invoiceapp.base” (our test application name)

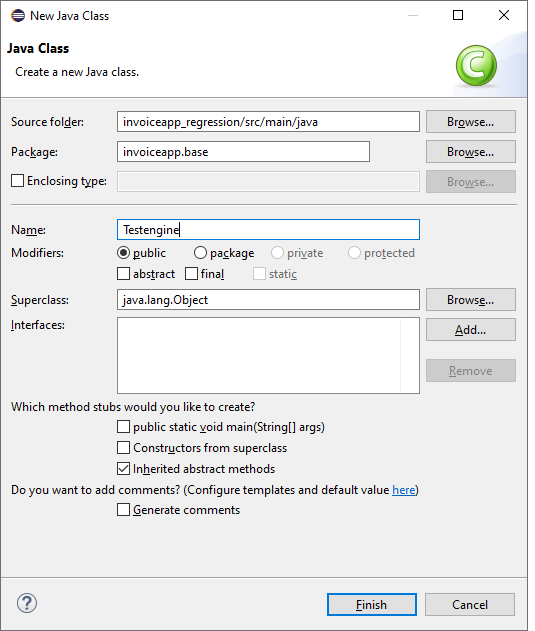
Create a new class in the base package and name it as “Testengine”

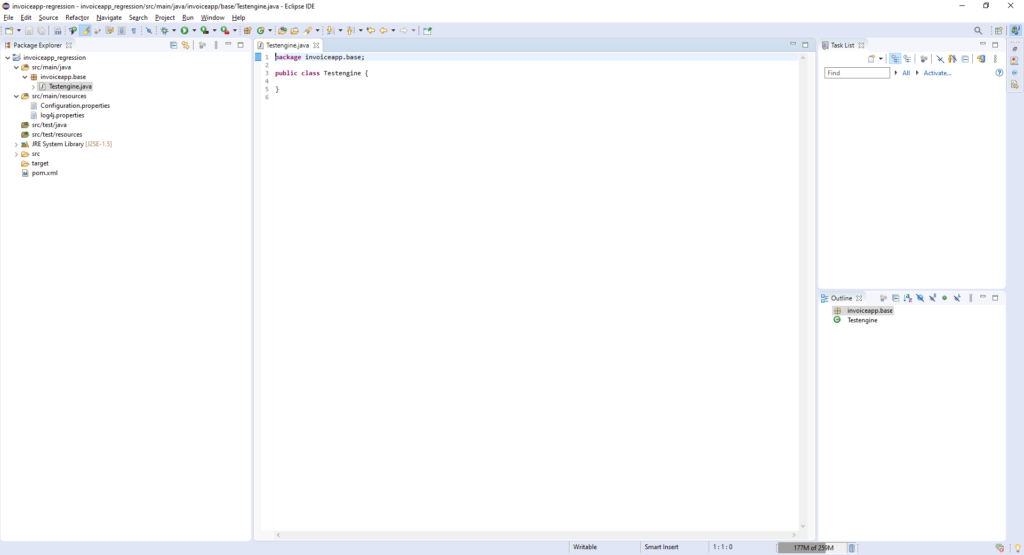
I just created a Base class now and named as “TestEngine.java” going forward we are going to use the name “TestEngine” instead of Base class for easy understanding., Its time to add TestNG annotations and methods in to TestEngine class.
Since, Log and Config.properties are important and those needs to be initialized first, I’m adding some codes for log4j adn Config.
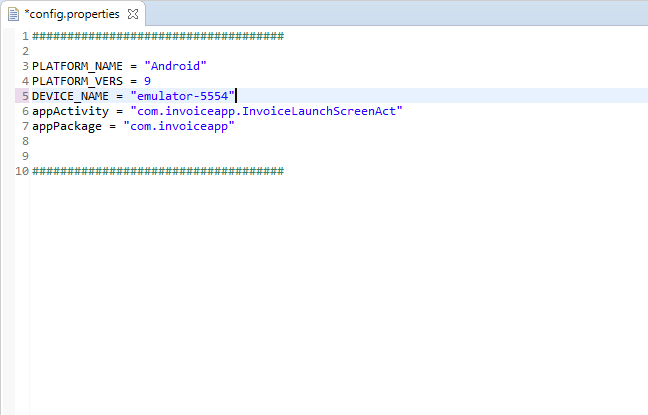
Just placed our config.properties file under “src/main/resources” with desired capability value so it’s time to configure the file in TestEngine class
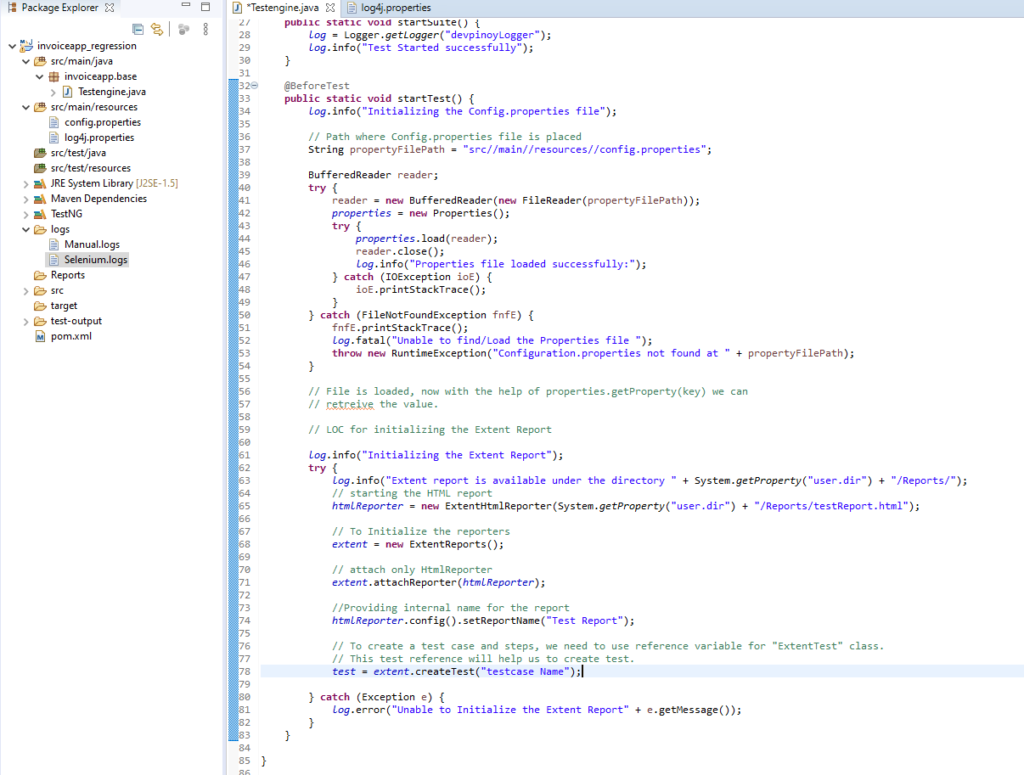
Declared Log4j , config.properties and Extent reports. (Complete code is available in the bottom of this page). [skipping to explain code for log4j, Extent report and .properties as we are well aware of these]. If not, please take a look at the videos form Naveen AutomationLabs for better understanding and follow the below code.
All Set, now we will add our Appium driver in our TestEngine class.
AppiumDriver is a Class with a parent “RemoteWebDriver” having “AndroidDriver” and “iOSDriver” as its direct subclass. It means if we declare our driver as an AppiumDriver we can either initiate it as an AndroidDriver or iOSDriver based on our need.
For executing Android based devices we will use “AndroidDriver<?>” can be “AndroidElement”
For executing iOS based devices we will use “IOSDriver<?>” can be “IOSElement”
We have our AppiumDriver declared as a public and static variable, this is because to inherit the properties of this driver in to inherited classes.
We can also declare the driver as “AndroidDriver” instead of “AppiumDriver”, if we are automating only Android devices.
// Initiating Appium Driver
	public static AppiumDriver<?> driver;
Using a method(user defined) startAppium(), we are invoking the AppiumDriver. We are getting the values for our capabilities from Config.properties file.
public static AppiumDriver<?> startAppium() { try { DesiredCapabilities cap = new DesiredCapabilities(); // All Capability values are retrieved from Config.properties file. cap.setCapability(MobileCapabilityType.PLATFORM_NAME, properties.getProperty("PLATFORM_NAME")); cap.setCapability(MobileCapabilityType.PLATFORM_VERSION, properties.getProperty("PLATFORM_VERS")); cap.setCapability(MobileCapabilityType.DEVICE_NAME, properties.getProperty("DEVICE_NAME")); cap.setCapability("appActivity", properties.getProperty("appActivity")); cap.setCapability("appPackage", properties.getProperty("appPackage")); cap.setCapability("autoLaunch", false); cap.setCapability(MobileCapabilityType.NEW_COMMAND_TIMEOUT, 500); cap.setCapability(MobileCapabilityType.AUTOMATION_NAME, AutomationName.ANDROID_UIAUTOMATOR2);// Declaring the driver as "Android driver" driver = new AndroidDriver(new URL("http://127.0.0.1:4723/wd/hub"), cap); } catch (Exception e) { driver = null; e.printStackTrace(); } return driver; }
Here for a quick testing of whether Appium driver is initiated properly and it is communicating with Appium Desktop server, I’m using @Test annotation to execute our test.
@Test
public void test001() {
        log.info("Test case started successfully");
	log.info("Trying to launch the Application under Test");
	try{
	 driver.launchApp();
	 log.info("Application launched successfully");
	 }catch(Exception e) {
	     log.info("Unable to launch the application :" +e.getMessage());
         }
 }
Before starting with the execution, Make sure Appium Desktop is running in the background using the host and Port # same as mentioned in the Java code. For example, My Appium Desktop server is running with the Host & port “127.0.0.1:4723”.
If you are running in physical device, make sure the device is connected properly and verify it once with “ADB Devices” command.
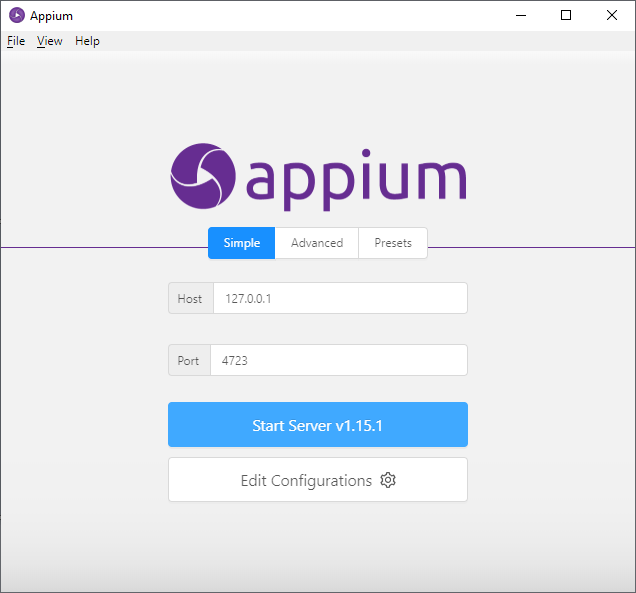
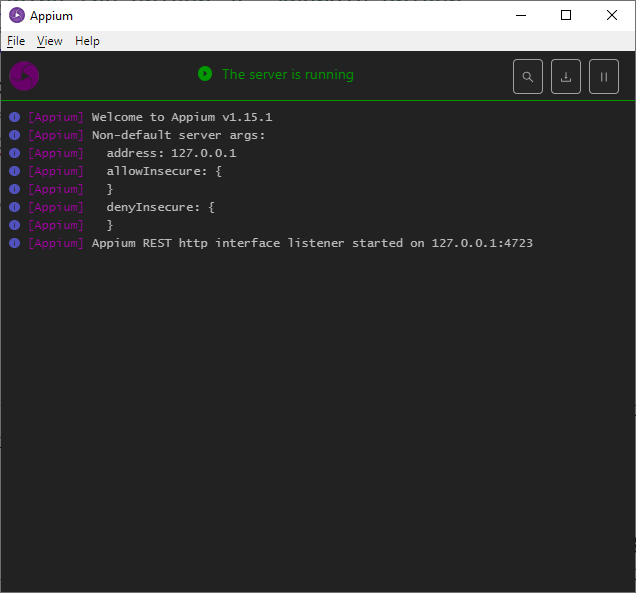
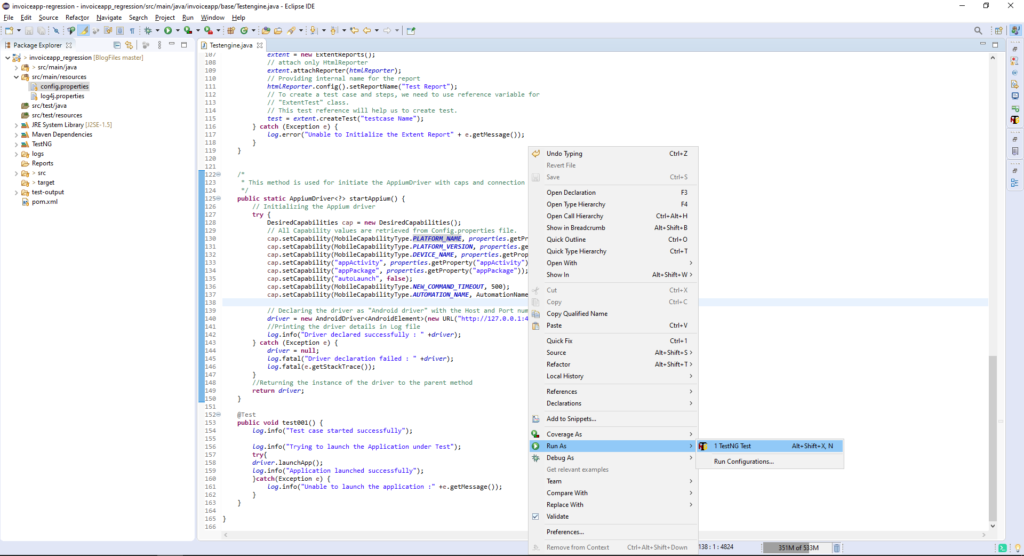
Now, we have our localhost listening at “127.0.0.1:4723”. It’s time to run our code as a “TestNG Test”

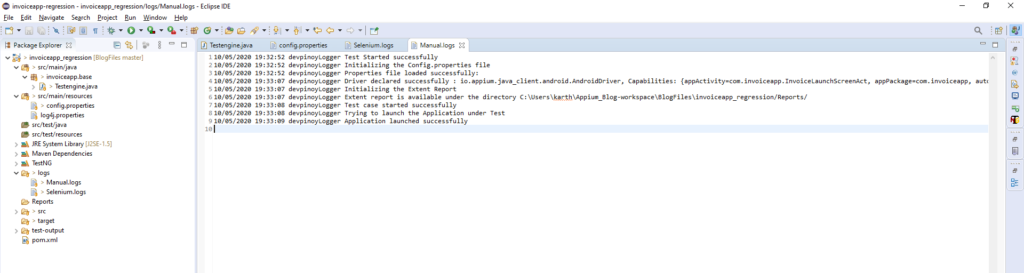
Verifying the console, Logs and Appium desktop server
Log:
Logs are printed as expected, You can see the driver instance printed in Line: 4
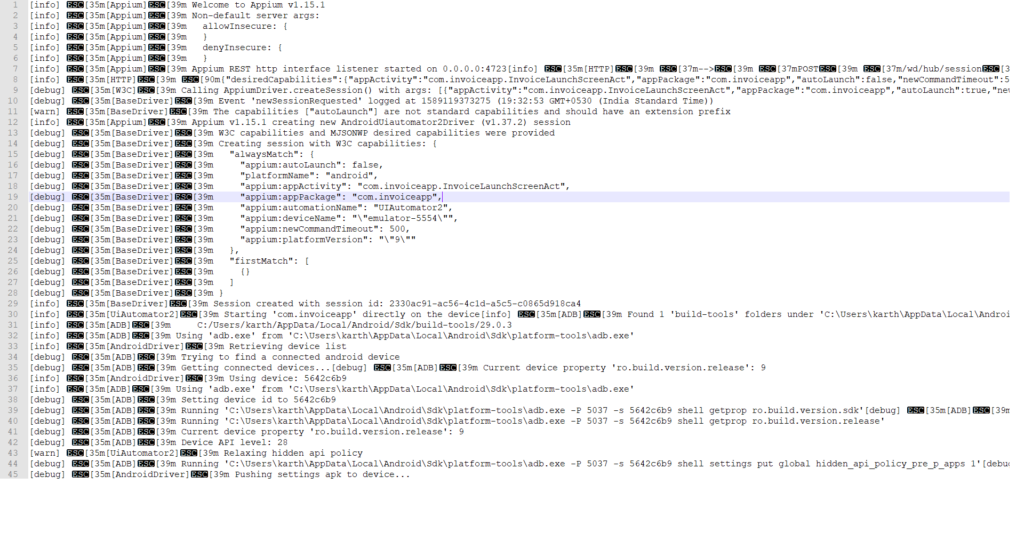
Appium Desktop server logs:
App launched as expected in my Physical device. You can use the same code to run using emulator. (Make sure device name is changed to emulator name).
CompleteCode:
package invoiceapp.base;

import org.testng.annotations.BeforeSuite;
import org.testng.annotations.BeforeTest;
import org.testng.annotations.Test;

import java.io.BufferedReader;
import java.io.FileInputStream;
import java.io.FileNotFoundException;
import java.io.FileReader;
import java.io.IOException;
import java.net.URL;
import java.util.Properties;
import org.apache.log4j.Logger;
import org.openqa.selenium.remote.DesiredCapabilities;

import com.aventstack.extentreports.ExtentReports;
import com.aventstack.extentreports.ExtentTest;
import com.aventstack.extentreports.reporter.ExtentHtmlReporter;

import io.appium.java_client.AppiumDriver;
import io.appium.java_client.android.AndroidDriver;
import io.appium.java_client.android.AndroidElement;
import io.appium.java_client.remote.AutomationName;
import io.appium.java_client.remote.MobileCapabilityType;

/***
 *
 * @author Ragav
 * @date May 10, 2020
 *
 */

/**
 *
 * @Usage: This class is used to initiate the Appium Driver and all other
 *         reporting stuffs. All static variables are declared here and
 *         inherited by other classes.
 *
 */

public class Testengine {

	public static Logger log;
	public static ExtentHtmlReporter htmlReporter;
	public static ExtentReports extent;
	public static ExtentTest test;
	public static FileInputStream fInputStream;
	protected static Properties properties;

	// Initiating Appium Driver
	public static AppiumDriver<?> driver;

	/*
	 * This method is used for initializing the Log4j and Config.properties
	 */
	@BeforeSuite
	public static void startSuite() {
		log = Logger.getLogger("devpinoyLogger");
		log.info("Test Started successfully");

		log.info("Initializing the Config.properties file");
		// Path where Config.properties file is placed
		String propertyFilePath = "src//main//resources//config.properties";

		BufferedReader reader;
		try {
			reader = new BufferedReader(new FileReader(propertyFilePath));
			properties = new Properties();
			try {
				properties.load(reader);
				reader.close();
				log.info("Properties file loaded successfully:");
				// Config file is loaded successfully, now with the help of
				// properties.getProperty(key) we can retrieve the value.
			} catch (IOException ioE) {
				ioE.printStackTrace();
			}
		} catch (FileNotFoundException fnfE) {
			fnfE.printStackTrace();
			log.fatal("Unable to find/Load the Properties file ");
			throw new RuntimeException("Configuration.properties not found at " + propertyFilePath);
		}
	}


	/*
	 * This method is used for init the Appium Driver and Extent report
	 */
	@BeforeTest
	public static void startTest() {

		// Getting the driver declared using our Capabilities
		try {
			driver = startAppium();
		} catch (Exception e) {
			log.fatal("Driver is not Initiated as Expected" + e.getMessage());
		}
		// LOC for initializing the Extent Report
		log.info("Initializing the Extent Report");
		try {
			log.info("Extent report is available under the directory " + System.getProperty("user.dir") + "/Reports/");
			// starting the HTML report
			htmlReporter = new ExtentHtmlReporter(System.getProperty("user.dir") + "/Reports/testReport.html");
			// To Initialize the reporters
			extent = new ExtentReports();
			// attach only HtmlReporter
			extent.attachReporter(htmlReporter);
			// Providing internal name for the report
			htmlReporter.config().setReportName("Test Report");
			// To create a test case and steps, we need to use reference variable for
			// "ExtentTest" class.
			// This test reference will help us to create test.
			test = extent.createTest("testcase Name");
		} catch (Exception e) {
			log.error("Unable to Initialize the Extent Report" + e.getMessage());
		}
	}


	/*
	 * This method is used for initiate the AppiumDriver with caps and connection protocol
	 */
	public static AppiumDriver<?> startAppium() {
		// Initializing the Appium driver
		try {
			DesiredCapabilities cap = new DesiredCapabilities();
			// All Capability values are retrieved from Config.properties file.
			cap.setCapability(MobileCapabilityType.PLATFORM_NAME, properties.getProperty("PLATFORM_NAME"));
			cap.setCapability(MobileCapabilityType.PLATFORM_VERSION, properties.getProperty("PLATFORM_VERS"));
			cap.setCapability(MobileCapabilityType.DEVICE_NAME, properties.getProperty("DEVICE_NAME"));
			cap.setCapability("appActivity", "com.invoiceapp.InvoiceLaunchScreenAct");
			cap.setCapability("appPackage", "com.invoiceapp");
			cap.setCapability("autoLaunch", true);
			cap.setCapability(MobileCapabilityType.NEW_COMMAND_TIMEOUT, 500);
			cap.setCapability(MobileCapabilityType.AUTOMATION_NAME, AutomationName.ANDROID_UIAUTOMATOR2);

			// Declaring the driver as "Android driver" with the Host and Port number to communicate with Appium desktop
			driver = new AndroidDriver(new URL("http://127.0.0.1:4723/wd/hub"), cap);
			//Printing the driver details in Log file
			log.info("Driver declared successfully : " +driver);
		} catch (Exception e) {
			driver = null;
			log.fatal("Driver declaration failed : " +driver);
			log.fatal(e.getStackTrace());
		}
		//Returning the instance of the driver to the parent method
		return driver;
	}

	@Test
	public void test001() {
		log.info("Test case started successfully");

		log.info("Trying to launch the Application under Test");
		try{
		driver.launchApp();
		log.info("Application launched successfully");
		}catch(Exception e) {
			log.info("Unable to launch the application :" +e.getMessage());
		}
	}

}
Guys, hope now it is clear on the usage of our base (TestEngine) class. In next blog we will see how to inherit the variables from TestEngine class to our child classes and creating a POM for different activies (screens) using AndroidElement and iOSElement.
I’m very excited to create POM. Hope you too, follow us and stay focused,
I will commit the codes discussed here in my Github repo. You can clone it and start modifying as per your idea.
https://github.com/Karthickragu/Appium_Blog
Cheers!
Naveen AutomationLab

 – Basics To Advanced (Coming Soon)")