Day: 28 May 2020
You might be wondering when Selenium WebDriver itself is such a powerful web automation tool, why do we need TestNG. Well, the fact is that it is indeed a powerful automation tool, however it lacks various capabilities such as ability to group, parameterize, sequence and generate reports. This is where tools like TestNG and JUnit come into play. These tools have inherent capabilities to organize and execute scripts as per the need of different test phases, arrange and execute them in a logical sequence as needed per the business requirements.
In the previous section, we have seen how to use TestNG with simple Java project. In this section let us see with Selenium WebDriver project in Eclipse IDE.
Step1. Go to Eclipse IDE, right click on the Package Explorer, select New and Click on Project option.
Step 2. You will see New Project window, select Maven Project and click on Next button
Step3. Select ” Create a simple project (skip archetype selection)” and click on next button.
Step 4: Provide Group ID, Artifact ID, Name and Description as shown in the below screenshot
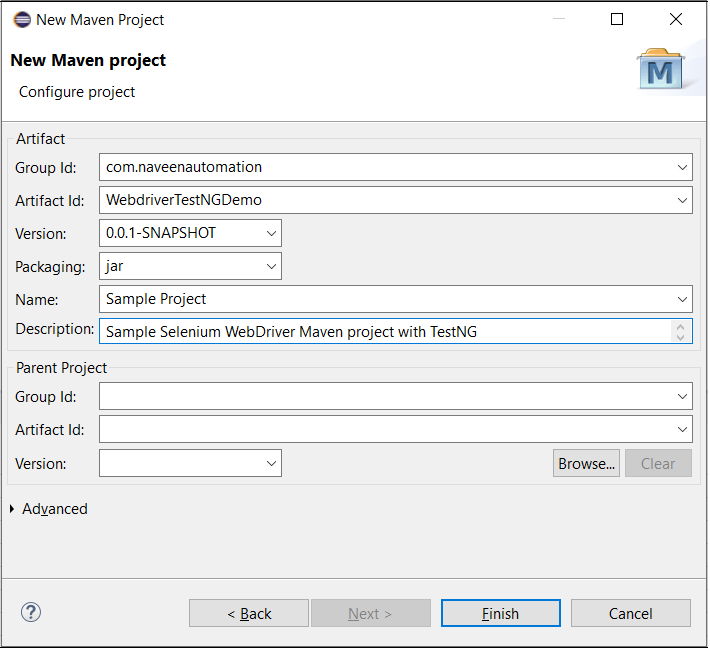
Step 5. Click on Finish button.
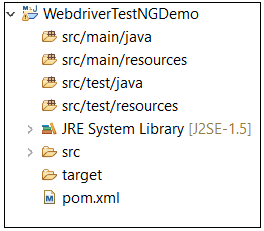
Maven creates the Project structure as shown in the below screenshot
Step 6. Maven reads pom.xml file and executes the project. Pom.xml is the file which contains project and configuration details such as dependencies, build directory, plugins, goals etc. to build the maven project. So we need to add TestNG and Selenium WebDriver jar files’ details in the dependency section as shown below.
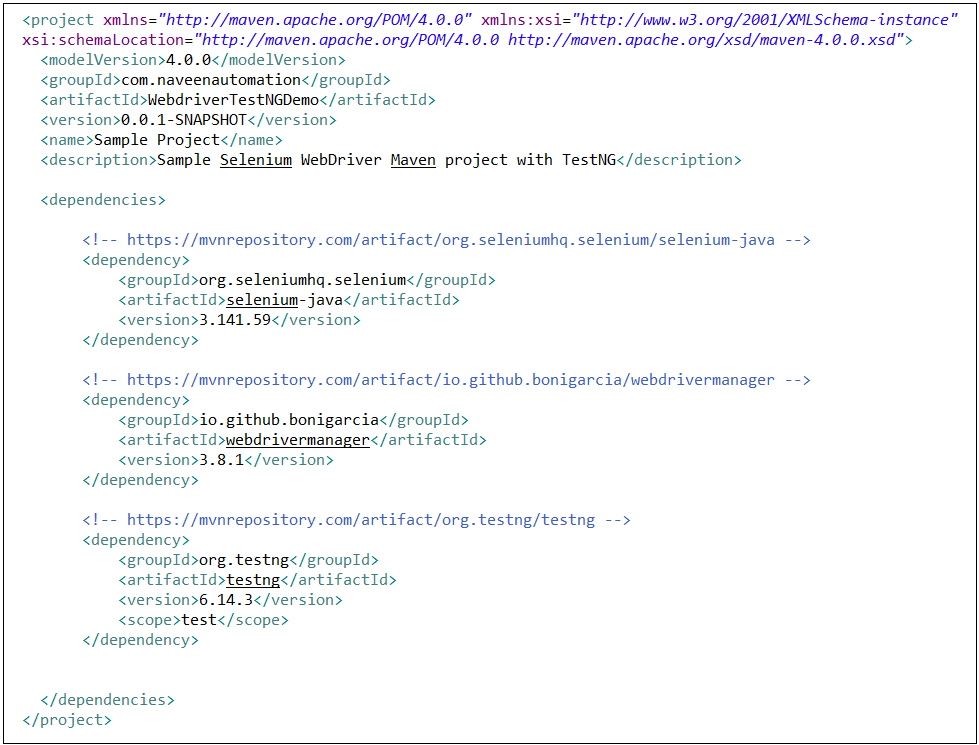
You might notice that we have added one more dependency i.e, webdrivermanager. Let’s quickly see what is the WebDriverManager.
You probably know that in Selenium Webdriver, to use browsers such as Chrome, Firefox, Safari etc., first we need to download the driver i.e, a binary file that allows WebDriver to handle browsers. And we should set the path of these files in the code as shown below
System.setProperty(“webdriver.chrome.driver”,”/path/to/chromedriver”);
System.setProperty(“webdriver.gecko.driver”,”/path/to/firefoxdriver”);
In addition to this, we need to check manually when the new version of the driver binaries released. WebDriver manger has automated this process for us to overcome this manual process. We just have to add the dependency and include the code as shown below.
WebDriverManager.chromeDriver().setup();
WebDriverManager.firefoxDriver().setup();
Step 6. We also need to add TestNG library in the Java build path. Let’s do it.In the Package Explorer, select the project, right click on it. Then go to Properties->Java Build Path->Add Library-> Select TestNG-> Next->Finish.
Note : All dependency jar files are downloaded in “Maven Dependencies” folder in the Project directory.
Step7. Now we are good to write the code. Remember all our TestNG, test related code goes in the src/test/java folder. We can either create a new Java class or a TestNG Class.
To create Java class, right click on the folder-> new ->Java class->Give a class name and click on Finish.
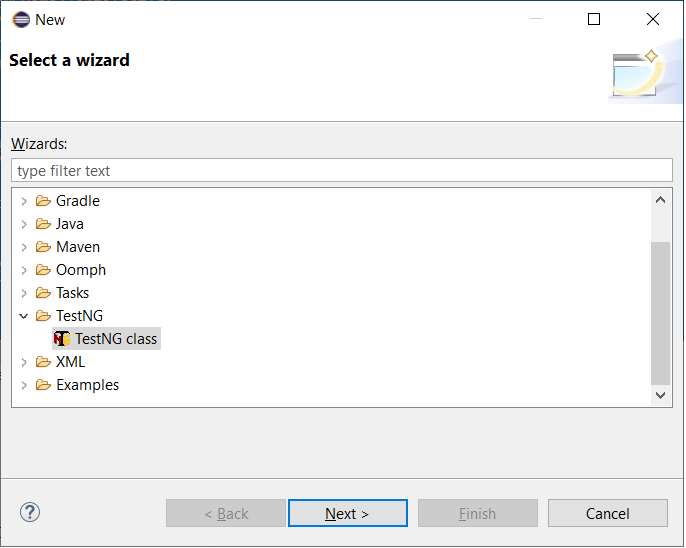
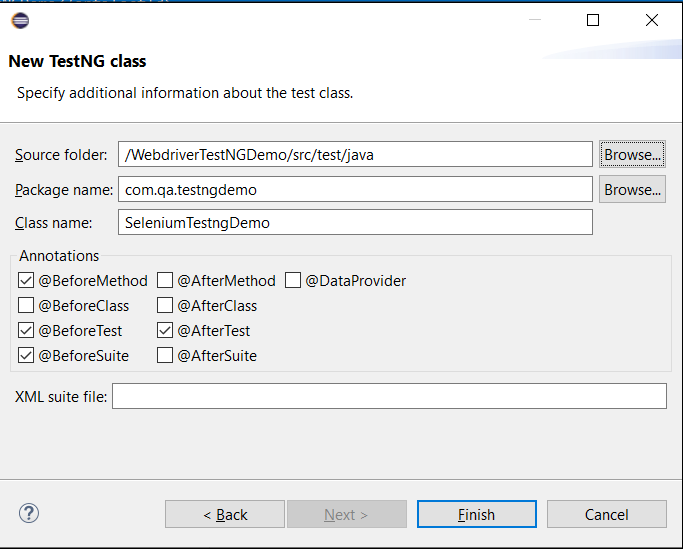
To Create TestNG class,right click on the folder->Others->select TestNG class as shown below
Provide the details and select the required annotations in the New TestNG class window as shown below and click on Finish button.
If you have created Java project, you need to write the required annotation along with Selenium Webdriver methods. If you have created the TestNG class along with required annotations, you might have to rearrange the annotations as per your testing needs. In additon to this, you can also include other annotations if needed. Let’s see a sample code.
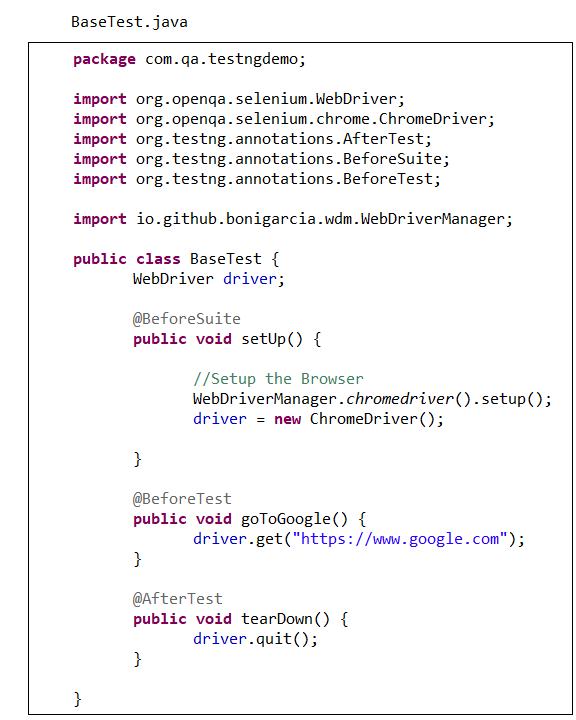
Step 1. Create two class files called SeleniumTestNGDemoTest.java and BaseTest.java files .Write codes to verify “Sign in” link and “Google Search “button in the Google webpage.
Step2: Go to BaseTest.java, write Selenium WebDrivercode code to initialize the WebDriver, launch the browser and navigate to the Google Website. These are pre-test condition to execute the test cases. Also write one post-test condition, i’e, to close the browser as shown below.
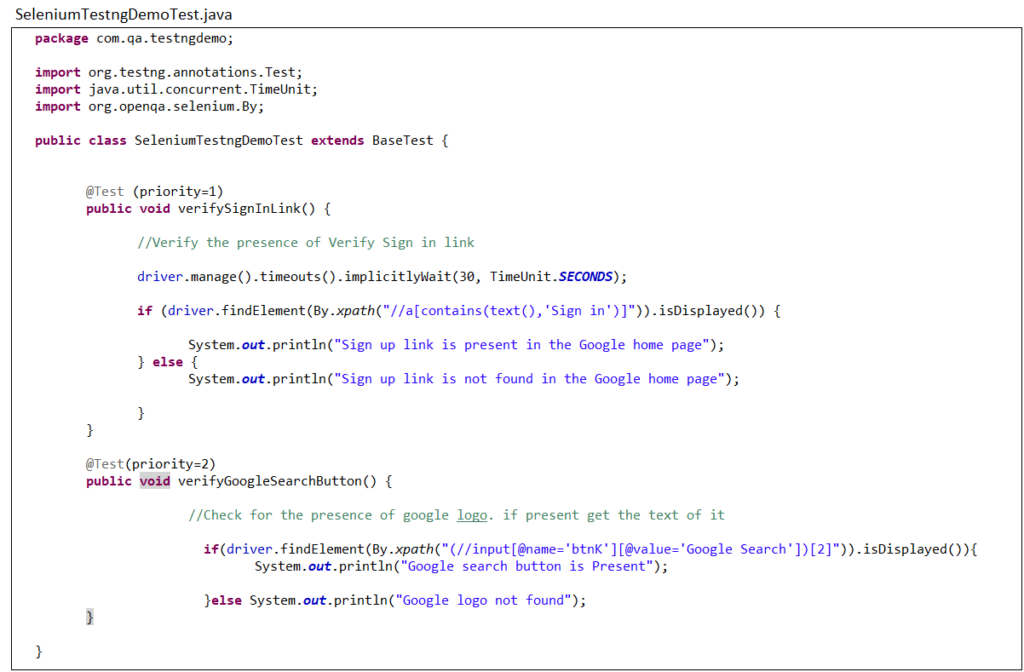
Step 3: Go to SeleniumTestNGDemoTest.java, write the selenium code for the above mentioned test cases. Refer the below screenshot for the same.
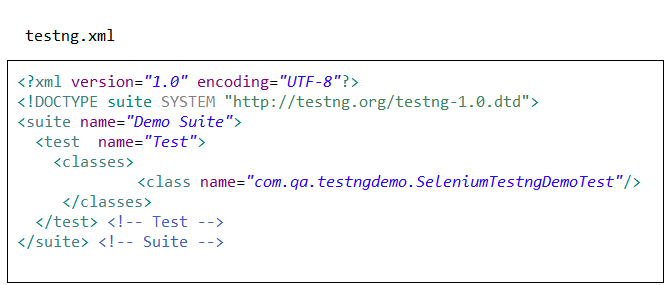
Step 4. Create a testng.xml file as shown below and run the testng.xml file. If you don’t know how to execute the TestNG projects, please refer my earlier article.
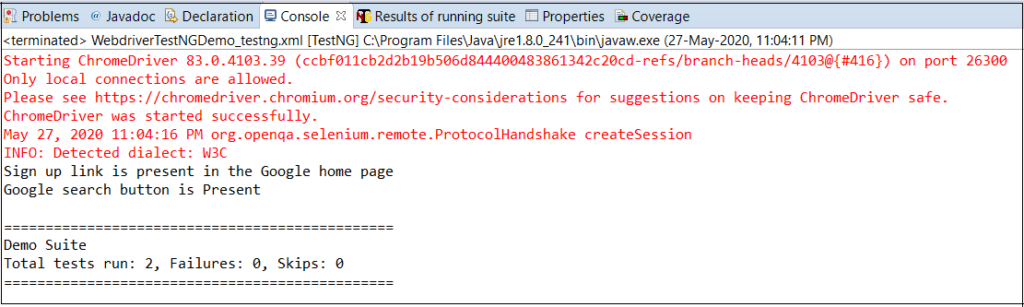
In the Console, you can see that it is executed successfully.
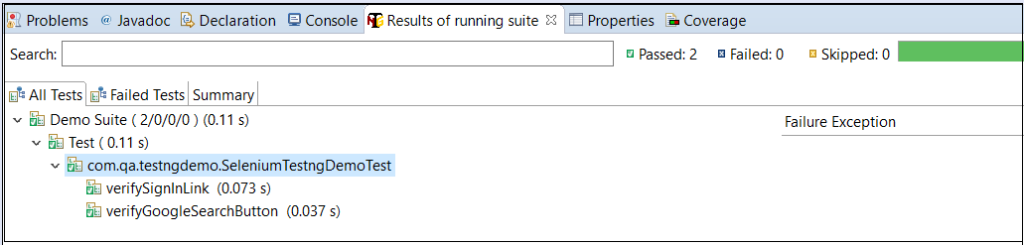
Also, you can check status of the test cases that are passed, failed or skipped in the Results tab as shown below.
The report generated will be saved in the index.html under test-output folder. You can refresh and check this folder. In the next article, we will see how to prioritize the test cases and then understand the TestNG reports in detail.
New Course Launched: GIT Tutorials (End to End) – Basics To Advanced
 – Basics To Advanced (Coming Soon)")