


Where we learn technology
In previous blog, We created a method in our parent class to declare our driver as “AndroidDriver”. Here comes another scenario, suppose I need to automate both iOS and Android application using the same framework.

Please read the blog carefully, this is little tricky in term of understanding the driver, but very easy to implement
How to create a Mobile automation framework supports both Android and iOS?
Nowadays it is common that, most of the applications are being developed for both Android and iOS. So when creating a test framework we need to think and create a flexible and reliable framework for supporting both the applications.
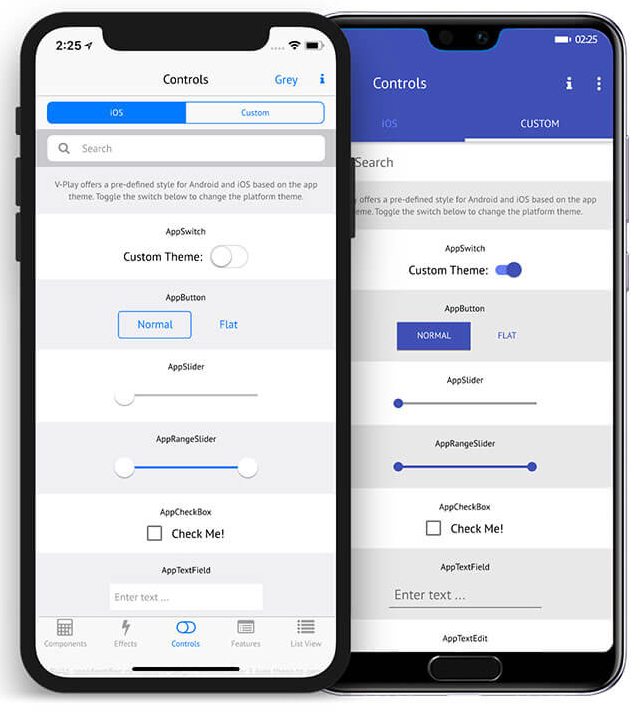
One good thing is that for most of the applications, user flow/architecture will not change based on the Operating system. For example, if you take any application which supports both Android/iOS like “RedBus” or “Linkedin”, you can see that the screens and UI will be same for both OS. May be the look and feel of UI’s can change depends on the SDK’s like XCode/Android studio.
Quick Tip: I suggest you to take a look of few softwares like Xamrin and ReactNative. These softwares are used to create a unique code which executes in both iOS and Android with the help of inbuild SDK libraries.
Being said that, screens and UI’s are same for both the apps, Our job is now easy to create class and maintain using POM for each screens. Because we can create a single .java file with elements supporting for both iOS and Android. For example,
By android_login_button = By.id("login");
By ios_login_button = By.id("XCUIlogin");

or
AndroidElement button_Login_android = (AndroidElement) driver.findElement(By.id("Login_button"));

IOSElement button_Login ios = (IOSElement) driver.findElement(By.id("XCUIlogin"));
The above example is just for your understanding. We should not create or initiate any elements like this in framework. Do you know why?
Because, consider a page having 50 elements, so we need to declare 50 variables for android and 50 variables for iOS. In total we declared 100 variables in a single java file. Do you think it is easy to manage like this? Also think about the amount of memory we are consuming because of these variables.
So to create a flexible and easily manageable framework we have lot of existing stuffs to declare our variables. For example we can use @FindBy annotations, for example,
@AndroidFindBy(id = "Login")
@iOSXCUITFindBy(id = "XCUILogin")
MobileElement login_Button;
By using @FindBy we can create a common variable for both OS. Remember, “Login_Button” variable is now common for both Android and IOS,
driver instance will automatically detects the identifier based on OS,
If, driver is an AndroidDriver then it will consider @AndroidFindBy.
If driver is IOSDriver, then it will consider @XCUITFindBy.
Did you notice?, “Login_Button” variable is declared as a type “MobileElement”, so in our code no need to use “driver.findElement” or “By” class to declare/identify the UI.
We can directly perform element operations like .click(), .sendKeys() and all other conditions[same like WebElement], For example,
Boolean visible = login_button.isDisplayed();
login_button.click();
String button_text = login_button.getText();
Always remember, Coding is not only about writing and executing the code, we need to give priority for “Best practices” like code Optimization, Memory optimization, lesser LOC etc…
How to Implement and declare driver in our Class?
Now, we are going to see how to create a method in “TestEngine.java” file that handles condition and supports for both iOS and Android.
As I already said, AppiumDriver<?> is a parent class for “AndroidDriver” and “iOSDriver”. So to make our driver to support both OS, we need to declare our driver as AppiumDriver.
// Initiating Appium Driver
	public static AppiumDriver<?> driver;
Okay, our driver is now “AppiumDriver”, how to assign the “Android” or “iOS” driver to our Appiumdriver?
//driver As an AndroidDriver
driver = new AndroidDriver<AndroidElement>(new URL("http://127.0.0.1:4723/wd/hub"), capabilities);

//driver As an IOSDriver
driver = new IOSDriver<IOSElement>(new URL("http://127.0.0.1:4723/wd/hub"), capabilities);
Our driver is now compatible to handle both OS. Still confused? Please find sample code below,
package invoiceapp.base;

import java.net.URL;
import org.openqa.selenium.remote.DesiredCapabilities;
import org.testng.annotations.BeforeMethod;
import io.appium.java_client.AppiumDriver;
import io.appium.java_client.android.AndroidDriver;
import io.appium.java_client.android.AndroidElement;
import io.appium.java_client.ios.IOSDriver;
import io.appium.java_client.ios.IOSElement;
import io.appium.java_client.remote.AutomationName;
import io.appium.java_client.remote.MobileCapabilityType;

public class OS {
	public static AppiumDriver<?> driver;

	@BeforeMethod
	public static void startTest(String platform) {
		if(platform.equalsIgnoreCase("Android")) {
			driver = startAppium_Android();
		} else {
			driver = startAppium_IOS();
		}
		}

	/*
	 * This method is used for initiate the AppiumDriver with caps and connection protocol
	 */
	public static AndroidDriver<?> startAppium_Android() {
		// Initializing the Appium driver
		try {
			DesiredCapabilities cap = new DesiredCapabilities();
			cap.setCapability(MobileCapabilityType.PLATFORM_NAME, "Android");
			cap.setCapability(MobileCapabilityType.PLATFORM_VERSION, "9");
			cap.setCapability(MobileCapabilityType.DEVICE_NAME, "5642c6b9");
			cap.setCapability("appActivity", "com.invoiceapp.InvoiceLaunchScreenAct");
			cap.setCapability("appPackage", "com.invoiceapp");
			cap.setCapability("autoLaunch", false);
			cap.setCapability(MobileCapabilityType.NEW_COMMAND_TIMEOUT, 500);
			cap.setCapability(MobileCapabilityType.AUTOMATION_NAME, AutomationName.ANDROID_UIAUTOMATOR2);
// driver is declared as an AndroidDriver, which supports AndroidElements
			driver = new AndroidDriver<AndroidElement>(new URL("http://127.0.0.1:4723/wd/hub"), cap);
		} catch (Exception e) {
			e.printStackTrace();
		}
		//Returning the instance of the driver to the parent method
		return (AndroidDriver<?>) driver;
	}

	/*
	 * This method is used for initiate the IOSDriver with caps and connection protocol
	 */
	public static IOSDriver<?> startAppium_IOS() {
		// Initializing the Appium driver
		try {
			DesiredCapabilities cap = new DesiredCapabilities();
			cap.setCapability(MobileCapabilityType.PLATFORM_NAME, "iOS");
			cap.setCapability(MobileCapabilityType.PLATFORM_VERSION, "12.0.1");
			cap.setCapability(MobileCapabilityType.DEVICE_NAME, "iPhone 8");
			cap.setCapability(MobileCapabilityType.UDID, "3jtn3j4n3ijn3ji4nrj34inrj34nr34nrk");
			cap.setCapability("bundleId", "com.invoiceapp");
			cap.setCapability("autoLaunch", false);
			cap.setCapability(MobileCapabilityType.AUTOMATION_NAME, AutomationName.IOS_XCUI_TEST);
// driver is declared as an IOSDriver, which supports IOSElements
			driver = new IOSDriver<IOSElement>(new URL("http://127.0.0.1:4723/wd/hub"), cap);
		} catch (Exception e) {
			e.printStackTrace();
		}
		//Returning the instance of the driver to the parent method
		return (IOSDriver<?>) driver;
	}
}
Note: This is just an example for understanding how to declare both the drivers in same class. Again, in lot of ways we can declare and initiate the drivers. In upcoming blog’s, I will defiantly let you know how to implement this in our “TestEngine.java” file and pass the “platform” parameter from TestNG xml file.
Points to Remember:
I’m very excited to create POM. Hope you too, follow us and stay focused…
I will commit the codes discussed here in my Github repo. You can clone it and start modifying as per your idea.
https://github.com/Karthickragu/Appium_Blog
Cheers!
Naveen AutomationLab

 – Basics To Advanced (Coming Soon)")
© 2025 naveen automationlabs
Theme by Anders Norén — Up ↑